As the second-largest search engine, with over 2 billion users per month, YouTube is an undeniably powerful channel for your marketing efforts. Despite its popularity, many business startup owners opt to use Facebook over YouTube as their channel, especially for uploading video content.
This is a mistake. YouTube is a powerful search engine that can help your business reach more people. Its strategy relies on optimizing videos to increase the chances of discoverability.
One of the most important tactics for optimizing your YouTube channel is to create engaging YouTube descriptions.
![→ Download Now: 7 YouTube Video Description Templates [Free Prompts]](https://i4lead.com/wp-content/uploads/2022/06/0b51489d-5d5c-4054-b30c-86008871e5f1.png)

A YouTube channel description is similar to the About Page of a website. It appears under the “About” tab of your channel’s YouTube page.
The YouTube channel description conveys to potential viewers what your content will cover, including the issues you tackle and the communities you serve. The goal is to turn a one-time viewer into a subscriber and consumer of your content. You’ll be able to add this when setting up your YouTube channel.
As a YouTube creator, your primary goal is to attract viewers and turn them into subscribers, often using your channel description. With that in mind, be sure to use keywords that your intended audience would use to search for your content.
YouTube Video Descriptions
Every YouTube video includes a description that can be found under the viewport of the video.
Additionally, every video needs a unique description to increase the likelihood of your video being found when someone is searching for a particular topic.
A YouTube content creator’s video description attracts and converts an audience. Therefore, it’s crucial that you optimize your video descriptions for SEO.
If you’re unsure how to start crafting compelling YouTube descriptions, keep reading. We’ll explore various tactics you can employ and provide templates to ensure you have everything you need to excel on YouTube.
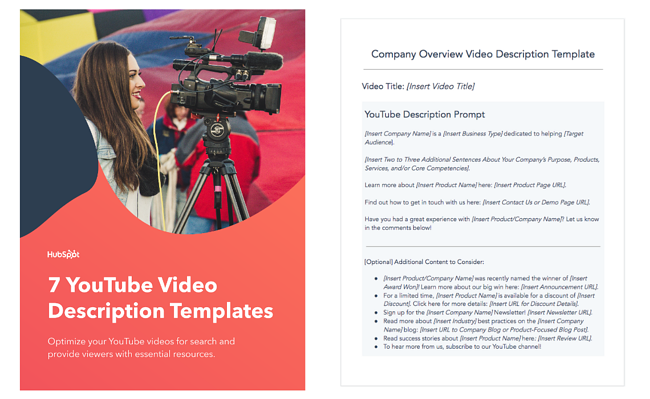
HubSpot compiled seven YouTube video description templates to help your business provide context to your viewers, rank better in search, organize your team, and link to relevant web pages on your site.
 Download These Templates for Free
2. Explain your content.
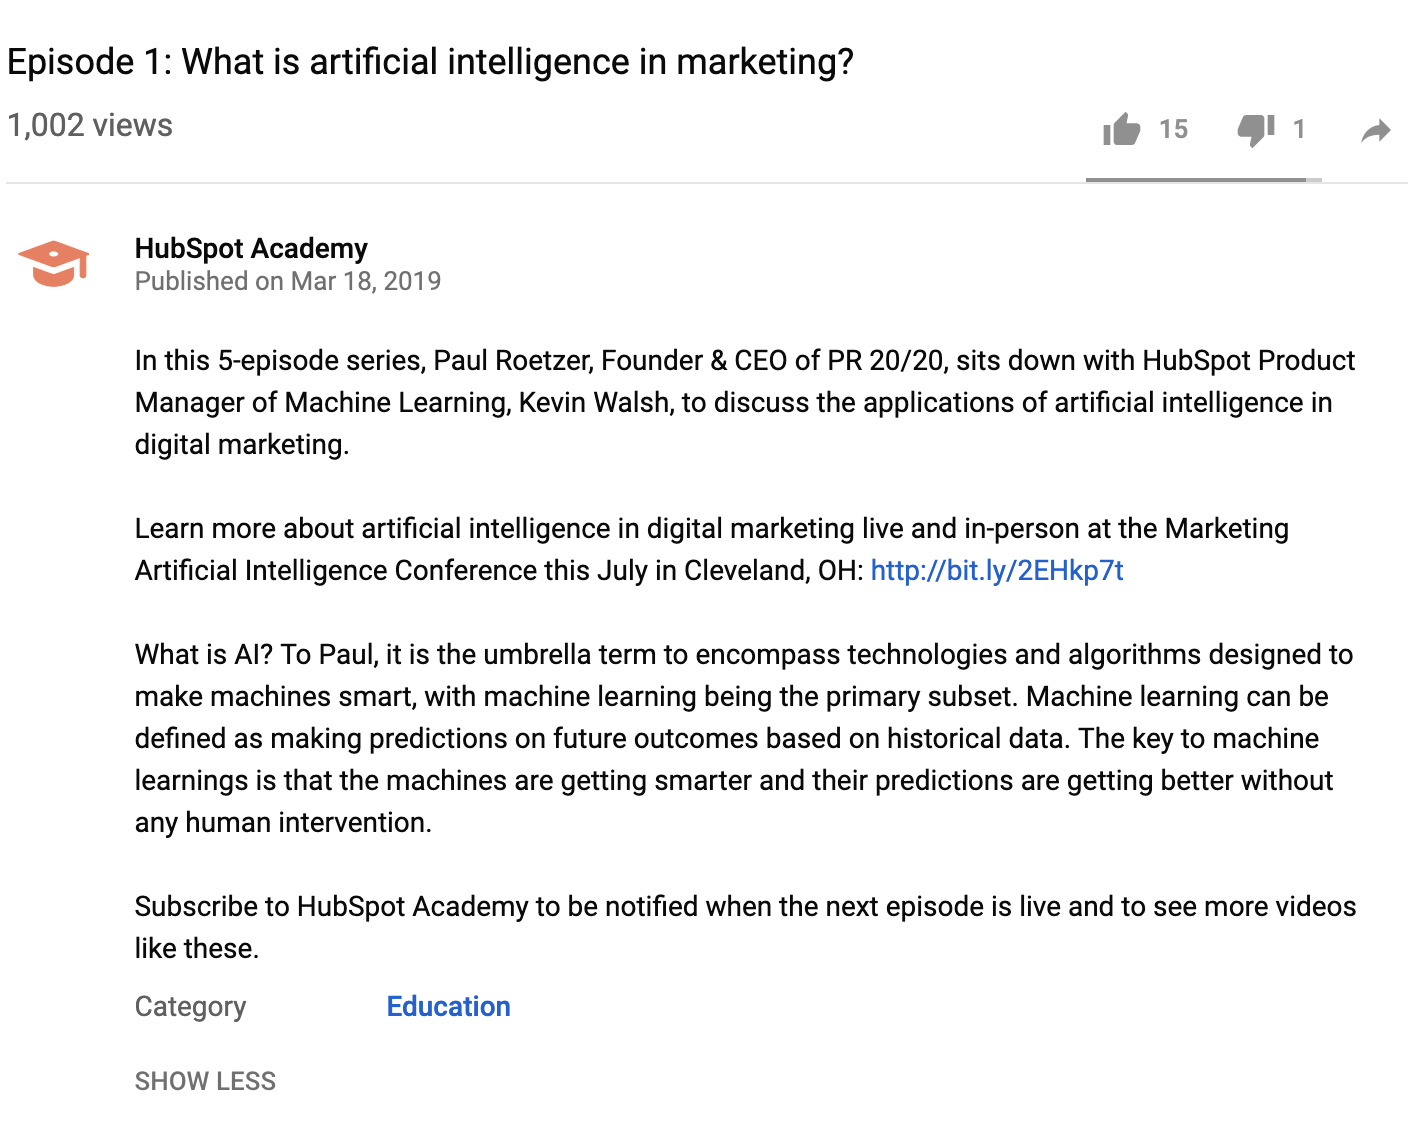
To explore the best tactics for writing YouTube descriptions, I spoke with Eric Peters, a Senior Growth Product Manager on HubSpot’s Academy team. He said, “[YouTube descriptions] are one of the primary ways YouTube knows what your video is about. Include links, additional resources, links to other videos and playlists, etc. Make sure the description box is easy to read.”
Peters explained that your YouTube video description and closed captioning should incorporate keywords into your description. It also helps with accessibility for people who are deaf or hard-of-hearing. Hence, adding closed captioning to your videos is an absolute must for accessibility.
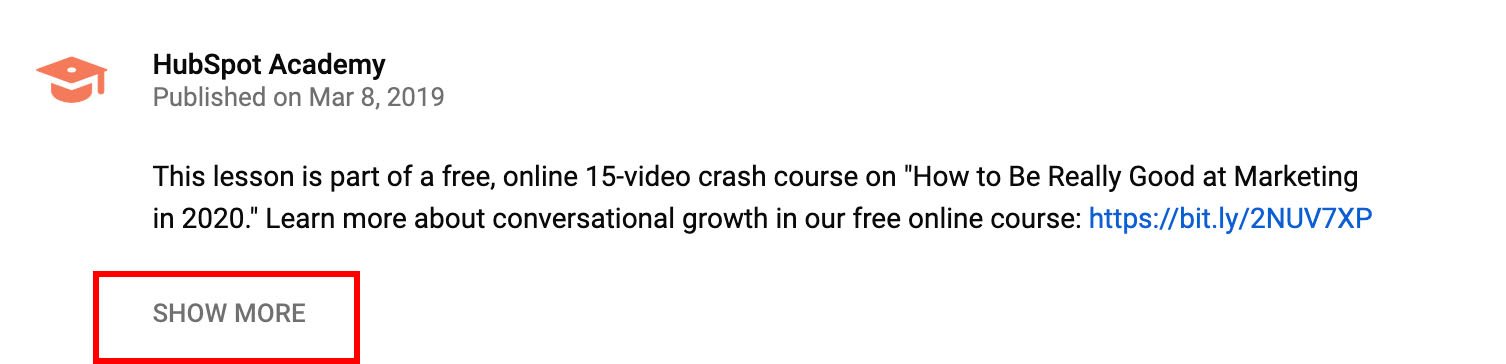
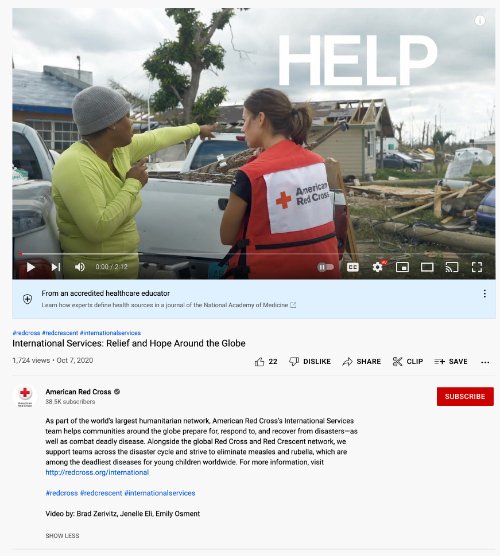
For instance, take a look at one of HubSpot Academy’s YouTube video descriptions:
A YouTube description differs from a web page meta description. In a YouTube description, content creators explain what your entire video is about and even link to external resources.
Peters told me, “You get 5,000 characters total, so make use of it. YouTube creators use asterisks or all-caps to differentiate titles from body copy because it’s all plain text. Consider writing up a text version of the key points from the video, or even copying the transcription of the video and paste it into the description.”
3. Include a call-to-action (CTA).
Your YouTube description is a fantastic opportunity to ask viewers to continue to engage with your channel or find additional resources that will help them learn more about a topic of interest.
For instance, let’s say you create a brief “How to Add Filters to Instagram” YouTube video, but you also have an in-depth “How to Use Instagram for Marketing” blog post. Why not link it in the description? Most likely, anyone watching your Instagram video on YouTube would be equally grateful for the opportunity to learn more through a blog post.
Perhaps you simply want to ask viewers to subscribe, turn on notifications, or share your content with their networks. These are all acceptable CTA’s for your description.
You must format your description to ensure you put the most important information first. Peters advises, “The first 200 characters are above the ‘more’ fold on the description box, so if you want your CTA/link to be seen by most people, keep it within the first 200 characters.”
After the first 200 characters, your text will be cut off, and viewers will need to click “Show more” to see the rest. Therefore, you must make your first 200 characters count.
4. Add your personality.
A YouTube description should be fun and demonstrate your brand’s personality with a unique voice. Unlike traditional forms of advertising, this is an opportunity for you to instill creativity and humor into your content.
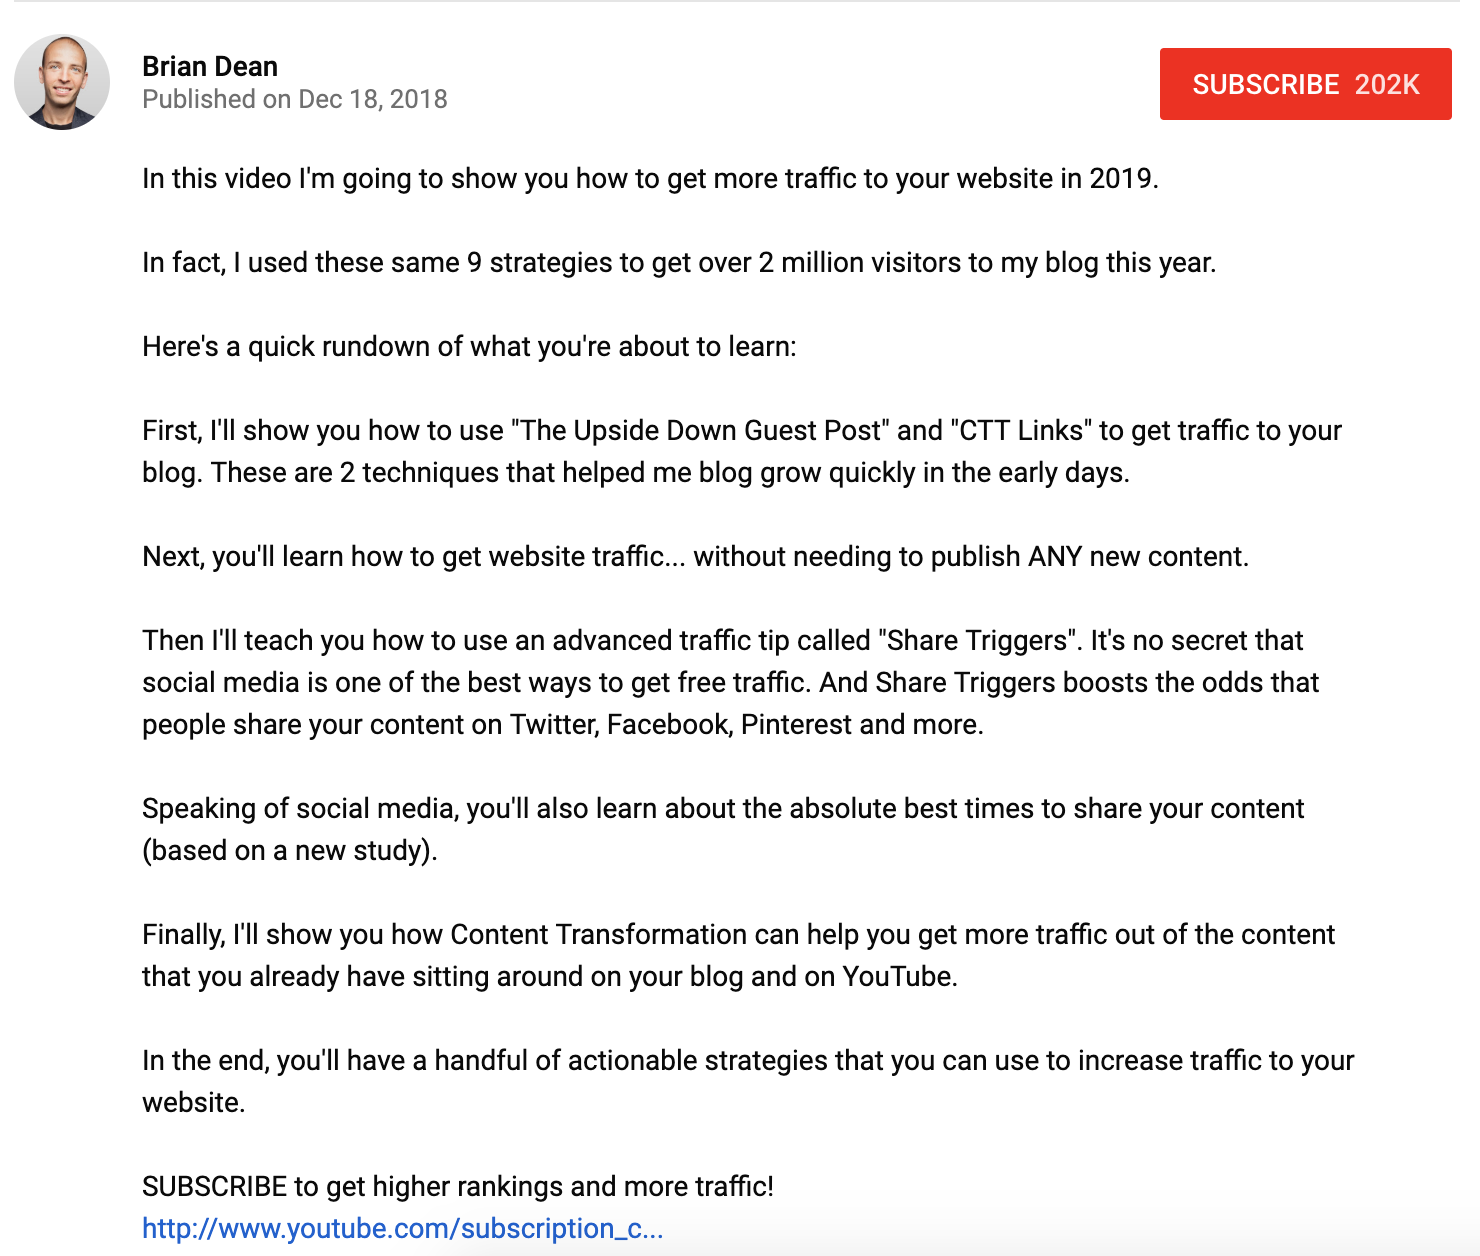
Brian Dean’s YouTube channel is a great example of this. His YouTube descriptions often mirror the way he speaks. The descriptions are candid and casual, and he makes it feel like he’s writing to a friend.
To learn more about using YouTube for marketing purposes, consider checking out HubSpot Academy’s comprehensive YouTube Marketing course.
5. Use timestamps to make videos scannable.
Including timestamps in your video description can make your video more user-friendly and help your content rank well on search engines.
YouTube video timestamps appear within search results, improving user retention by directing users to the most relevant portions of videos from SERPs.
Users can search for keywords that appear in your video’s description and click on a thumbnail on the SERP to view the portion of your video that answers their search query.
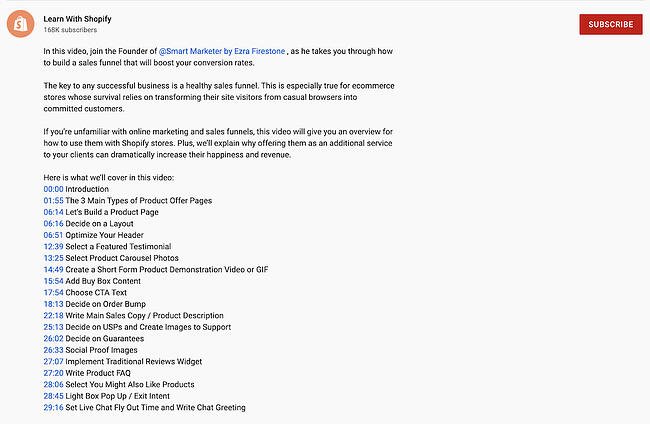
Image Source
YouTube Channel Descriptions
Every YouTube channel description should allude to a specific niche or central theme. You want to tell your audience what they will learn from your channel. This will give them a reason to tune in to your channel, subscribe to it, and continue learning from you and your videos. Additionally, when you add your niche to your YouTube description, your audience can more easily find you in a sea of potentially similar creators.
YouTube Channel Description Examples
1. Wes McDowell
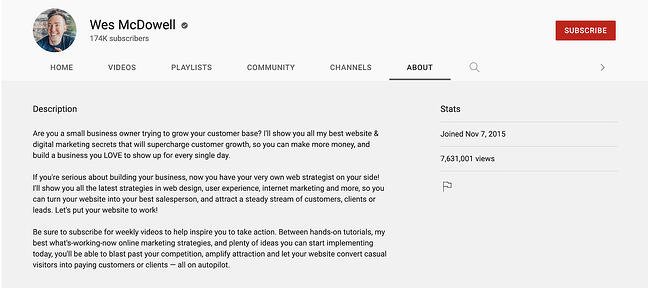
Image Source
Wes McDowell’s YouTube channel targets viewers in the digital marketing niche. The channel description mentions the channel’s mission: teaching small businesses owners digital marketing strategies they can use to grow their businesses. The description also lists topics the channel will feature in its videos, invites viewers to subscribe, and describes the benefits of subscribing to the channel.
Why We Love It
This YouTube channel description is clear and direct. It details what viewers will get when they come to the channel. This description also describes the marketing strategies and techniques viewers will learn. Clarity goes a long way to make a channel easily searchable and rankable on YouTube.
2. Yoga With Adriene
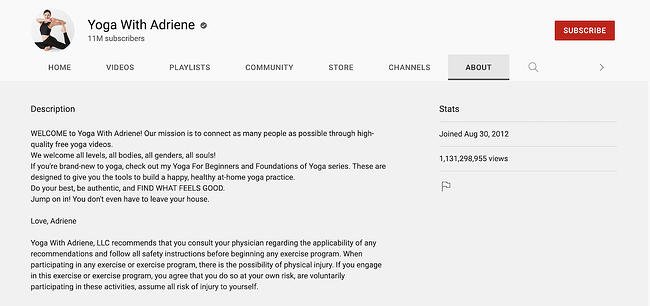
Image Source
Yoga With Adriene’s YouTube channel description highlights one of the channel’s main values: inclusion. The channel description mentions that everyone is invited to participate and learn more about yoga through her videos, regardless of their skill level. The description also recommends videos that beginners can watch to become familiar with the content.
Why We Love It
This channel description is an excellent example of how a company’s mission can be useful for video content. The description gives subscribers a glimpse into Yoga with Adriene’s values, creating a connection with the viewer. This angle is helpful for ranking on YouTube because it’s aligned with morals and values that subscribers can easily identify with.
3. Wild Wonderful Off-Grid
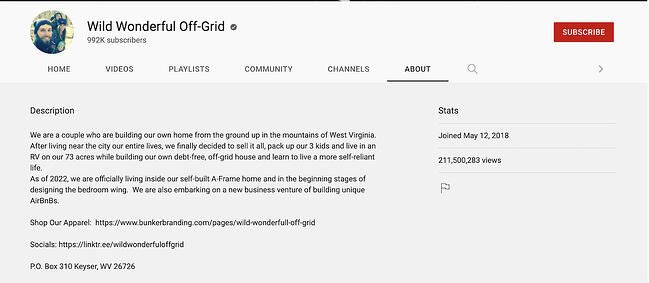
Image Source
Wild Wonderful Off-Grid’s YouTube channel description positions the channel within a niche by using the keywords “off-grid,” “self-reliant,” and “building our own home” to appeal to viewers who are interested in living off-the-grid. The description also invites viewers to visit their online store and social media profiles.
Why We Love It
This YouTube channel description establishes a niche, describes the channel’s content, provides background information about the creators, and encourages subscribers and viewers to participate further in their brand. The description also directs their audience to other aspects of their business, such as their store and social media platforms, which fosters value for their subscribers.
4. The Pals
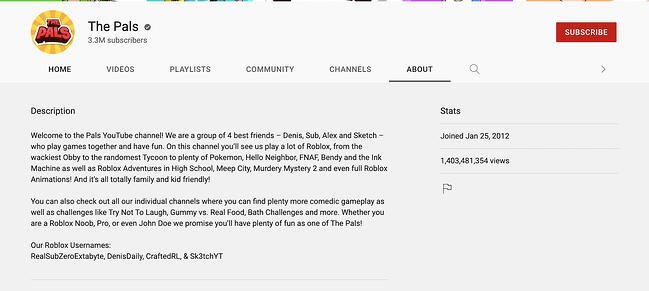
Image Source
The Pals’ YouTube channel description introduces the channel’s creators, lists the video games the channel will highlight, and provides each creator’s personal YouTube channel and Roblox username.
Why We Love It
This YouTube channel description focuses on the entertainment the channel provides. The description targets subscribers looking for gaming knowledge and mentions the creators’ personal journeys to set the channel apart from others in the same niche and genre.
5. Florian Gadsby
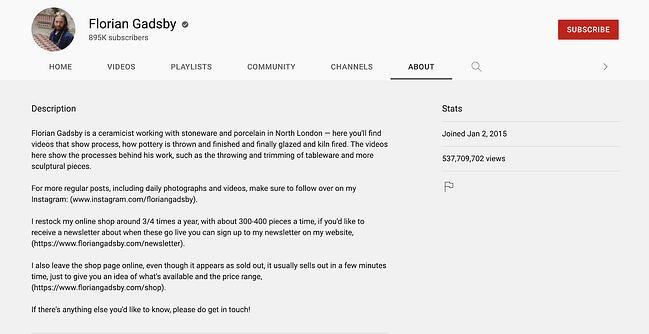
Image Source
Florian Gadsby’s YouTube channel description introduces the channel’s creator and lists the topics that viewers can expect to see when they subscribe. It also links to the creator’s social media and newsletter, and provides information about the creator’s online store, including its restocking schedule.
Why We Love It
This YouTube channel description takes a personal approach to the channel’s subject matter. The description gives visitors clarity about the channel’s content and artistic focus. It also encourages viewers to interact with the creator on their social media platforms to learn more about them and view more of their content.
6. SciShow
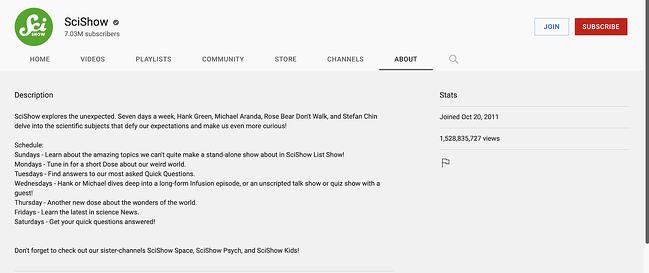
Image Source
SciShow’s YouTube channel description introduces the channel’s creators and hints at the topics that viewers can expect to see every week. The description also outlines the channel’s posting schedule and mentions other YouTube channels associated with the brand.
Why We Love It
This YouTube channel description tells its viewers when they will see uploads. This is a good strategy to ensure users visit the channel right at the time when they’re expecting to see new content. If views go up on a page, the YouTube algorithm is more likely to boost your channel to a wider audience.
7. Unbox Therapy
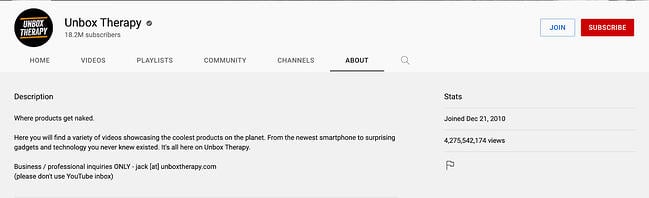
Image Source
Unbox Therapy’s YouTube channel description states the channel’s tagline, gives an overview of the channel’s content, and provides a contact email for business inquiries.
Why We Love It
This simple channel description piques viewers’ interest with a captivating tagline and a straightforward explanation of the channel’s content. It also includes an email that allows viewers to contact the creators to inquire about the business and ask professional questions about the channel.
YouTube Channel Description Templates
Now that we’ve covered the basics, take a look at a few templates you can use to craft a compelling YouTube description.
1. Be clear and concise.
You might create a playful, easy-going channel ‘About Me’ description, like this one:
Hi, I’m [Name]. This is my channel about increasing your sales, effectively targeting your audience, and growing an email list that you can use to grow your business.
If you’re a marketer who wants to learn marketing strategies to get [result, i.e., more traffic to your site], subscribe to my channel.
My channel publishes videos that focus on storytelling content that connects X, shows you how to infuse your authenticity in your brand, and gives you a marketing strategy that feels organic. If that sounds like it could be helpful for you, please join me!
2. Connect with subscribers.
Alternatively, you can craft a YouTube description that describes what your company does from a third-person point of view, like this one:
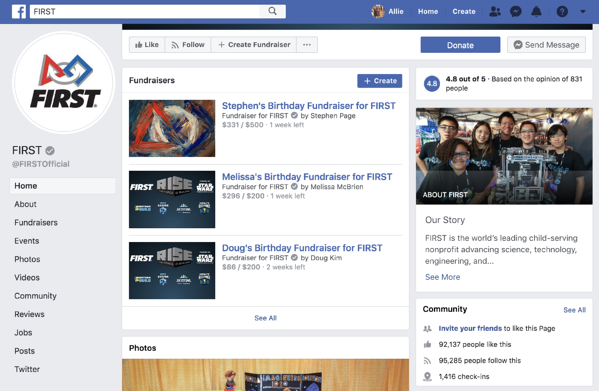
[Company] is the worldwide leader in X, Y, and Z. Since [year], [Company] has been on a mission to [insert company vision or purpose here].
To learn more about [Company], its values, and its [company offering], subscribe to our channel to stay informed.
3. Create a niche.
When you write your YouTube channel description, you’ll want to use keywords that define and represent your channel’s niche. Incorporating niche keywords in your channel description helps viewers identify your niche and what content you produce.
[Name] and [Name] have nuanced discussions about dating, their lifestyle, and relationships. They discuss current topics that affect modern dating and how to maneuver relationship patterns. You can purchase [Name] and [Name]’s [product] to learn more about improving your knowledge of relationships.
4. Show your journey.
You may want to create a channel description that asks viewers to join you on a journey that you document on your YouTube channel. For instance, if your YouTube channel focuses on streaming video game content, you may invite your subscribers to watch you as you attempt to win the game. Therefore, mentioning a goal for your channel can help you gain new subscribers eager to come along for the ride as you pursue a goal.
This channel gives everything you need to know about gaming, including the latest equipment reviews, new game reviews, and once-a-week live streams. Watch as I, [name], try to beat my high score in the latest release of [insert game name here].
5. Be more personal.
An effective channel uses a lot of personal touches with its viewers to gain subscribers because the content is authentic and offers emotional appeal. This type of description implies that you want to create a sense of community with your channel.
This is a personal journey of how I became a painter. Learn about what paints I purchase, the tools I use, and the techniques I learned during school. Art is my passion, and I express my love for [insert passion] through it.
6. Create anticipation for new content.
A content creator needs to build excitement for the next video — a sense of urgency and anticipation for their audience. A YouTuber can create giveaways, conduct polls, and invite special guests to participate in the videos to maintain the channel’s success.
This channel gives pop culture commentary through a [political ideology] political lens. We make commentary on books and current events. We also upload a new video every Wednesday and Friday.
YouTube Video Descriptions
A helpful video description can spike your audience’s interest and result in longer watch times, better view counts, and even new subscribers. Plus, it can help with YouTube SEO, allowing YouTube’s algorithm to understand your content and suggest it to new users, further boosting your YouTube metrics.
YouTube Video Description Examples
1. “5 Best Coding Languages for Beginners 2021” by nicole . young
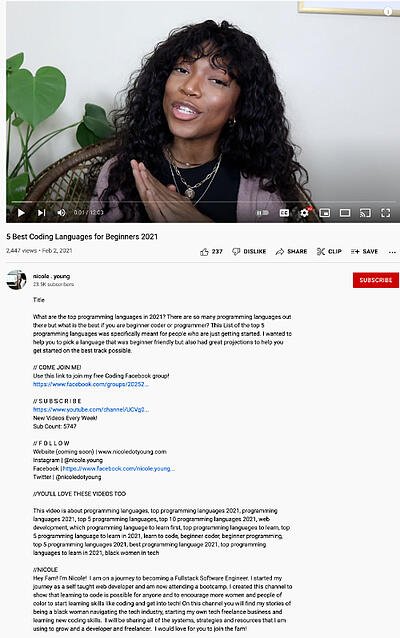
Image Source
The description of nicole . young’s YouTube video, “5 Best Coding Languages for Beginners 2021,” hooks the viewer by posing a question that will be answered in the video. The video description also includes a benefit that the viewer will gain from watching the video.
Why We Love It
In this video description, the creator summarizes the video’s title and specifies the target audience. The text will help audiences (and YouTube) understand the video’s content. This creator understands that the channel description is prime real estate for contact information, social media handles, and calls to action, persuading viewers to stick around.
“How to Write Counterpoint – Music Composition” by Music Matters
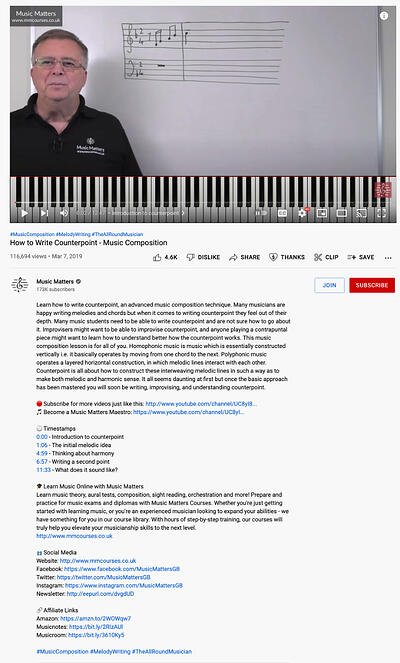
Image Source
The description of Music Matters’s YouTube video, “How to Write Counterpoint – Music Composition,” uses keywords such as “writing counterpoint,” “music composition lesson,” and “understanding counterpoint” to appeal to audiences that are interested in learning the music composition technique. The description also includes timestamps that viewers can use to skip to the portion of the video that addresses the specific topic they want to learn about.
Why We Love It
This YouTube video description uses keywords to appeal to a niche audience. The specificity makes it easily searchable on YouTube. Using keywords to make each video search-friendly will drive traffic to your video’s specific content.
“How to Create a 90 Day Plan for your Business (+ Free Workbook)” by Anna Clark
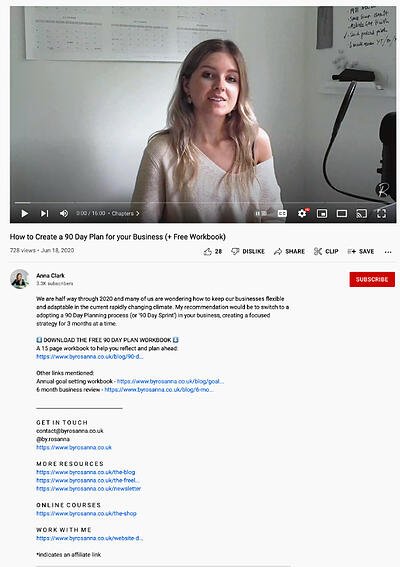
Image Source
The description of Anna Clark’s YouTube video, “How to Create a 90 Day Plan for your Business (+ Free Workbook),” includes links to the creator’s website, courses, newsletter, and social media accounts, and a workbook that viewers can download and complete as they watch the video.
Why We Love It
It’s good to involve your viewers in other aspects of your business. The interaction and engagement you earn will help you rank against other active channels. Directing your viewers to other resources for your business will also help your YouTube channel drive traffic to your website, increasing your authority in your business niche.
“How To Create An Email Sales Funnel” by Wishpond
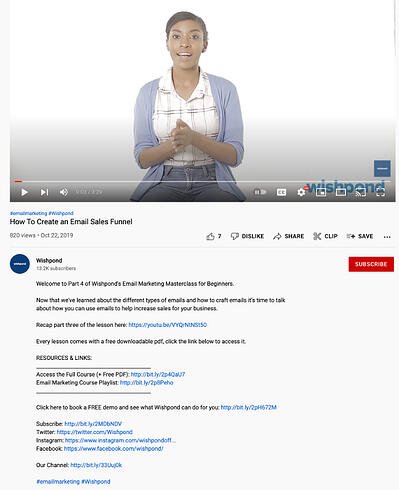
Image Source
The description of Wishpond’s YouTube video, “How To Create An Email Sales Funnel,” hooks the viewer by stating that the video is the fourth installment in a series and linking to the previous video. The video description also includes an incentive for viewers to learn more about the company.
Why We Love It
This description segments the video as a section of a larger series. If subscribers learn that you provide similar content on your channel, they will be more inclined to watch your other videos. The description also lets viewers know there’s a free demo of the service. If you sell other products or services in your business, be sure to link them in the description.
“How to Outline Your Novel – Part 2” by Writing with Jenna Moreci
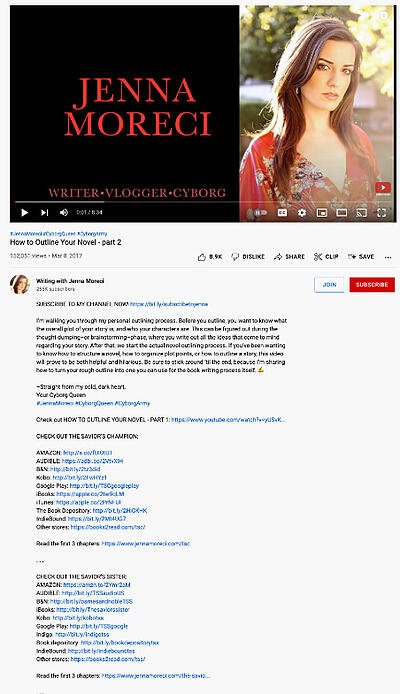
Image Source
The description of Writing with Jenna Moreci’s YouTube video, “How to Outline Your Novel – Part 2,” hooks the viewer by stating that the video is the second installment in a series and linking to the previous video. The video description also includes an incentive for viewers to learn more about the creator’s products.
Why We Love It
This video description is great because it lets viewers know what’s coming next. Inserting a “new segment” in your YouTube series allows viewers to anticipate your next video.
“Microgreens Growing: Materials and Beginner’s Guide” by Epic Gardening
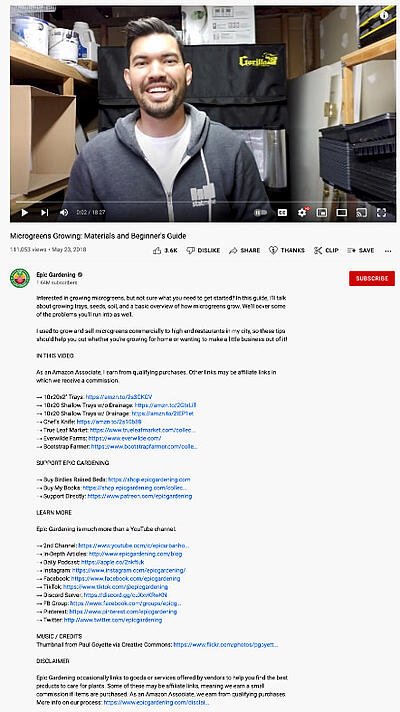
Image Source
The description of Epic Gardening’s YouTube video, “Microgreens Growing: Materials and Beginner’s Guide,” invites novice gardeners to learn about growing microgreens. The video description tells viewers about the creator’s past experience with microgreens, lists the supplies that the creator mentions in the video, and lists ways that viewers can support the creator beyond watching their video.
Why We Love It
The creator provides a list of products used in the video. The viewers can conduct further research into the products or purchase them immediately through the links.
“Budgeting for Beginners – How to Make a Budget From Scratch 2021” by Debt Free Millennials
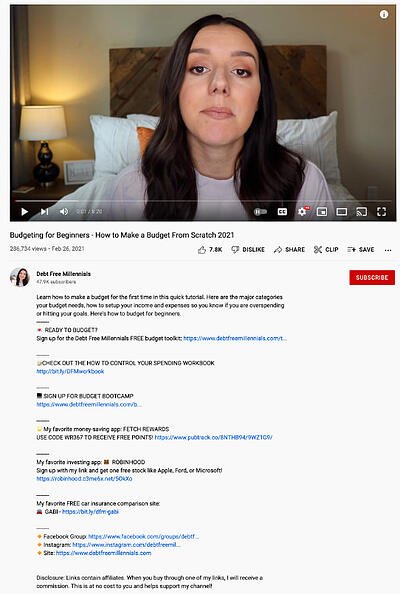
Image Source
Debt Free Millennials’ YouTube video, “Budgeting for Beginners – How to Make a Budget From Scratch 2021,” teaches viewers to create a budget. The description gives viewers an overview of the topics covered in the video and invites them to sign up for products and services through affiliated links. It also includes links to the creator’s Instagram, Facebook group, and website so that viewers can connect with the creator through different social platforms.
Why We Love It
The creator has created a sense of community and togetherness. If you include your social media links in your YouTube video description, subscribers will follow you on multiple platforms to remain engaged with your content. The content creator invites them to return for new videos and share their own experiences on social media.
YouTube Video Description Templates
A YouTube video description is descriptive text that includes but is not limited to keywords, themes, and special concepts/guests that the content creator wants their viewers to know. The YouTube video description increases visibility through SEO, views, and subscriptions. In each video description, the content creator will encourage their viewers to “Like,” “Share,” and “Subscribe” to their content. An effective video description will be persuasive and informative, and prompt the audience to tune in regularly.
1. Make it search-friendly.
We have all done it: Having parts of an idea and hoping Google will fill in the blanks by completing the search with the rest of our thought. As a content creator, you need to own each of the video’s related tags, including misspellings, to help refine the content under your channel. The YouTube videos need to be centered around keywords, maximizing your SEO for Google and YouTube searches.
Listen to how our CEO explains the difference between X and Y, and learn best practices for implementing your own strategy.
Learn more about X and Y in our course: [course link].
2. Lead viewers to other resources.
You can use a YouTube channel description like this one to help new viewers connect with you on your other channels and social media platforms:
Hi there! New to [name of channel]? If so, here’s what you need to know: I like [interests related to channel] a LOT, so I use this channel to explore X, Y, and Z, to help you [desired result for viewer].
Where else you can find me:
INSTAGRAM: http://instagram.com/[accountname]
TWITTER: http://twitter.com/[accountname]
LIFESTYLE CHANNEL: http://www.youtube.com/[accountname]
Join our growing community for new videos every Tuesday and Friday!
BUSINESS INQUIRIES
Please contact [PR representative] at [email or phone number].
3. Incorporate keywords.
YouTube increases visibility within keyword searches and relevant content. As a result, videos should have buzzwords in video and channel descriptions.
If you want to craft a description that explains what your video is about and incorporates a keyword description, try this:
Hey there! This lesson is part of a free online course. Take the full course here: www.company.com/course1.
Some people are unsure what X is — at its most basic, X is [brief definition of keyword]. In this video, you’ll learn how to X, Y, and Z, to ensure you’re able to grow your brand online.
In addition, we’ll explain how you can avoid doing A. Sometimes, A is all it takes to lose a customer.
4. Tease a new initiative.
A new video is upcoming, and you need to send a teaser to your audience that will create buzz leading up to the release of the new content. A video teaser can be uploaded to YouTube Shorts to increase anticipation.
Join the “musical nerds” on a mission to improve our musical understanding. We upload every Wednesday and Thursday. We will have Q & A sessions to answer all of your beginner questions on Wednesdays, starting next week.
5. Be transparent.
Authenticity sells. Viewers know when you aren’t being transparent with them. YouTubers should be willing to build trust and engage within the community.
What’s up, guys? In this video, we’ll talk about an everyday makeup look you can do in 10 minutes. I’m not an early riser, but just like anyone, I still want to look good for the day. I’ll list the products I used in this video.
Please subscribe if you are feeling my vibe. I post content weekly, and you can always find me on Insta! I’ll drop my social media handles below.
**All opinions are my own. This video isn’t sponsored. I’m sent products for my consideration, and I earn a small percentage from sales through affiliated links. Clicking on affiliated links doesn’t cost you anything.**
6. Maintain engagement.
A video description contains keywords and time stamps for content created. It will help maintain engagement and show the chronological order of things, especially if viewers are looking for a particular video for a specific date. A strong YouTube description avoids clickbait to reel in users.
Hi, everyone! We’re the Science Kidz! Today we are experimenting to find out which popcorn brand leaves behind the least number of kernels. Will it be Orville Redenbacher’s or Act II?
Every week, we do a new experiment as part of our initiative to highlight STEM careers in Savannah, Georgia. If you have an experiment you want to see The Science Kidz try, leave a comment below. You never know — we could pick yours!
Follow me on Instagram for more experiment ideas, and tag us in some of the experiments you do with your friends!
7. Help viewership with paid sponsorships.
Content creators with paid sponsorships, or paid product placements in their videos, will influence brands and generate income for themselves. If “#ad” appears in your video description, you can bet mentioning the product or brand will prompt the audience to try it. Offering it at a discount price may also incentivize potential clients.
Hey, y’all! Today, we’ll be rebuilding a 454 Chevy Big Block motor. We’ll be adding 200 horses to bring the motor up to 680 horsepower. I hope y’all are ready to dive into business with Motor Boyz.
This episode is sponsored by Husky tools, and we’ll be using their latest impact and driver tools to rebuild the 454. We would like to thank Anderson Auto for donating the 1972 C10 to be our frame once the motor is rebuilt and completed.
Download these YouTube description templates, and help your video go viral.
These must-have YouTube video and channel description templates can help you reduce the time it takes to upload and optimize your YouTube videos, getting them out to your audience quickly and with less effort. Be sure to customize the text to enhance the reading experience because you want to be as helpful as possible for your audience.
Editor’s note: This post was originally published in March 2019 and has been updated for comprehensiveness.

![New Data: Instagram Engagement Report [2022 Version]](https://i4lead.com/wp-content/uploads/2022/06/9294dd33-9827-4b39-8fc2-b7fbece7fdb9-3.png)

![→ Access Now: Video Marketing Starter Pack [Free Kit]](https://i4lead.com/wp-content/uploads/2022/06/8f27c677-d952-4663-8787-bf65c6a1ecf2-4.png)


![Free Ebook: The Marketer's Guide to TikTok for Business [Download Now]](https://i4lead.com/wp-content/uploads/2022/06/2c7242e4-ad54-4f63-8627-a15aa6a2ea50-2.png)
![→ Access Now: Video Marketing Starter Pack [Free Kit]](https://i4lead.com/wp-content/uploads/2022/06/8f27c677-d952-4663-8787-bf65c6a1ecf2-3.png)

![Download Now: Nonprofit Marketing & Fundraising Trends for 2022 [Free Report]](https://i4lead.com/wp-content/uploads/2022/06/6193b715-2ba9-4c6d-add0-681edfcae689-1.png)


![→ Access Now: Video Marketing Starter Pack [Free Kit]](https://i4lead.com/wp-content/uploads/2022/06/8f27c677-d952-4663-8787-bf65c6a1ecf2-2.png)


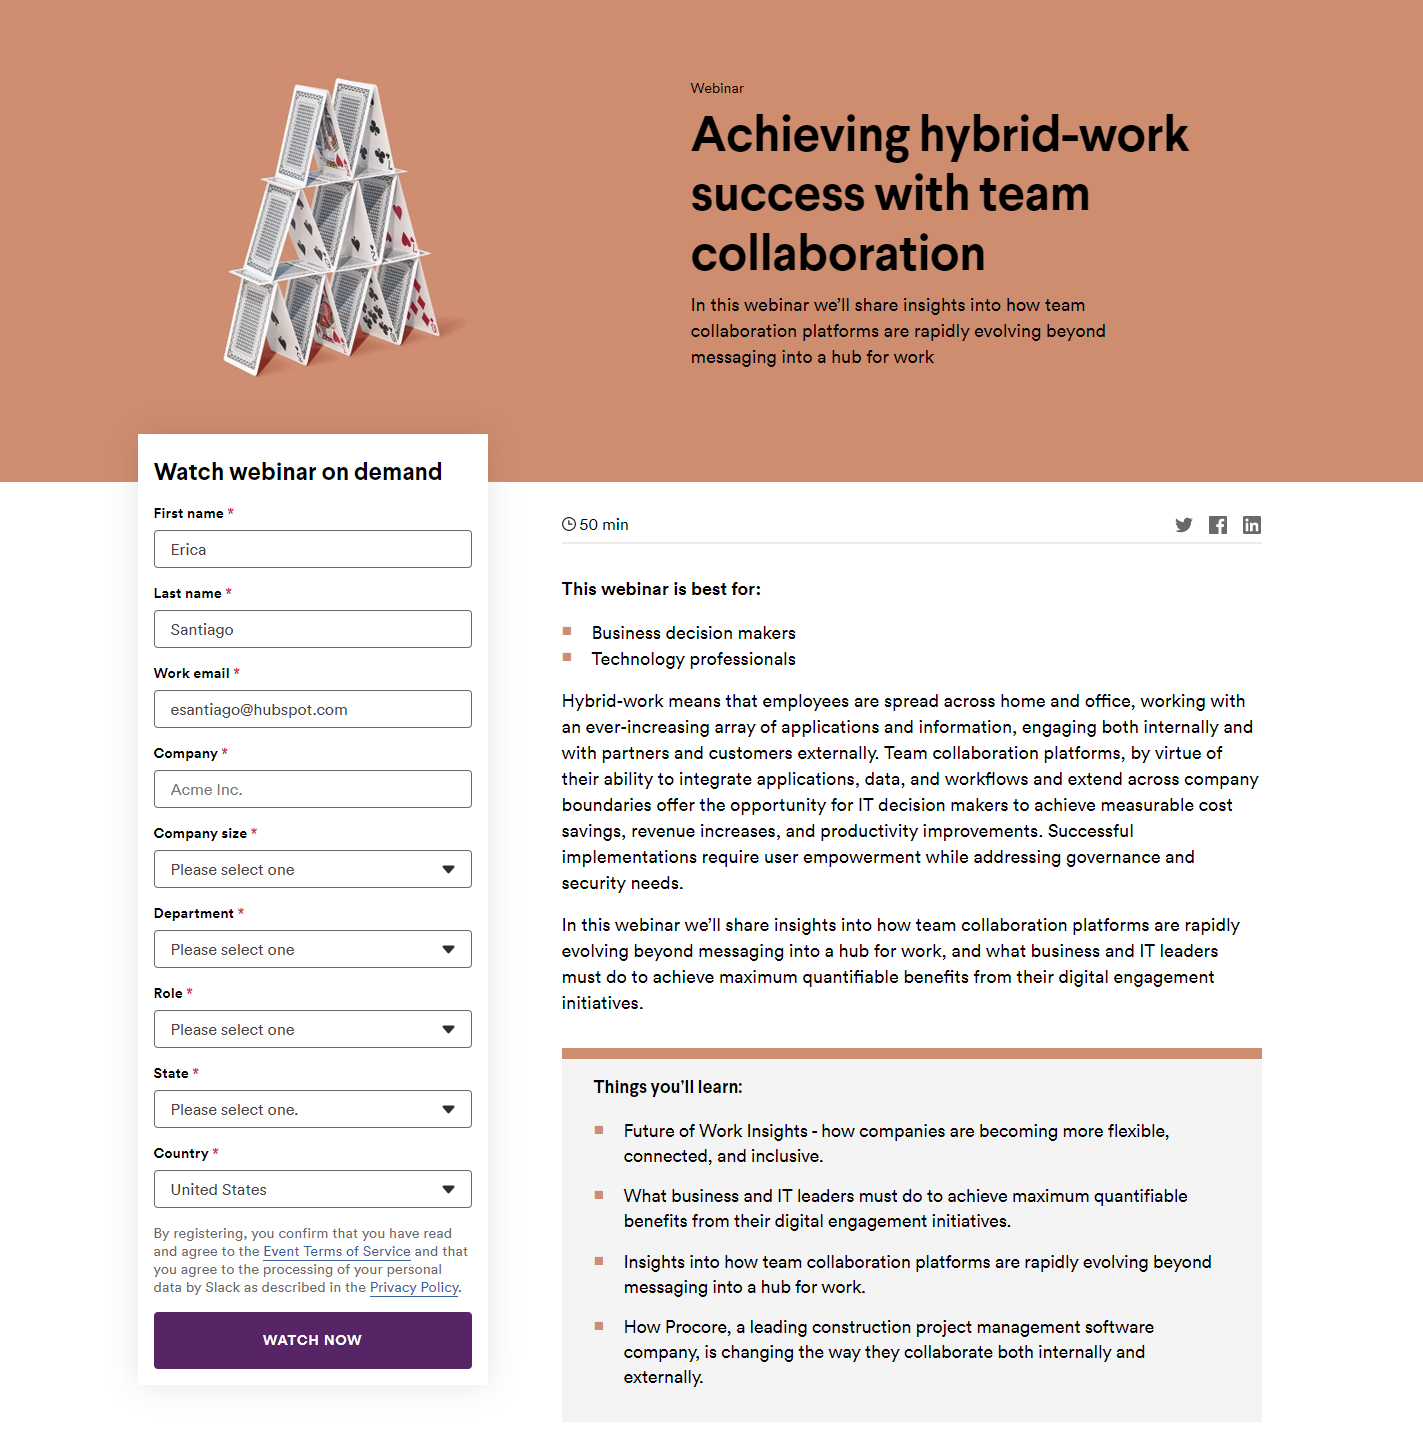
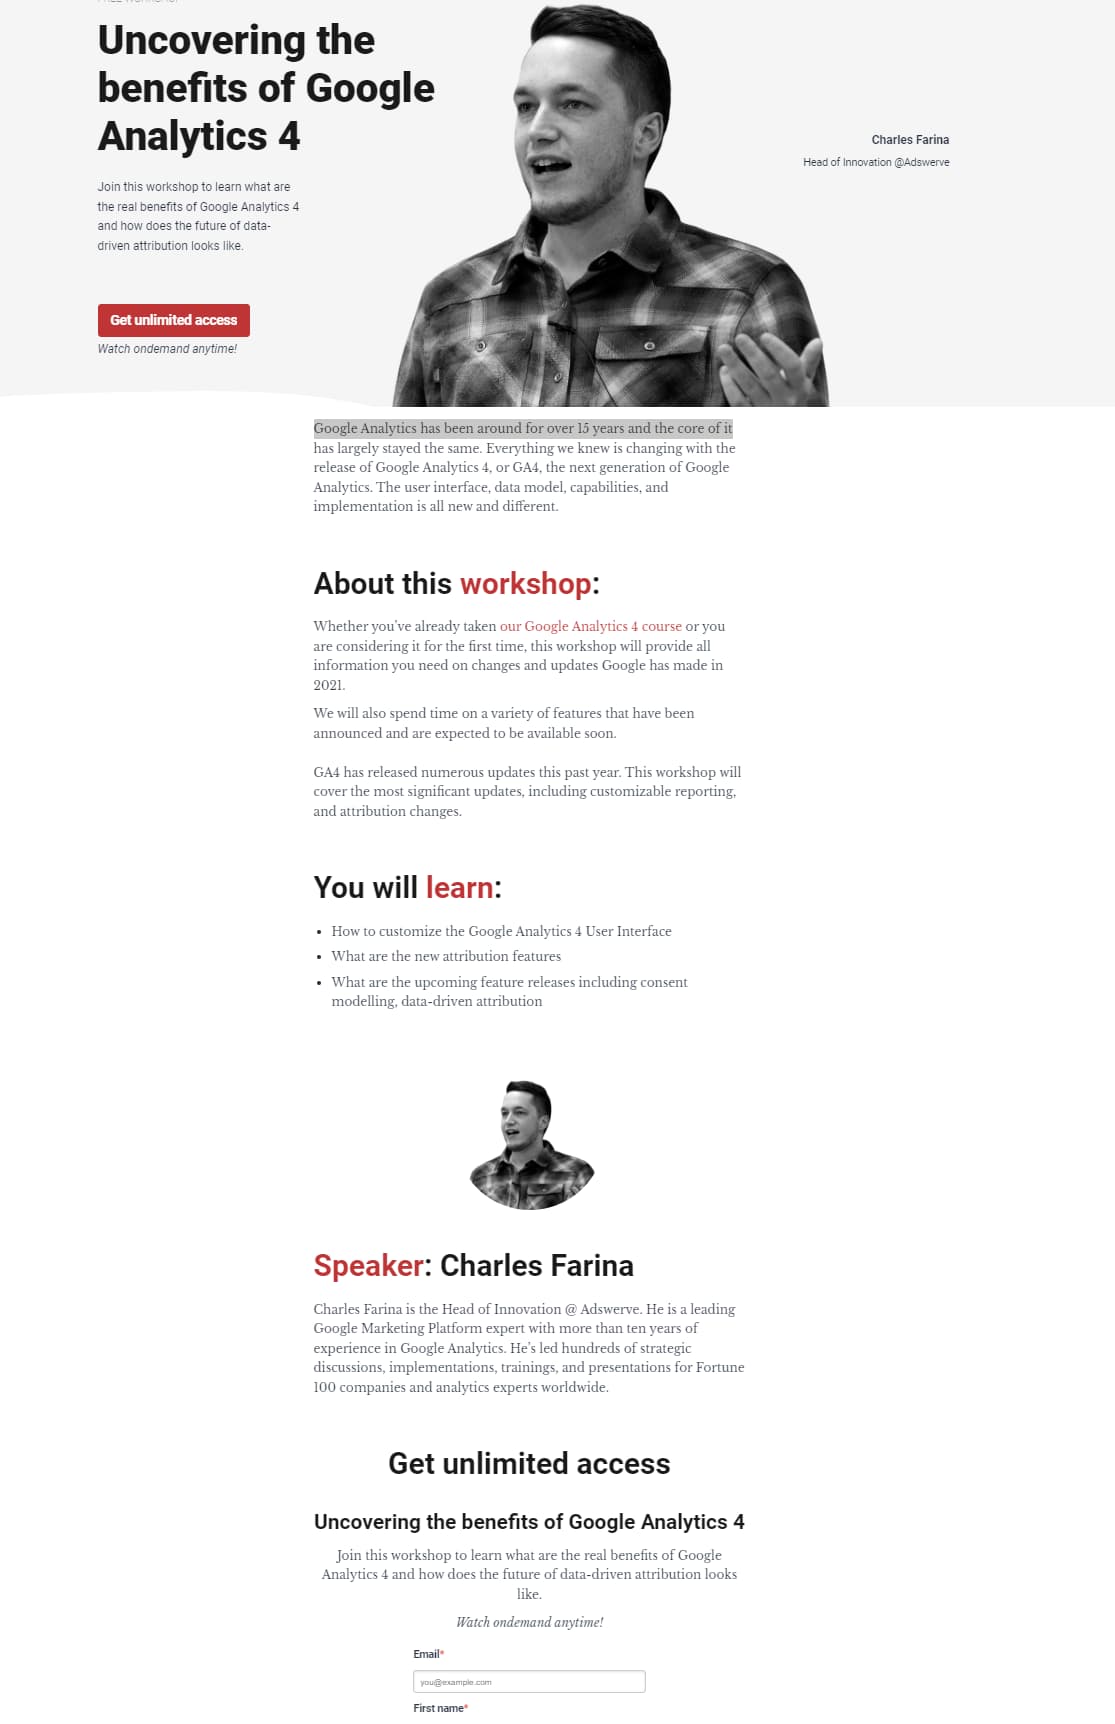


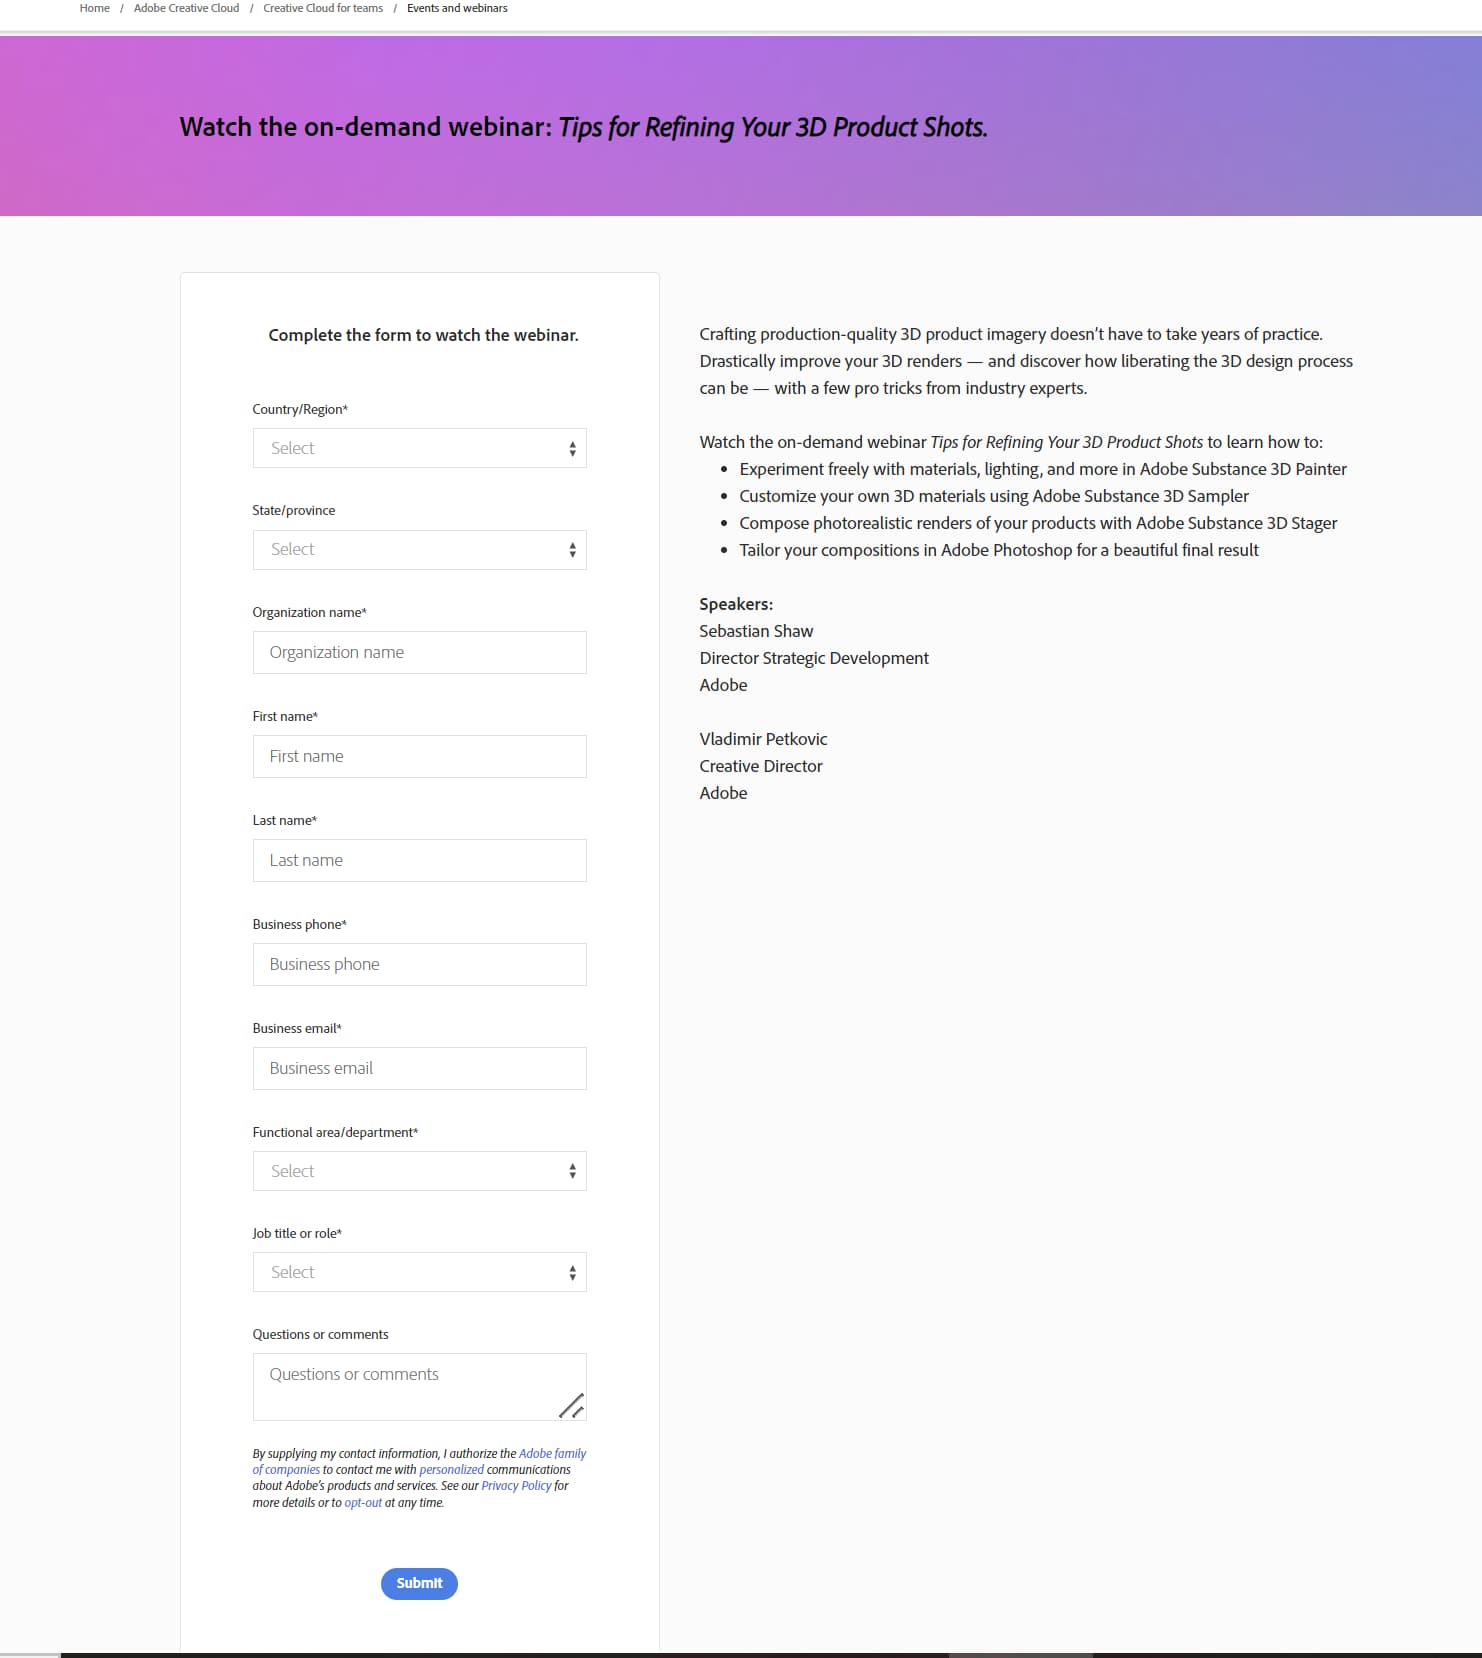
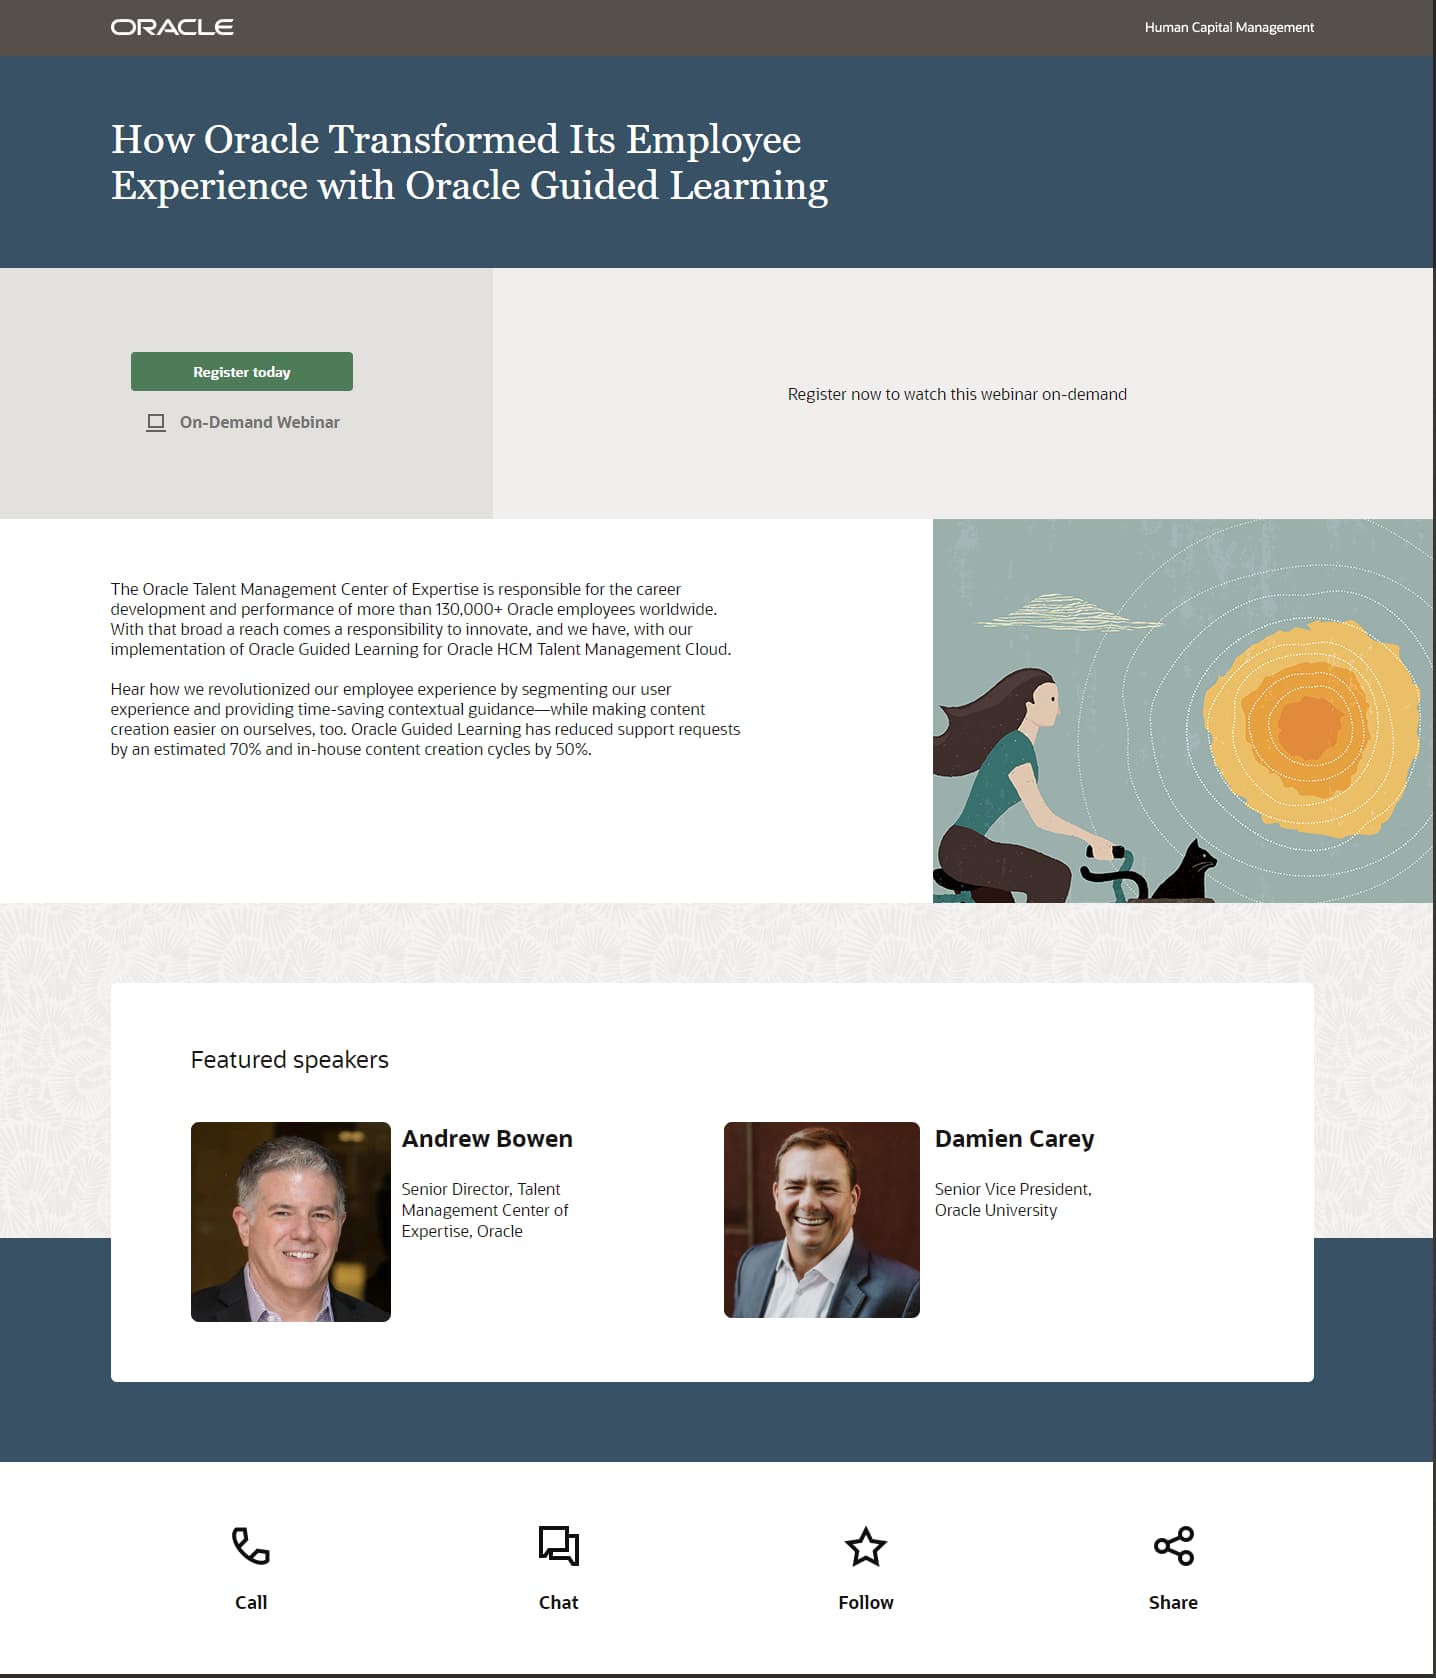
 The paragraph below includes everything visitors need to know about the webinar and its purpose. Even better, below the paragraph are images of the webinar speakers and their roles in the company to lend credibility.
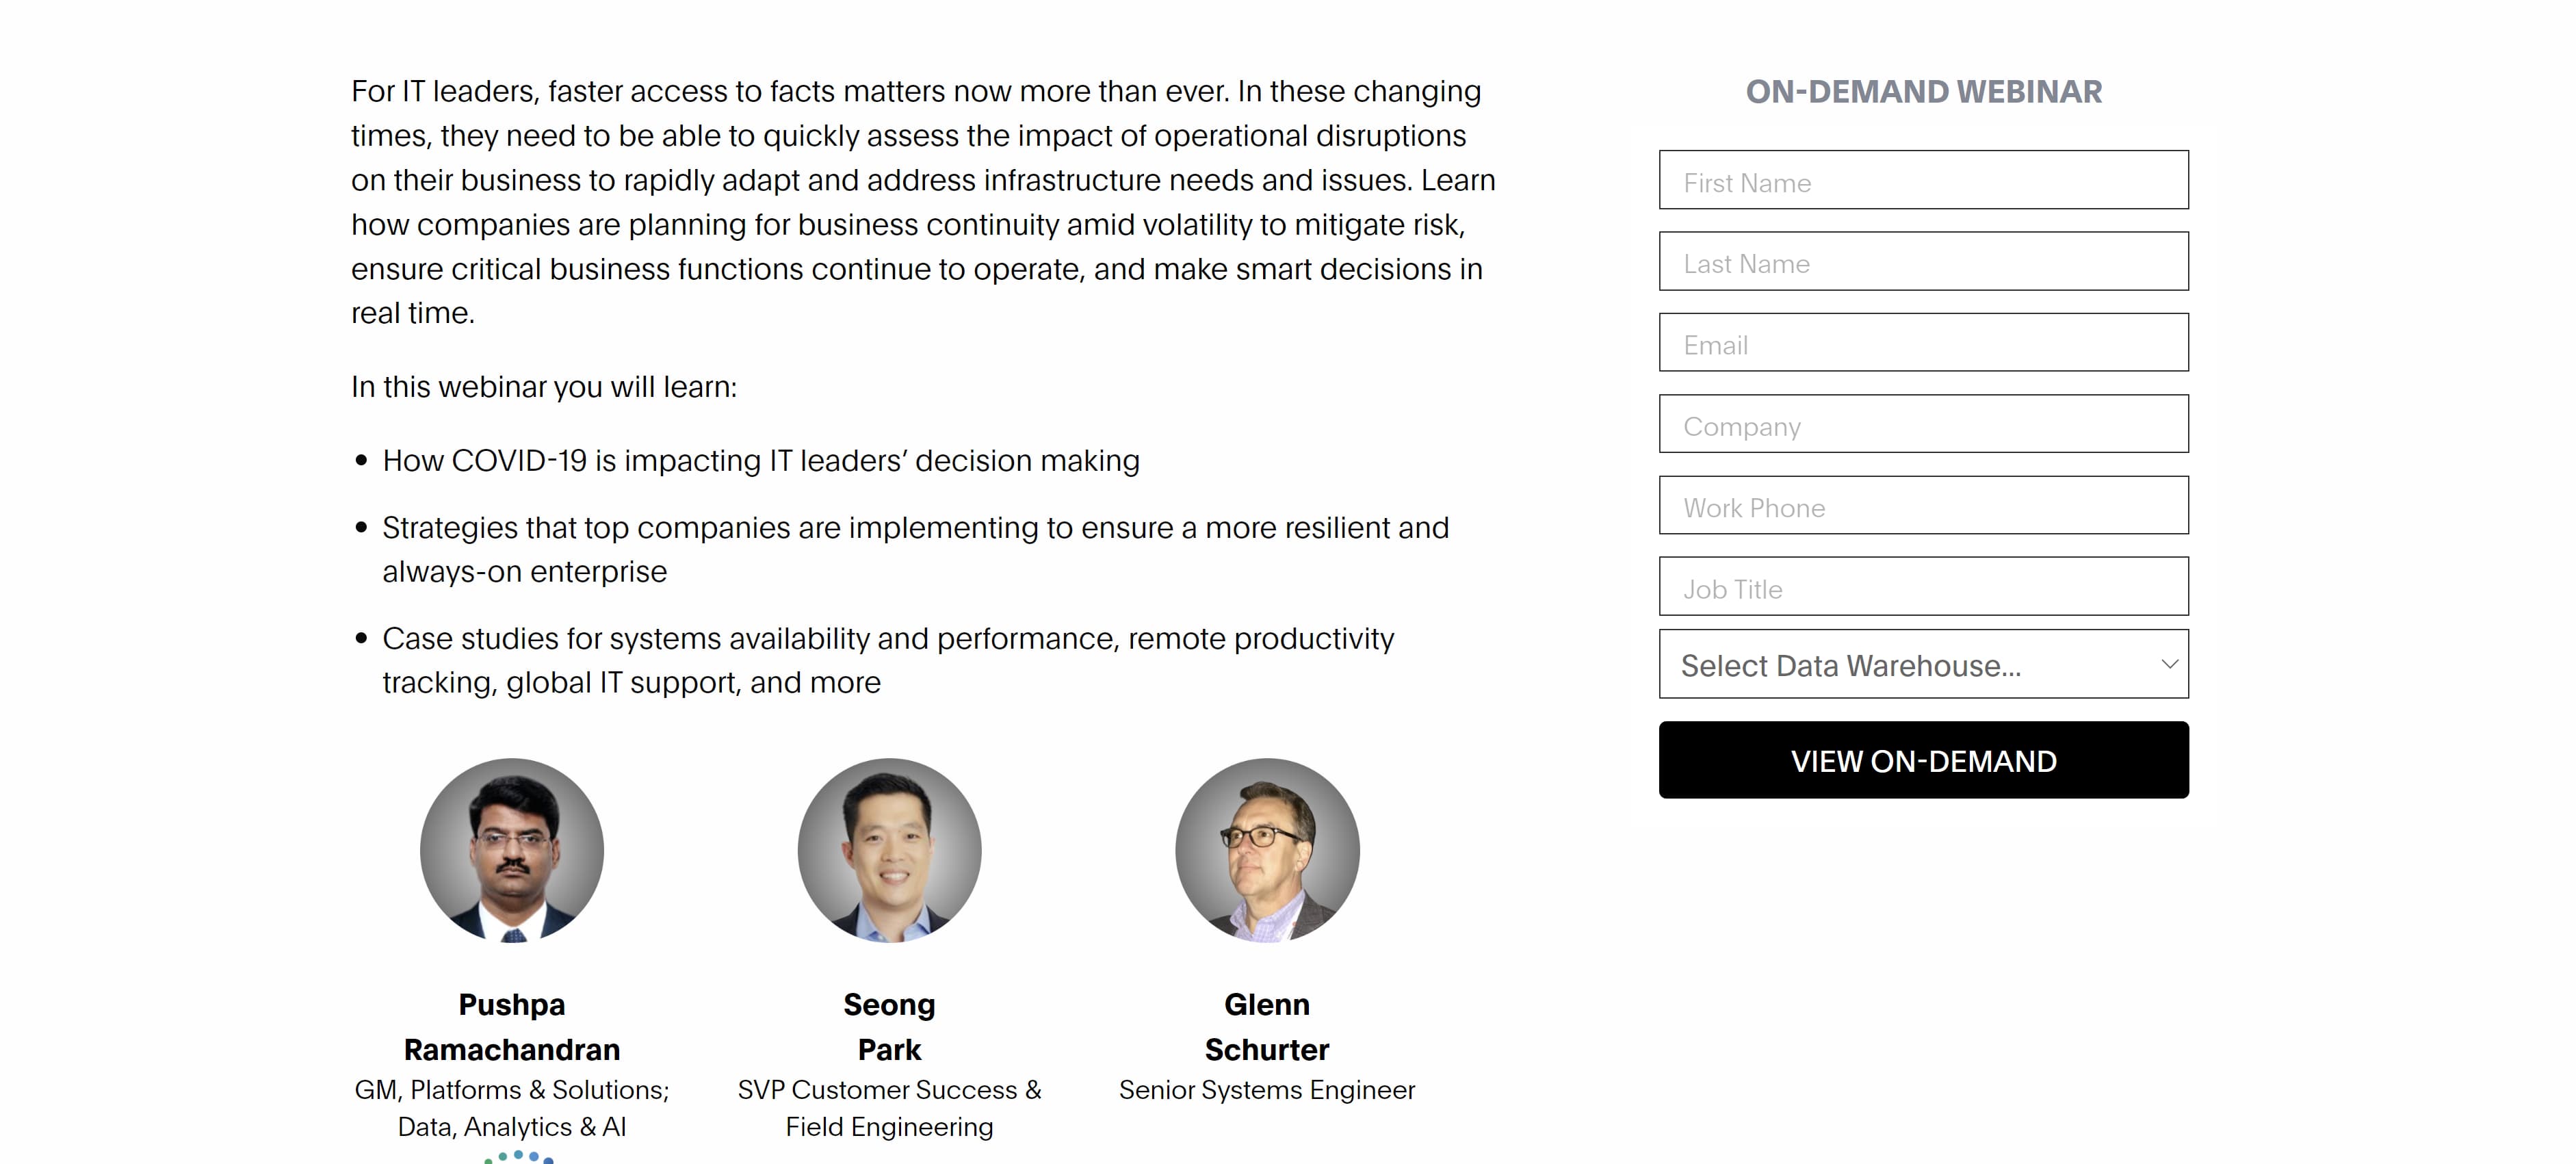


![→ Click here to download leadership lessons from HubSpot founder, Dharmesh Shah [Free Guide].](https://i4lead.com/wp-content/uploads/2022/06/4e634041-e1ce-4a85-8e65-aea12fc10b84-3.png)