Categories B2B

14 Best Video Editing Software Tools for YouTube

People watch almost 5 billion videos every day on YouTube. It’s no wonder content creators choose this channel to share their ideas, products, and skills — they know there’s potential to earn a great following and potential customers. Given the multitude of videos that live on the platform, it’s important to make yours stand out if you want the same.

The quality of your video will rely on your filming equipment and the editing software you use. A video with high resolution, proper lighting, and seamless video editing will set the foundation for masterful and professional-looking content.

Sign up for HubSpot Academy's YouTube for Marketers Course [Free Online Course]

To help you accomplish this, we’ve created a list that features the best (free and paid) video editing tools on the market. All of these tools make it possible for you to create engaging, standout content for one of the top social platforms globally.

Skip to:

1. Shotcut

Shotcut, a free open source video editor that is available for Windows, Mac, and Linux, offers a variety of impressive features comparable to Windows Movie Maker. For instance, the tool allows you to cut video footage to a certain length before converting it, and offers filters and effects to make your video look sleeker. Shotcut can handle streaming in a variety of formats, ranging from HTTP to RTSP and UDP.

While the interface is minimalist, the tool is actually very comprehensive, and all of its video and audio filters are fully customizable. Best of all, you can add, remove, or alter your changes at any time, since editing on Shotcut is non-linear; or able to be edited out of chronological order.

Shotcut video editing software mask file

Image Source

Price: Free

Available for: Windows, Mac, and Linux

2. VSDC Free Video Editor

VSDC allows you to either import existing clips or record directly from your webcam, making it an excellent option for YouTube vloggers. The interface is simple, and the tool provides options to apply “Instagram-like filters”, voiceovers, titles, shapes, and other impressive visual and audio effects. Additionally, VSDC lets you export straight to YouTube or another social network.

It‘s important to note, if you want to export your videos from the free version, you’ll select the cog icon in the top right, click “Acceleration options” and then uncheck the box marked, “Use hardware acceleration for encoding video”.
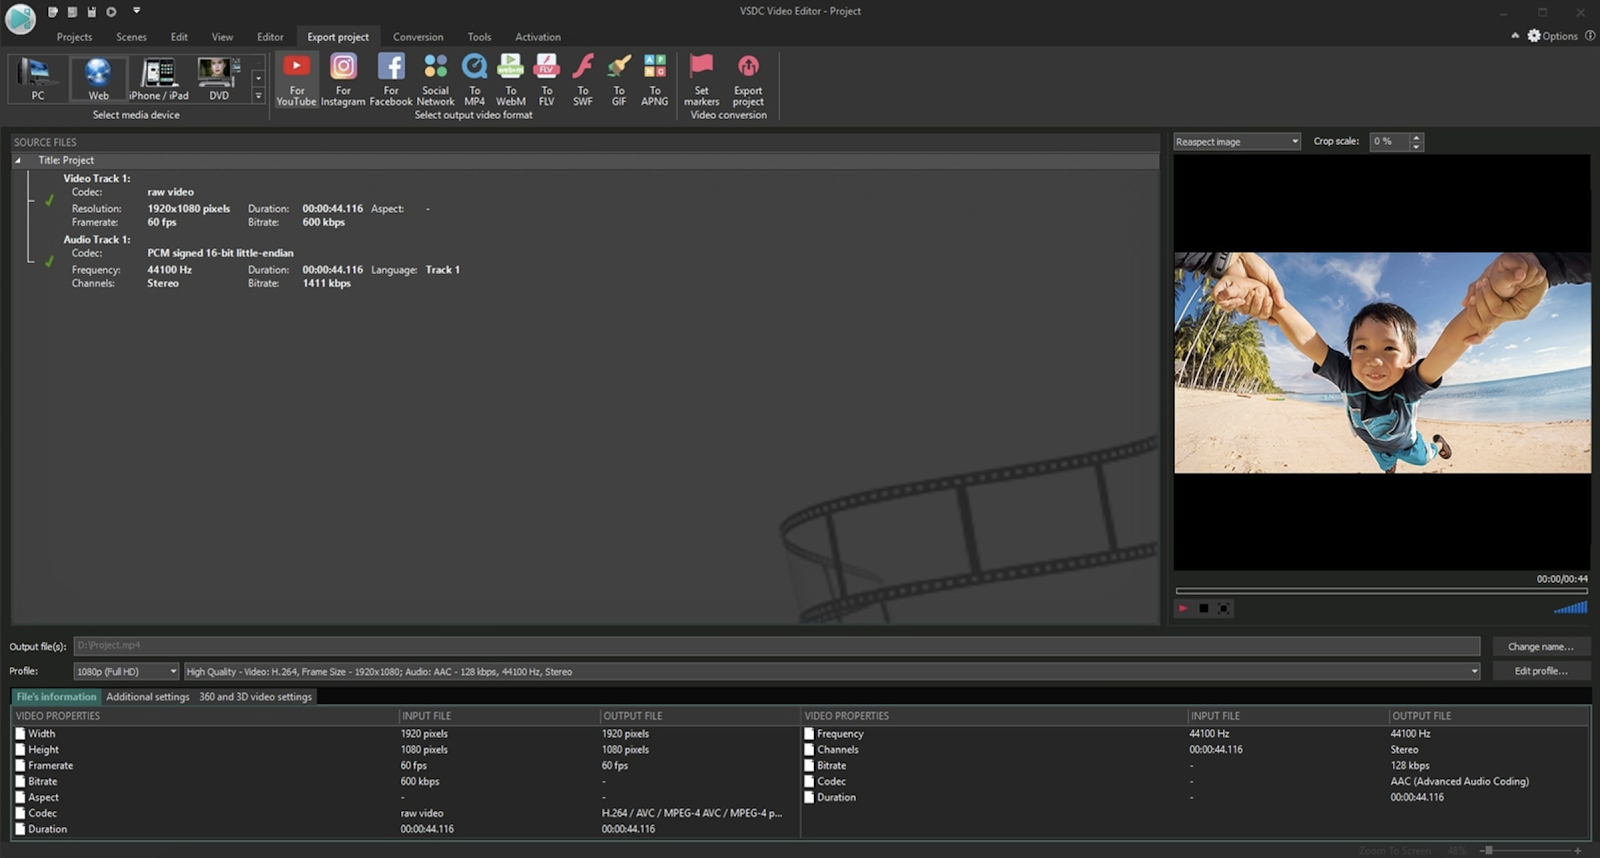
VSDA video editing software used on recording

Image Source

Price: Free, or $19.99 for Pro Version

Available for: Windows

3. DaVinci Resolve 18

Matti Haapoja, a YouTuber with a channel that focuses on the filmmaking process, reviewed this tool and compared it in quality to Final Cut Pro and Premiere Pro (unlike those programs, DaVinci Resolve 18 is completely free). DaVinci Resolve provides tools for both offline and online editing, color correction, post-production audio effects, and visual effects. Additionally, the software lets you collaborate with others during the editing process, which could be particularly helpful if you have multiple video editors on your team.

The software‘s latest iteration comes with new AI tools to help sort and analyze audio clips based on classification. Best of all, DaVinci Resolve offers impressive features to help your video rank for SEO — for instance, you can use Smart Bins to automatically sort and display footage based on metadata criteria (you can also sort manually). Additionally, you’re able to enter custom keywords and tags.
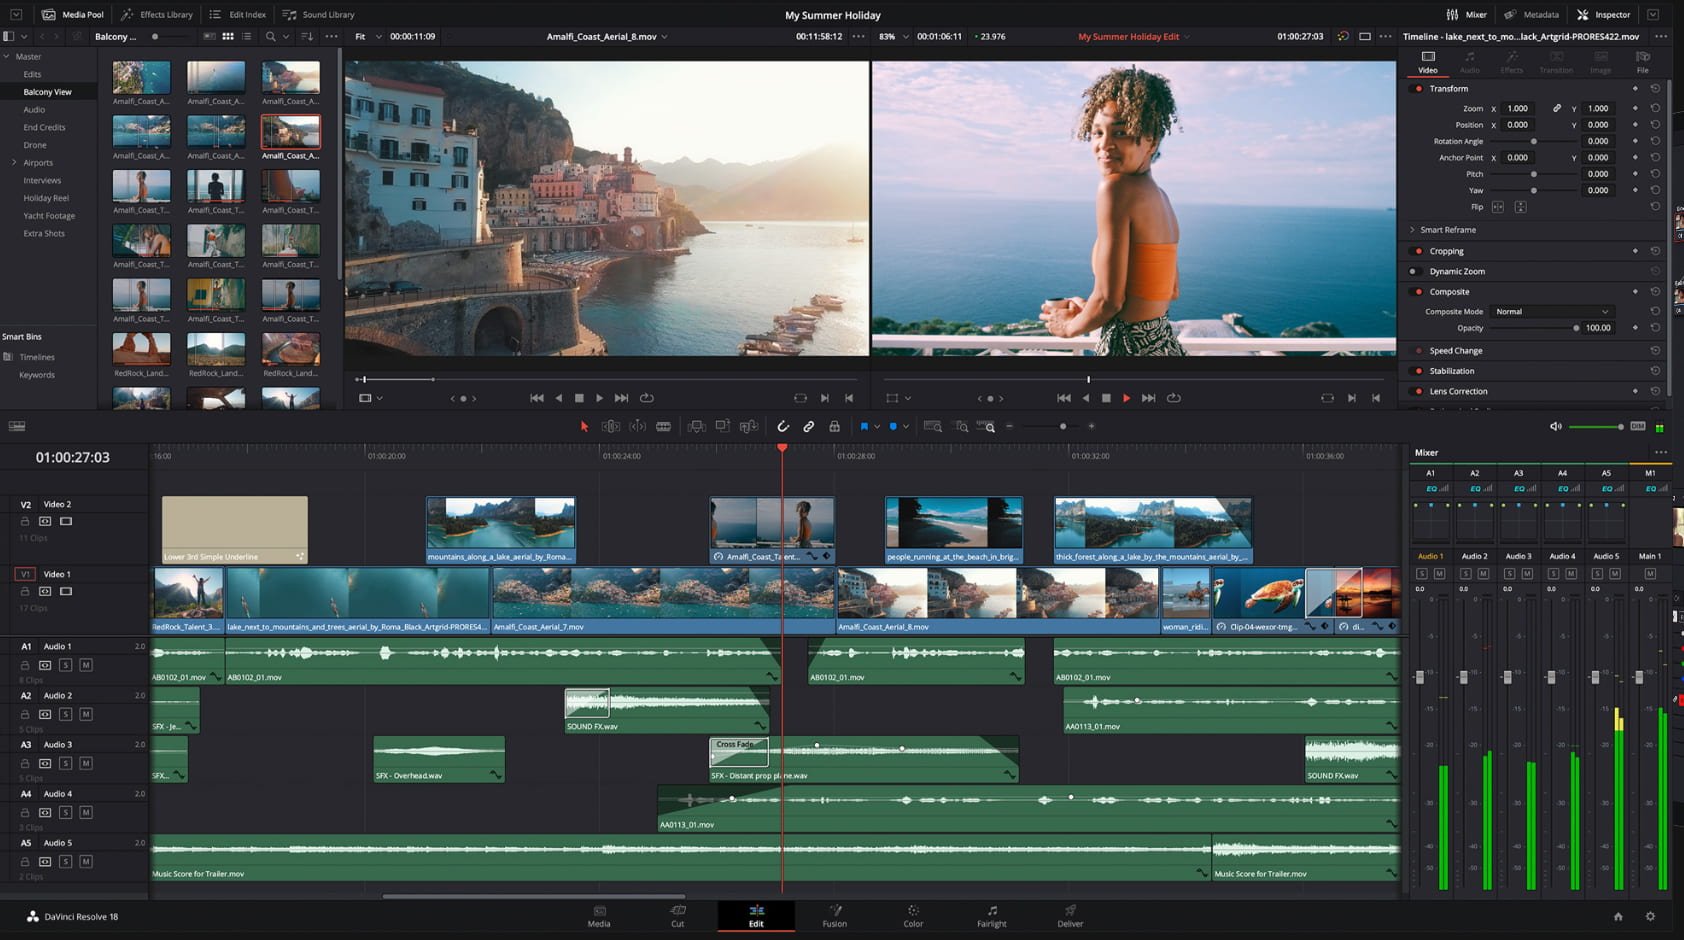
Image Source

Price: Free for DaVinci Resolve 18, or $295 for DaVinci Resolve Studio

Available for: Windows, Linux, Mac

4. LightWorks

If you’re looking for an extensively customizable, professional software, then look no further than LightWorks. While it’s available for free trial, investing in this software will offer a much more extensive user experience. LightWorks offers media production features that you can use to edit film nonlinearly, with over 100 special effects. Not only that, it has support for up to 4K resolution and is compatible with both HD and SD formats. Users can also enjoy a range of royalty-free audio and video content suitable for YouTube’s copyright guidelines. The software features new social media templates for smooth transitions, thumbnails, and more that can prove beneficial for uploading to many different channels.

LightWorks video editing software showing layered audio files

Image Source

Price: Free, $9.99 monthly for Create or $23.99 monthly for Pro

Available for: Mac, Linux, Windows

5. FlexClip

FlexClip is easy to use and has a free plan that allows you to create up to 10-minute videos. This makes it a great option for YouTubers who are just starting or who are tight on budget. Even if you have no experience with video editing, you can easily create professional-looking videos with FlexClip since it offers a library of video templates in different categories that can be used to create videos quickly and easily. These templates include a variety of styles, from slideshows to product reviews to explainer videos.

Additionally, FlexClip just released three cutting-edge AI functions, including AI video script, text-to-speech, and AI image generator, which are set to revolutionize the video creation process. You can also easily add voiceovers or narration to your YouTube videos without the need for external voice recording with the text-to-speech feature.
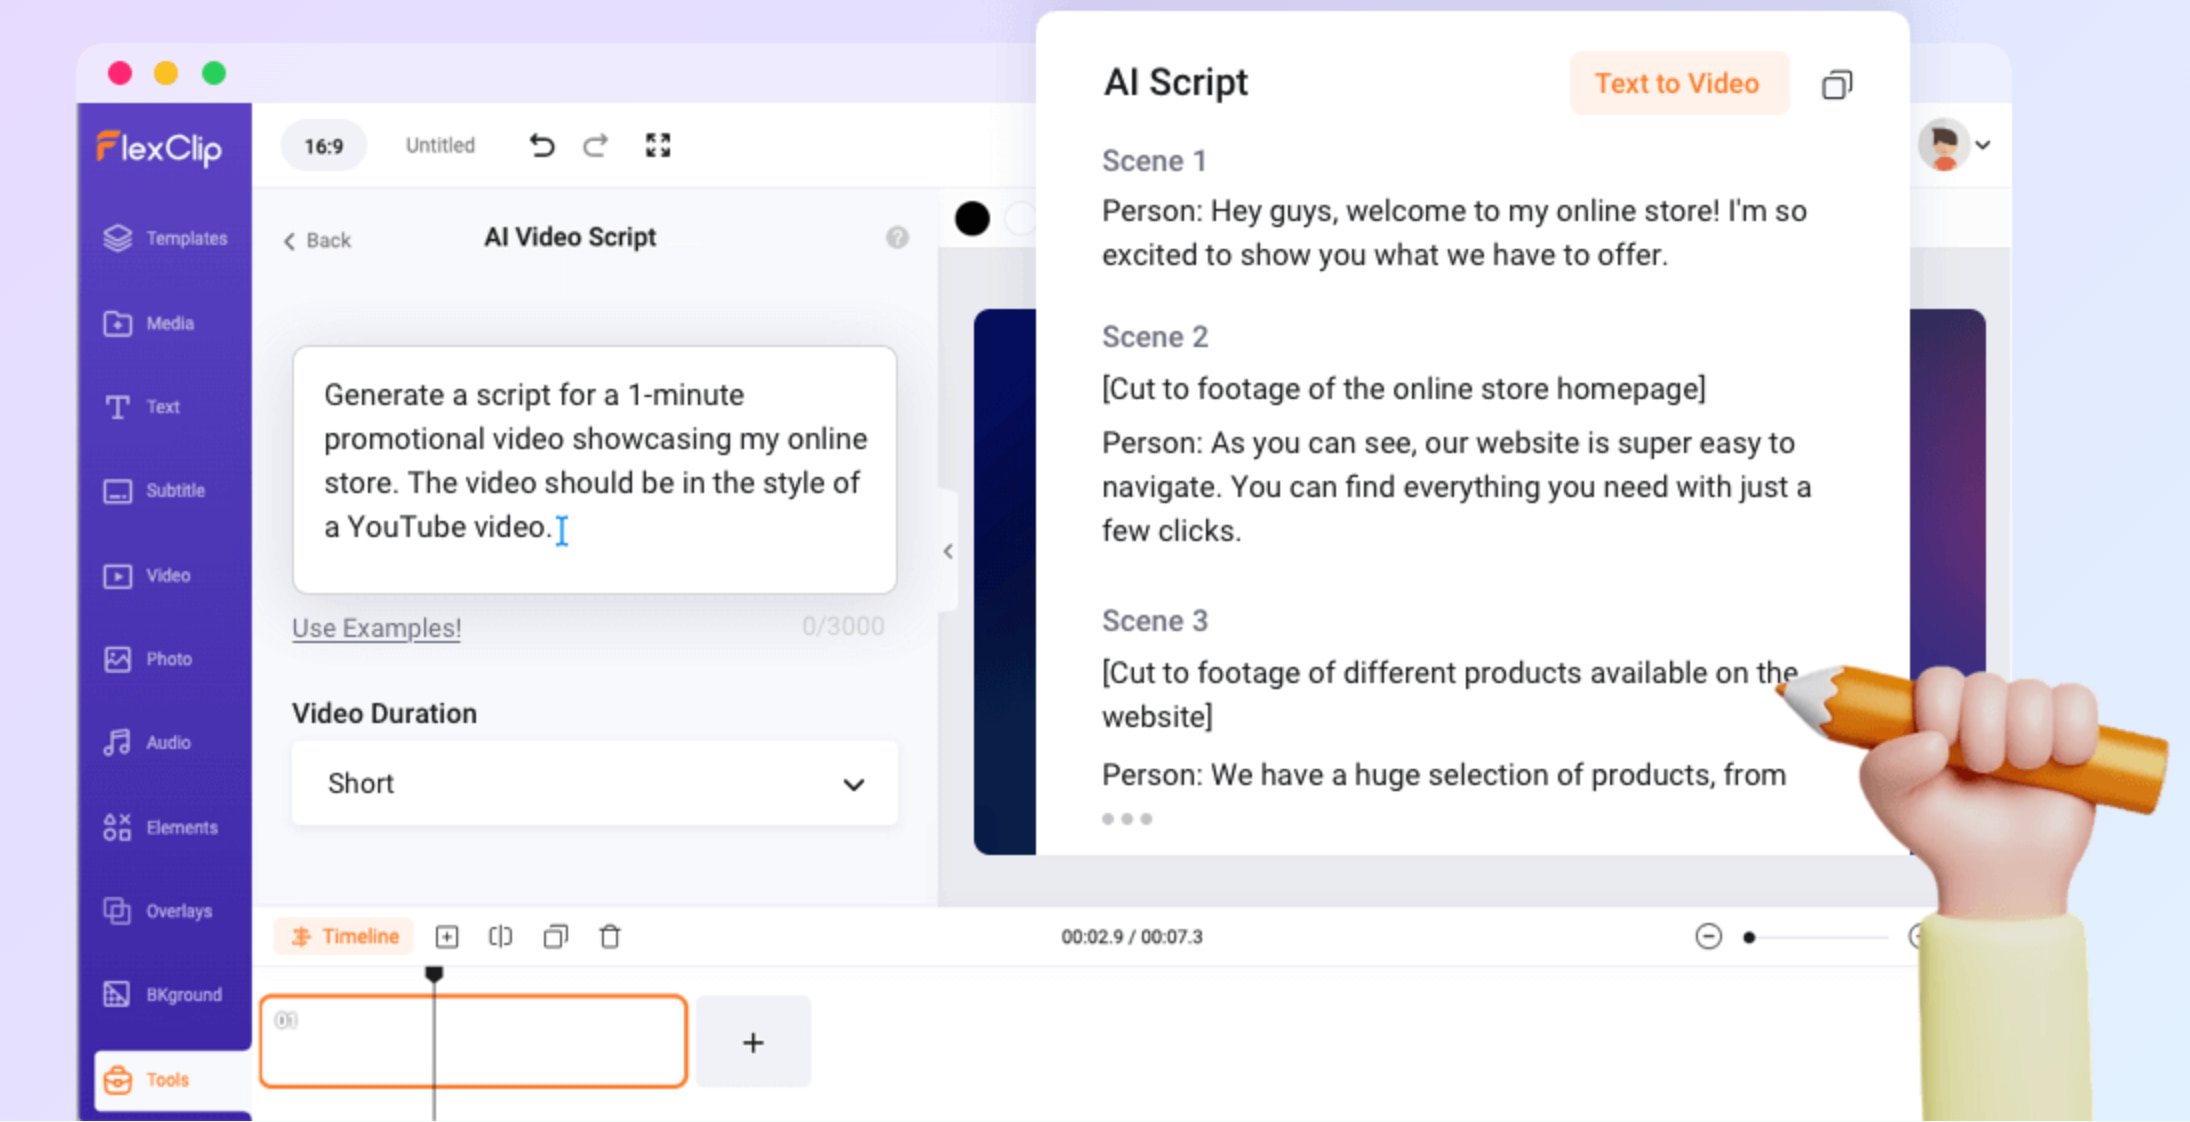
Image Source

Price: Free, $9.99 monthly for Plus, or $19.99 monthly for Business

Available for: Mac, Linux, Windows

6. InVideo

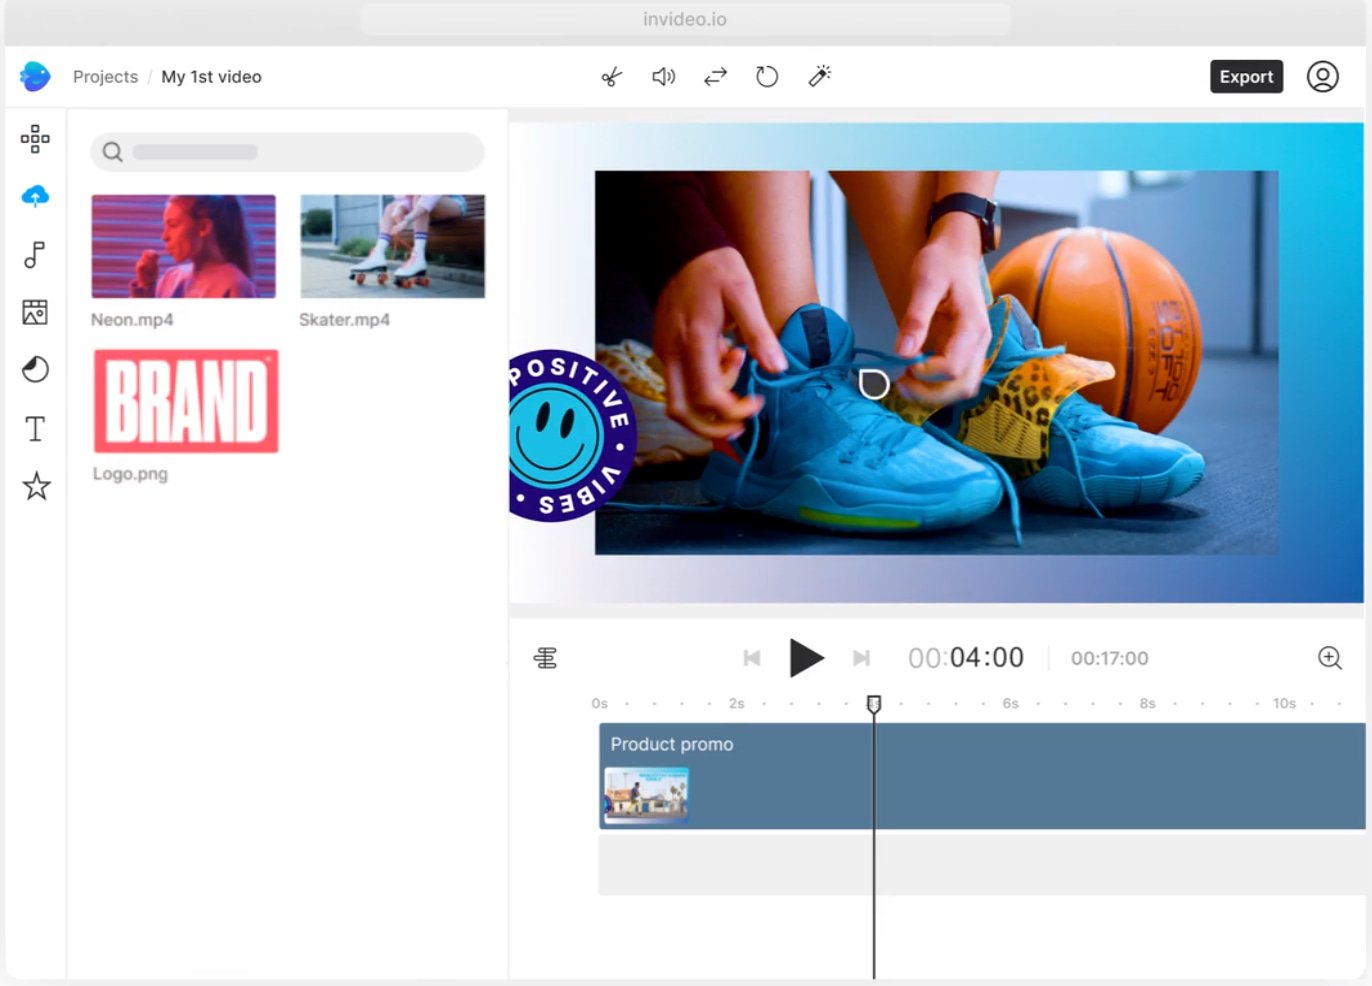
If you’re new to creating video content, InVideo will help you tackle the learning curve of editing. Using AI tools, this software allows users to upload video and quickly find a template that works for them.

Generate scripts with AI, or use it to quickly convert blog articles to video content with InVideo‘s text-to-video feature. Users also have the option to build videos from scratch using the tool’s library of 8 million stock media options.

Image Source

Price: Free, $15 monthly Business plan, $30 monthly Unlimited plan

Available for: Windows, Mac

1. Wondershare Filmora 12

Referred to as “a video editor for all creators”, this tool is incredibly easy to use whether you‘re a novice video editor or a professional. With Filmora, you’re able to use filters, overlays, transitions, and custom titles to spruce up your content for YouTube and engage your audience.

Additionally, the tool offers audio features for key-framing and background noise removal, as well as an audio equalizer. If you have multiple clips you’re hoping to combine into one cohesive video, this is a good tool for you — it allows you to import up to 100 layers of media and offers features so you can layer your clips.

Wondershare Filamore9 green screen before and after shot

Image Source

Price: Free trial, $49.99 Annual Plan, $59.99/year Cross Platform Plan, or $44.99 annually, $79.99 one-time payment for Perpetual Plan

Available for: Windows, Mac, or app version for iOS or Android

2. Vimeo

Vimeo’s editing tool (formerly Magisto) is a software that simplifies video editing for those intimidated by more technical processes. Designed for novice and beginner video editors, this interface uses AI to create video content in minutes. Users only have to upload footage and audio files and the software does most of the work based upon the style of video requested. Editors can use its professional auto-editing abilities that include facial recognition, filters, and more on a PC or smartphone. Magisto’s easy-to-use streamlined process is an efficient way to create videos for business at scale on iOS and Android devices.
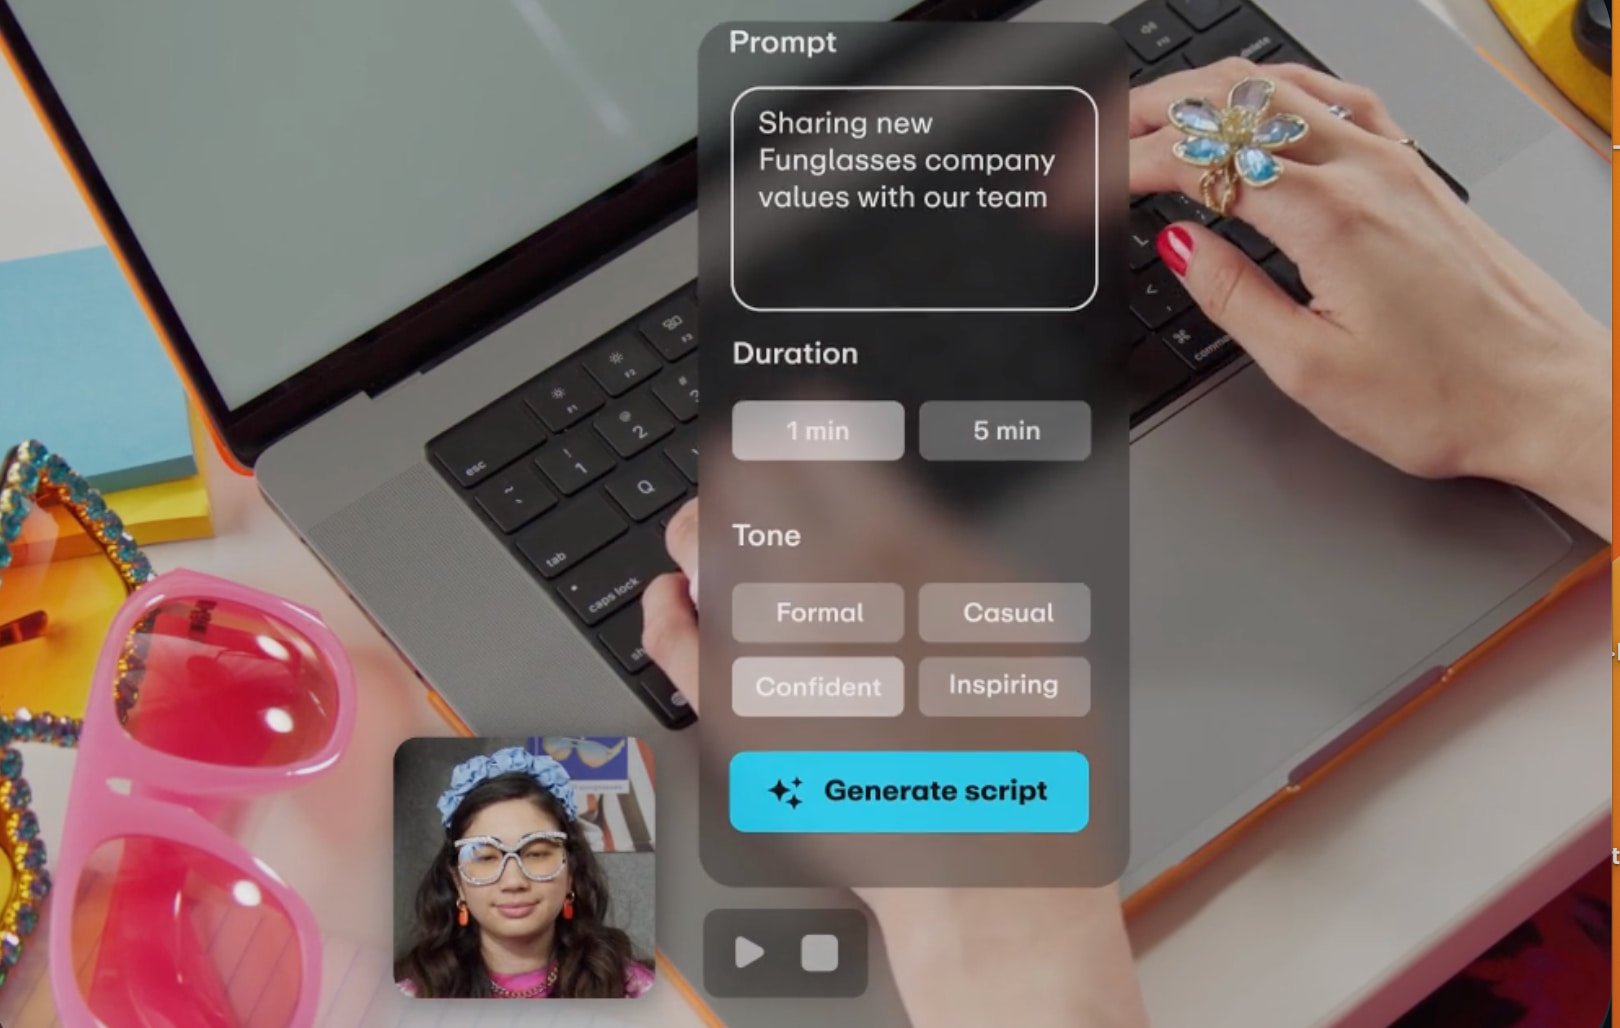
Image Source

Price: $12.99/seat/year Starter, $20/seat/year Standard, $65/seat/year Advanced, contact for quote for Enterprise

Available for: iOS, Android

3. PlayPlay Video Editor

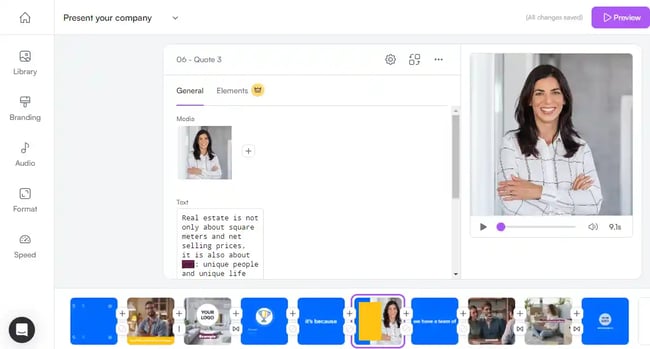
PlayPlay is a cutting-edge online video editor platform that empowers users to create professional-quality videos with ease. PlayPlay was designed for marketing and communication teams with a user-friendly interface and a wide range of customizable templates to help users craft engaging video content that resonates with their target audience.

Making video creation even easier, PlayPlay has introduced an AI Assistant feature to help you create videos faster. The royalty-free Getty image and music libraries will help you to create the best-quality content with less cost. You can also choose from thousands of categorized media and audio files for your project.
youtube-video-editor-alternatives_2

Image Source

Price: Free trial, contact for enterprise pricing

Available for: Windows

4. Movavi Video Editor

Movavi Video Editor enables you to create stunning videos with the help of special effects, transitions, and customizable color profiles. It‘s easy to use, and you can even add voice-overs and background music from Movavi’s library or your own audio files. This video-editing software makes all difficult tasks easy including background removal, split-screen, and even motion tracking, so you won’t need any special previous experience to start using it. Above all, you can enhance the audio quality by normalizing the volume and removing background noises.

You can save projects in 4K resolution if you’re looking for ultra-high quality video footage and export the results in any format. Moreover, you can upload your finished videos directly to YouTube, Google Drive, Vimeo, and TikTok to get your content out as quickly as possible.
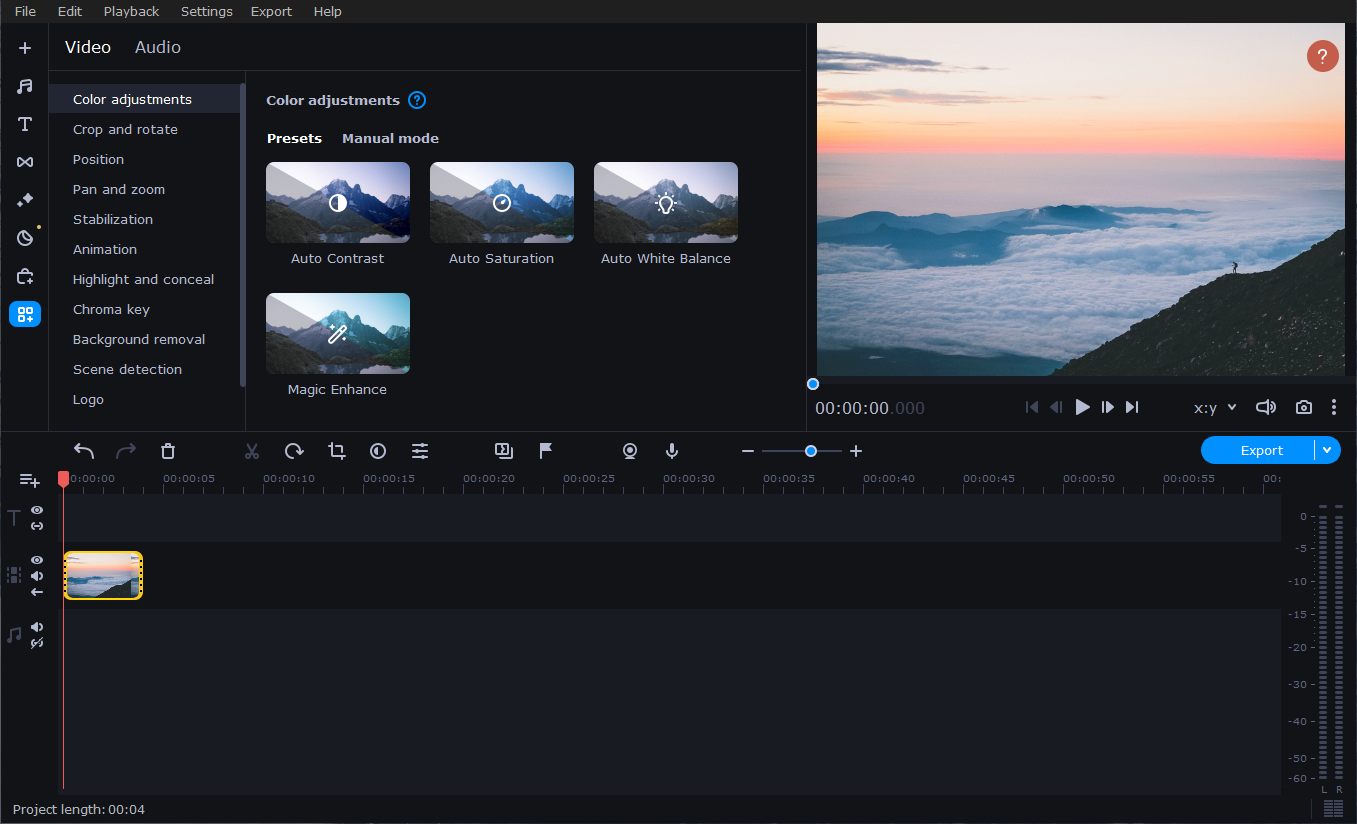
Image Source

Price: $94.96 Video Suite 1-year subscription, $104.95 Video Suite + Photo Editor 1-year subscription, $155.95 Unlimited 1-year subscription

Available for: Mac, Windows

5. Premiere Pro

Premiere Pro is one of the highest-quality video editor tools you’ll find. Used by Hollywood filmmakers, TV editors, and YouTubers, the software offers all the creative features you need to craft polished videos. Premiere Pro provides features for color grading, data visualization, and audio tools to remove background noise. Additionally, Premiere Pro now comes with Premiere Rush CC, which is an app you can use to edit footage on your phone, then share directly to your social networks, including YouTube.

Leticia De Bortoli, a HubSpot Senior Video Editor, shares what takes her videos to the next level. She uses Premiere when editing her team’s videos, as well as Audition for sound, and DaVinci for color correction. Bortoli cites this software, great lighting, and audio tools as the secrets to her sharp videos.
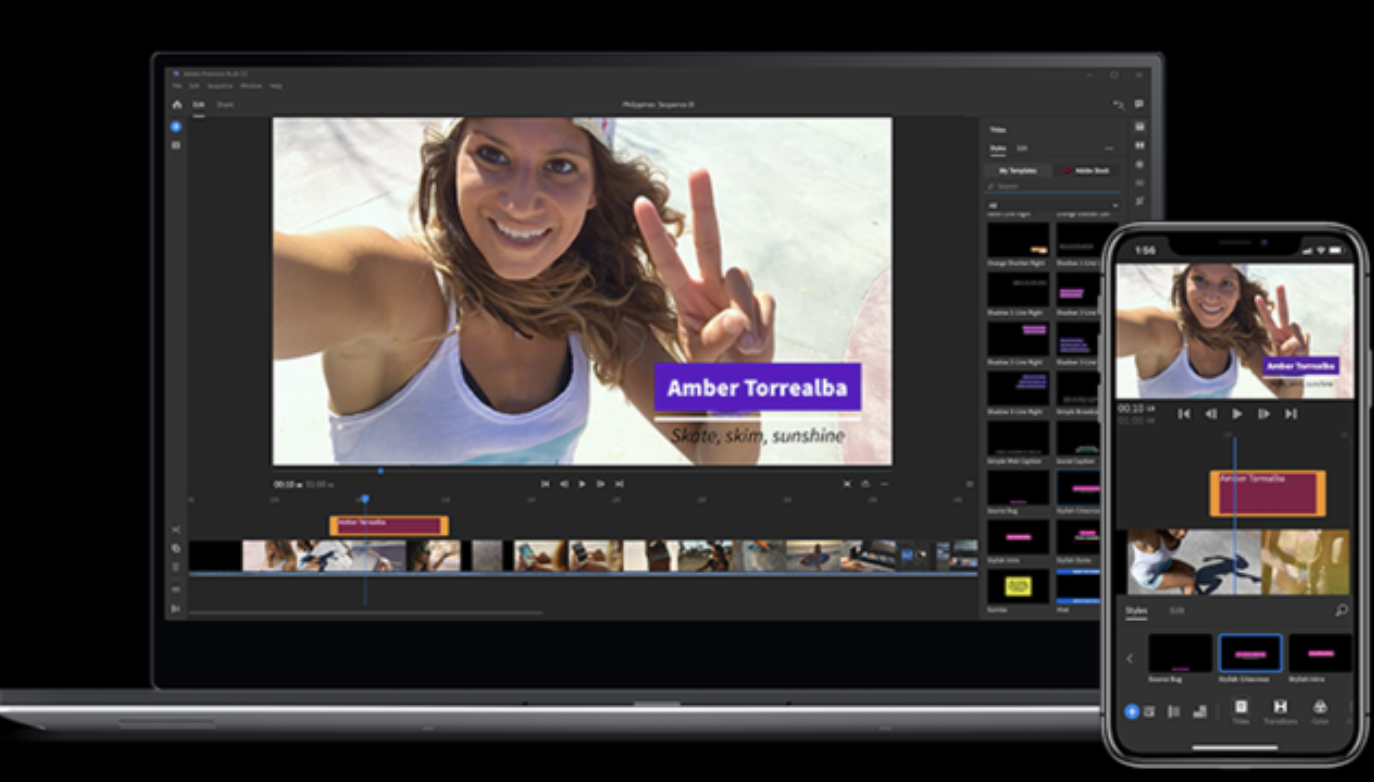
Premiere Pro video editing software on PC and mobile

Image Source

Price: As a standalone app, Premiere Pro is $239.88 per year

Available for: Mac, Windows

6. VideoStudio

VideoStudio is an excellent video editing software that is intuitive even for the beginner editor. This software has all the standard features to storyboard and sound editing for footage up to 4K. Users can benefit from VideoStudio as it has individual auto movie creator features like Highlight Reel creator to assist in simplifying the editing process. Starting your YouTube channel with the help of VideoStudio would be a smart way to build your content.
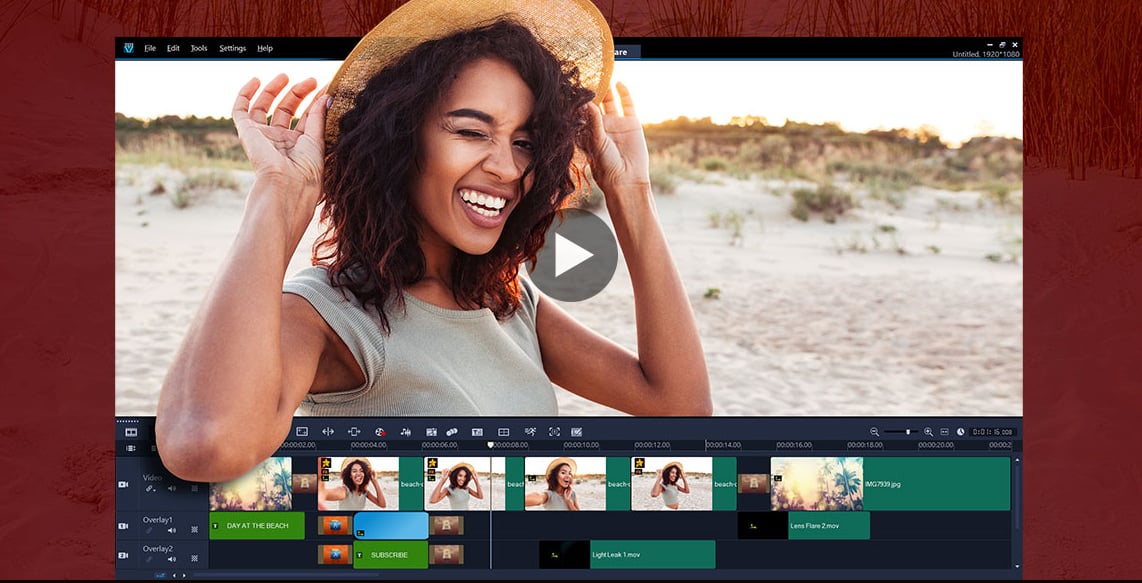
Image Source

Price: One-time payment of $59.99 to $79.99 depending on package

Available for: Mac, Windows

7. Pinnacle Studio 26

Pinnacle Studio 26 is an editing software that is made for video enthusiasts looking to build unique and eye catching content. Not only does this software offer high end features like fast rendering performance, motion tracking, and color correction, but it can support 360 camera and VR footage in its Studio Ultimate package. Pinnacle’s range of effects goes beyond previously mentioned softwares by letting users create frame by frame edits for enhanced masking or warping of footage for astonishing visual effects. Dynamic features aside, it can also simplify screen recording or multi-camera editing perfect for a variety of YouTube series formats.
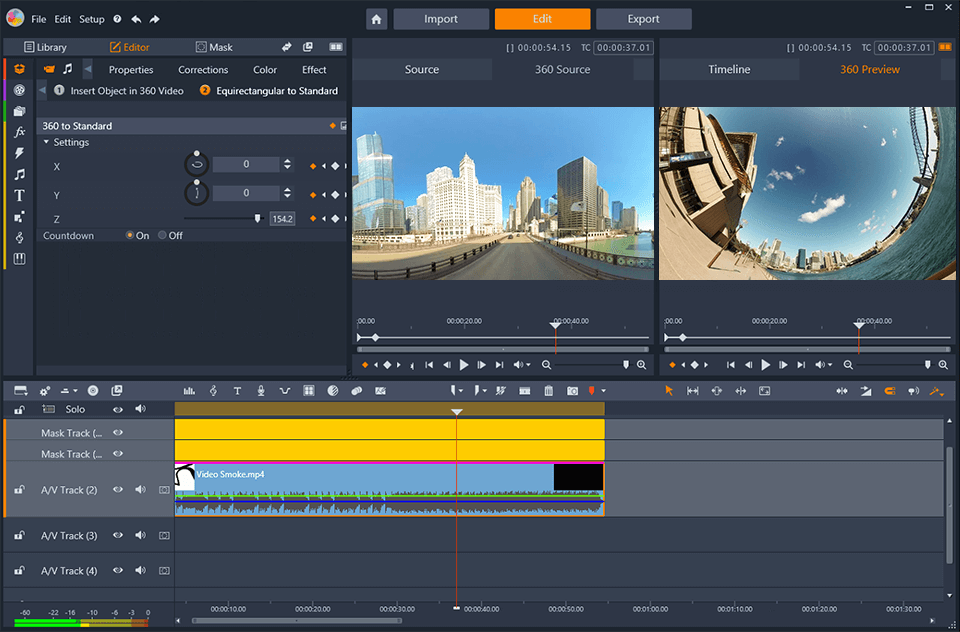
Pinnacle Studio 24 video editing software showing 360 camera landscape footage

Image Source

Price: One time payment of $59.95 to $129.95 depending on package

Available for: Windows

8. CyberLink PowerDirector 365

Users who subscribe to PowerDirector can enjoy video and audio software with new effects, music samples, and general improvements added monthly. The difference between this software and others is that this editing software offers you features similar to Photoshop, for your recordings. You can enjoy creating vector shape designs in the same interface used for desirable YouTube titles and transitions in the same interface as where you edit frames of footage. While there is a learning curve with CyberLink PowerDirector, the possibilities are endless when you begin.

Additionally, David Guerrera, a HubSpot Senior Video Creator and Animator, mentioned the YouTube channel Film Riot for further inspiration when making unique videos with powerful software. “Film Riot is a great resource for filmmakers of all skill levels who are looking to learn new techniques to use on their next low budget or big budget video project.”
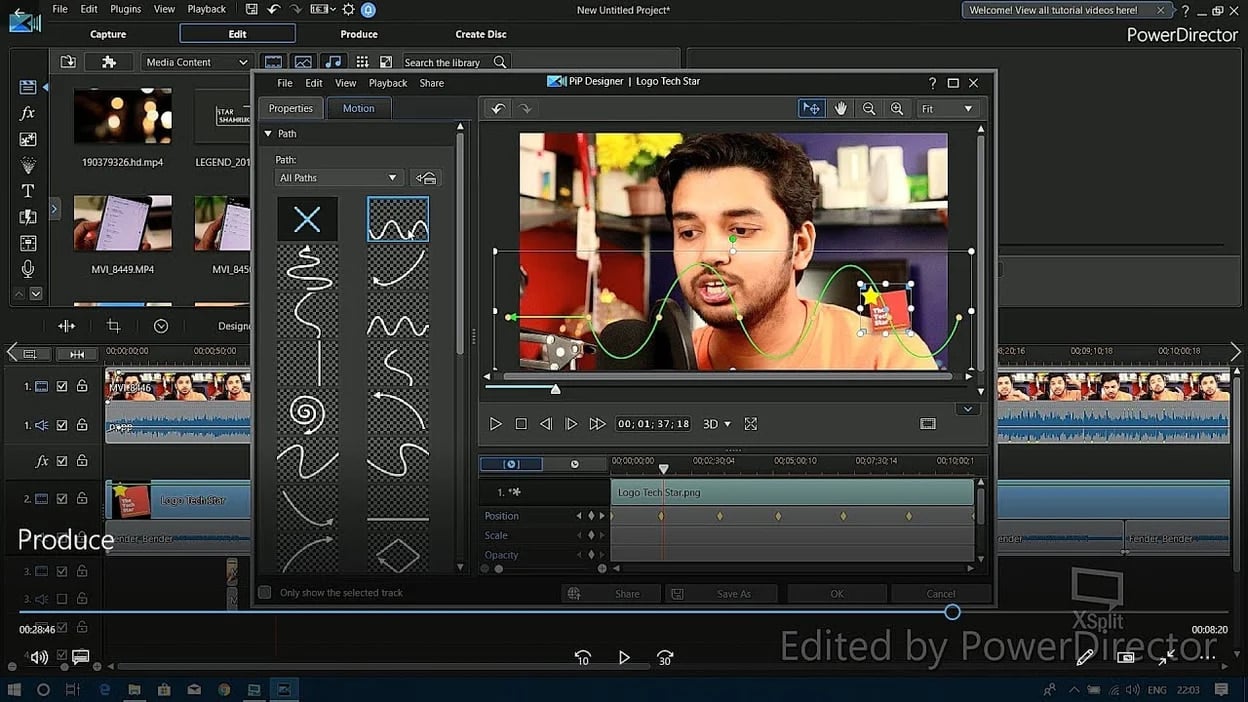
Image Source

Price: $51.99 annually base plan, $96.99 annually Director Suite plan, or $139.99 annually for Ultimate plan monthly and $69.99 annually

Available for: Mac, Windows

Choosing the Right Editing Software

Ultimately, you‘ll need to choose software that works for your team and your budget, but creating high-quality YouTube videos doesn’t have to break the bank. In fact, you can find plenty of tools that are either free or fall under $100.

The hardest part about starting a YouTube channel is, starting. There’s a lot of competition on the platform, but there are ways to break through the noise. Building a channel with videos featuring smooth video editing, high-resolution picture and clear audio recording will set the standard for your channel’s success.

Editor’s note: This post was originally published in March 2019 and has been updated for comprehensiveness.

Apply for a job, keep track of important information, and prepare for an  interview with the help of this free job seekers kit.


Categories B2B

16 Best Email Previewing, Testing, & Rendering Tools

You know the expression, “What you see is what you get”?

Well, when it comes to email marketing campaigns, that might not always be the case.

Boost Opens & CTRs with HubSpot’s Free Email Marketing Software

In this post, we’ll discuss the best free and paid email testing, previewing, and rendering tools you can use to make sure your emails are ready for the eyes of your leads and customers.

What is an email previewer?

An email previewer is a tool that helps you preview your messages before sending them to your list. Previewing your messages ensures your emails are professional, error-free, easy to read, and ready for your leads and customers.

Why use an email previewer?

Since everyone uses different email providers such as Gmail, Outlook, or Yahoo, emails can appear differently for various subscribers.

Sometimes images are blocked, alt text is missing, or fonts won‘t render. If this happens, you could damage your credibility and lose subscribers. That’s why it’s essential to test your emails before you send them.

Now let’s take a moment to review HTML versus plain text emails and previews.

No matter which email type you choose, you should preview your emails to make sure they’re ready for your audience.

This is especially important if you go with an HTML email since it inherently includes multimedia elements, colors, fonts, branded elements, images, and more.

HTML Email Preview

As your HTML emails become more sophisticated, it’s important to preview and test your emails before sending them to recipients. An HTML preview allows you to adjust anything necessary before the final version is sent to your audience.

That way, you can send your messages to the people who matter most — your customers — with complete confidence.

From HubSpot to GlockApps, here’s how to choose the right email previewer for your needs and budget. Aside from previewing emails, many suggested tools also include other email marketing features, like advanced testing.

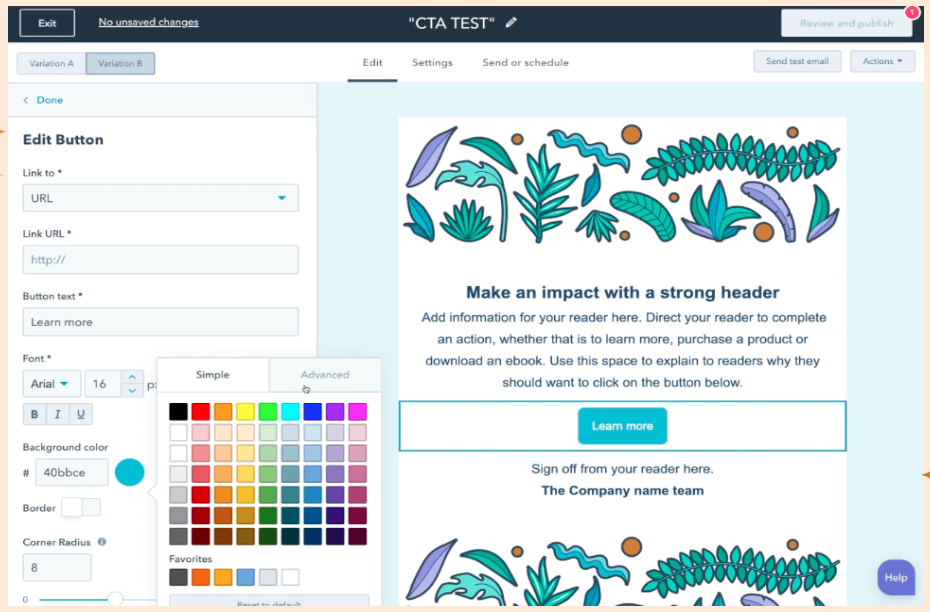
1. HubSpot Email Marketing Tool

An example of HubSpot’s Email Marketing Tools

Price: $18 per month to $800 per month.

We’ve baked HubSpot’s Email Marketing Tools into your CRM plan. You can use authentic and accurate customer data to power your email marketing efforts.

Because the CRM platform scales with your business, HubSpot’s Email Marketing Tools are ideal for growing companies.

You can easily customize lists as your subscriber count grows. The drag-and-drop email editor also makes previewing emails for different devices and platforms easy.

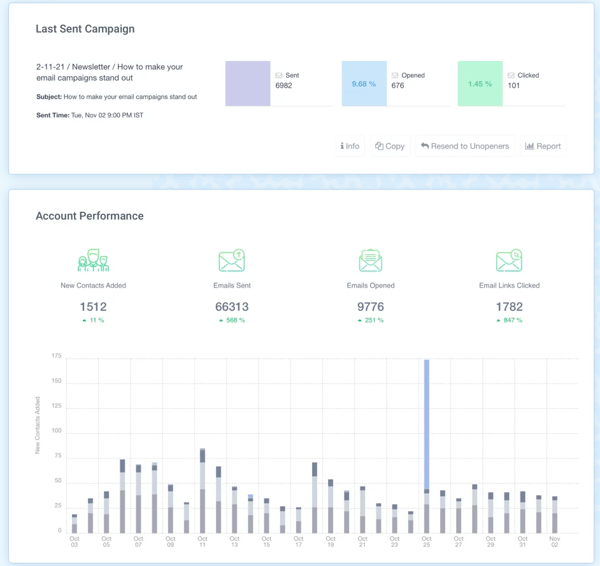
2. SendX

An example of SendX’s email marketing software

Price: Ranges from $9.99 a month for 1–1,000 subscribers to $189.99 a month for 30,001–35,000 subscribers.

SendX is an email marketing software for experienced email marketers. There’s only one plan (Business Plan), and the price varies based on your volume of subscribers. The Business Plan includes all software features and unlimited emails per month.

SendX caters to “unfairly banned” niches, including “cryptocurrency” and “affiliate marketing.”

Their product offers a heatmap report featuring an overview of call-to-action (CTA) success across campaigns. You can use the feature to see which visuals inspire readers to take action.

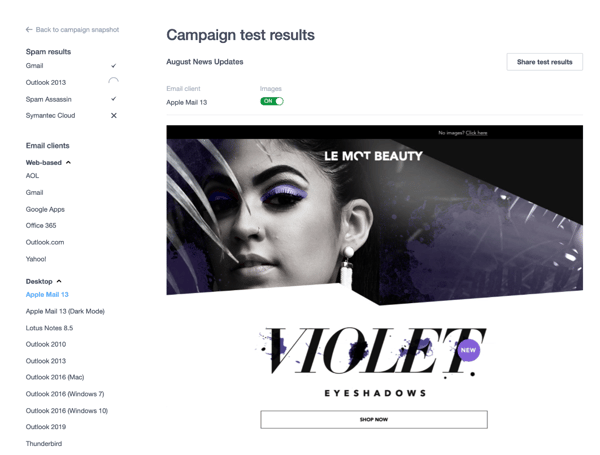
3. Campaign Monitor

Email preview tool from Campaign Monitor

Image Source

Price: $9 monthly for a basic plan; $29 monthly for an unlimited plan; and $149 monthly for a premier plan

Campaign Monitor’s Inbox Preview tool shows what your email will look like when sent to all major email providers and when viewed on various devices.

You simply have to click the view you’d like from the options listed on the left. It’s even possible to view your email without images.

In addition, this tool can check to see if your email will pass popular spam filters to ensure it lands in your audience’s inboxes.

4. Mailosaur

Mailosaur email preview tool

Price: $9 a user per month for a starter plan; $16 a user per month for a business plan; $20 a user per month for a professional plan; and custom pricing for enterprises

Mailosaur allows you to instantly see how your email will appear on all popular email clients, allowing you to catch any mistakes and to feel confident that your email will look great in any inbox.

It further allows you to view your email on different devices and different browsers. You’ll be sure to correct any errors before sending out your emails.

5. GlockApps

An example of GlockApps email deliverability tool with a preview option

Image Source

Price: $59 monthly for a basic bundle; $99 monthly for a business bundle; $199 monthly for a custom bundle

GlockApps is a deliverability tool that helps marketers in the tech space preview and test their emails. Aside from testing for spam scores, you can preview and analyze email content.

Once you run the tests, GlockApps will provide you with action steps to improve your emails before pressing send.

6. SendForensics

An example of SendForensic’s email deliverability tool

Price: $39 monthly for a brand plan; $63 monthly for a company plan; $159 monthly for an agency plan

SendForensics is an all-in-one email deliverability tool for in-house marketers and agencies. SendForensics’ tool is mainly for email testing, but the paid plans also offer a previewing feature.

Because the previewer doesn’t use an emulator, you’ll see your email exactly how it’ll look on a device or browser.

It’s important to note that the following free email preview tools are also free email testing tools. Meaning, they have the ability to assist with email previews and email testing.

1. HubSpot Email Marketing Tool

An example of HubSpot’s Email Marketing Tools

Get Started with HubSpot’s Email Marketing Software for Free

With HubSpot’s Email Marketing Tools, you can create, personalize, and optimize your marketing emails without the need for any code or help from designers.

Since this tool is part of the HubSpot CRM platform, you‘ll know the data you’re using to customize your emails is accurate. For instance, personalize emails by referring to the recipient’s lifecycle stage or membership status — then schedule your campaign so your customized emails are sent automatically.

Pre-made, customizable email templates and the tool’s drag-and-drop editor allow you to quickly create beautiful emails to your recipient list.

Lastly, A/B test different elements of your emails — such as subject lines or the time that you send your emails — to determine what works best for your audience.

2. SubjectLine.com

An example of SubjectLine.com’s free subject line tester

Testing the visual design of your emails is important. However, don’t forget to preview your actual content as well.

With SubjectLine.com, you can test your subject lines and receive a free rating out of 100. The tool considers the total length, word length, urgency, and more.

Word choice matters in your subject lines, and this tool will help you develop more clickable subjects so your readers are more likely to open.

3. MailNinja Email Previewer

An example of MailNinja’s free email previewing tool

MailNinja is a free, easy-to-use, uncluttered email preview tool. With this tool, you can see instant previews of your HTML emails. Additionally, you can double-check your alt text, send test emails, and see how your email will look on different devices.

This is a simple, free option if you don’t trust or want to use a different preview tool than your email marketing software.

4. Inbox Analyzer

An example of Inbox Analyzer’s free email testing and previewing tool

Inbox Analyzer, another free email preview tool, helps take the pain out of inbox and spam testing your emails.

Send your emails to the most popular inbox providers to see how they appear and if they deliver — this tool will let you know if your email hits the inbox, spam folder, or is undelivered.

Additionally, you‘ll receive instant reports on your sender scores, reputation alerts, and even blocklists. With this tool, you’ll be able to find issues and learn how to resolve them.

5. PutsMail

An example of PutsMail’s free standalone email testing tool

Image Source

PutsMail is a free email testing tool by Litmus. Plus, PutsMail lets you see how your email will look across 50+ platforms and devices. This is a great tool if you’re just looking for a quick and easy way to preview your emails.

1. Get Response

An example of Get Response’s email marketing platform with email previewing

Price: $19 monthly for email marketing; $59 monthly for marketing automation; $119 monthly for ecommerce marketing

Get Response is an email marketing software that can help you create content, boost sales, and increase traffic to your site. Preview your emails in over 25 popular email clients, and determine if and when multimedia elements like images are blocked.

2. Litmus

An example of Litmus’ email testing tool

Price: $99 monthly for Litmus Basic; $199 monthly for Litmus Plus

Litmus is a tool for testing and developing email campaigns. With a paid account, you’ll gain access to an email preview testing tool that allows you to see screenshots of your emails across 90+ different apps and devices.

Litmus allows you to personalize messages at scale. It’s suitable for established companies with large email lists. Every paid plan comes with email previewing and offers unlimited read-only users. There’s a range of templates that are easy to implement.

Better yet, if you have a Litmus account, you can add a Chrome extension to your browser and test your emails without ever leaving your email service provider.

With the extension, you can validate your links, images, and tracking. Plus, the extension will instantly run a new checklist with every edit.

3. Stripo

An example of Stripo’s email preview tool and template builder

Image Source

Price: $15 monthly for a basic plan; $45 monthly for a medium plan; $95 monthly for a pro plan

Stripo is an intuitive email builder with email testing and a variety of available email service provider (ESP) integrations (including HubSpot, Gmail, Outlook, and Mailchimp). There’s a library of custom modules, so you can use them across various campaigns.

All of the emails you design with Stripo’s HTML editor are responsive, so you’ll never have to worry about how they render for recipients across different devices. Additionally, after building dynamic AMP emails with Stripo, the tool’s code validator checks the email for errors for you.

Stripo will be releasing a “Real-time co-editing & commenting” feature for the Medium and above plans in the future. Stripo works for in-house marketers — there’s also a use case for HR managers who send out internal newsletters.

4. Email Preview Services

An example of Email Preview Services email enhancement solution

Price: $25 monthly for a standard plan; $45 monthly for a business plan; $160 monthly for a professional plan; $399 monthly for an enterprise plan

Email Preview Services (formerly Preview My Email) is another email testing solution that can help you improve your performance.

With it, you’ll get real screenshots of your email across all the popular email providers in one click. This tool also offers email analytics that can help you better understand your email audience.

It’s a great email enhancement solution for marketers, designers, and developers. Every plan has unlimited email previews to access via a dedicated inbox.

Email Preview Services gives you four ways to preview emails before sending — copy-paste, API integration, HTML-upload, and send as email.

5. Email on Acid

An example of Email on Acid’s email preview and testing tool

Price: $74 monthly for The Basics; $134 monthly for Premium; $449 monthly for Professional)

Email on Acid is an email preview tool designed to help you display emails properly across all clients. The email previews are live clients, so you’ll see exactly what your subscribers see.

This tool gives you screenshots, so you have no questions about what your email will look like on 90 clients and devices. It also tests for poor formatting, broken links, and code problems.

Email on Acid also offers the ability to comment, edit, and review email previews directly in the software for a faster and more efficient testing process.

Start Previewing, Testing, and Rendering Your Emails

Previewing your emails is an important part of email marketing. If people can‘t see your emails or your credibility is ruined, those emails haven’t done their job.

Use an email previewing and testing tool to ensure they’re perfect for recipients.

Editor’s note: This post was originally published in June 2020 and has been updated for comprehensiveness.

New call-to-action

Categories B2B

How to Make an Ad: A 15-Step Guide [+Expert Tips]

Advertising is changing — by the end of 2023, companies are on track to spend more than $424.3 billion dollars on digital advertising.

The challenge? Massive variety in the digital advertising market — from differing platforms and ad types to target audiences — can frustrate efforts to capture customer interest and drive ROI.

Download Now: Free Ad Campaign Planning Kit

How do you choose the right medium to promote your platform? What metrics matter? And once you decide, how do you actually make the ad?

Our comprehensive ad-making guide has you covered. Let’s go.

Featured Resource: Advertising Planning Templates & Kit

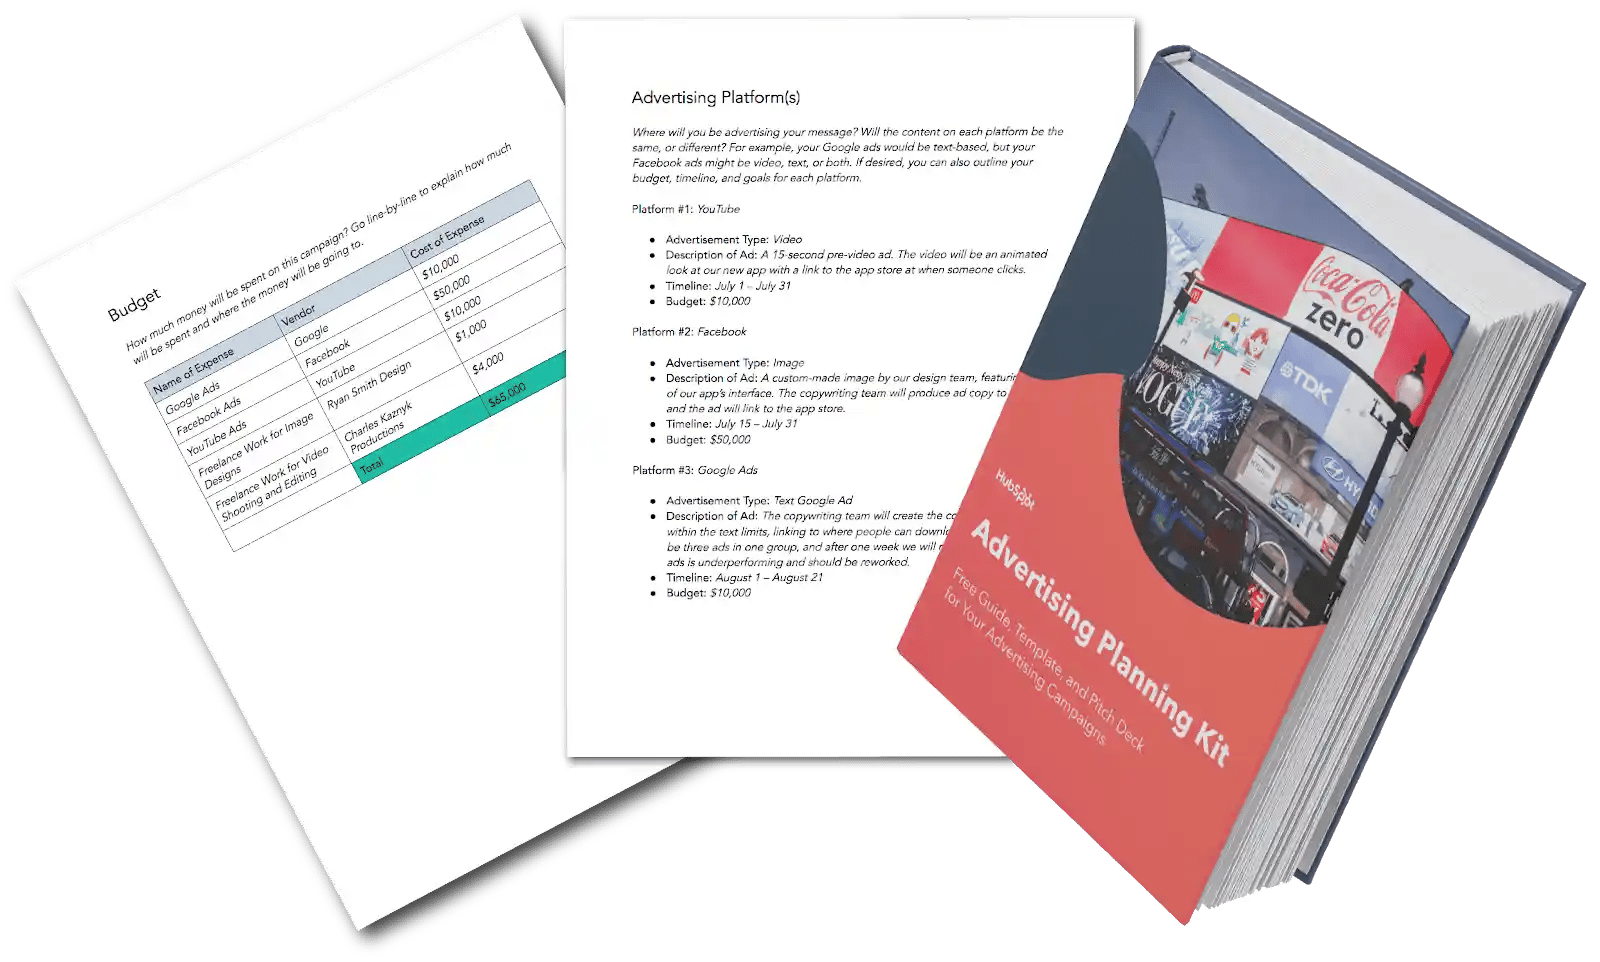
ad_2 To make your advertising planning easier, use HubSpot’s free Advertising Planning Kit. Included are templates to help you plan and present your ad pitch, schedule your release dates, and inform your stakeholders. We’ve also thrown in an advertising best practices guide to help you choose the advertising method that works best for your business.

1. Choose Your Target Audience

When making an ad, you’ll first need to decide the audience you’re making the ad for. Target the right market and you’ll find customers naturally inclined to engage with your brand and product. Cast too wide a net and you may find yourself lost in the digital noise.

One way to help your ad find the right audience is to get granular on whom you want to target with your messaging, which will help you incorporate the best messaging and select the best advertising platform. This should be based off of your buyer personas — semi-fictional representations of your ideal customer based on market research and real data about your existing customers.

If you need help building your personas, try using HubSpot’s Make My Persona tool.

2. Conduct Marketing Research

Market research is an essential part of campaign promotion. Feeding into your buyer personas, market research can answer key questions about your target market, such as:

  • How old are they?
  • What do they spend most of their time doing?
  • What social media platforms do they use, if any?
  • Do they live in suburban, urban, or rural areas?

Knowing the above information about your target audience can help you answer questions like — TV or YouTube? Instagram or LinkedIn? Billboard or bus? — because you’ll understand more about how to appeal to the right people.

You can use this Market Research Guide and Set of Templates to get started on market research for your ad.

3. Choose Your Platform

Your market research should give you the insight and confidence you need to choose the most effective platform to reach your target audience. You should also do some supplemental research on the costs, ROI, and benefits of certain ad platforms and methods.

You may come to the realization that using multiple ad platforms and methods would be the right move for your campaign – such as social media and search engine ads. This is actually a great strategy, as it casts a wider net and opens up the possibility of reaching even more prospects where they already are.

4. Decide on a Budget

For advertising, you need to spend money to make money.

Getting your budget approved can be difficult, so make it easier to get what you need by clearly outlining:

  • The total budget you need
  • How the costs are broken down
  • A projected ROI (or business impact)

Be sure to come to any budget meeting prepared to answer whatever questions could be thrown at you and to defend the specifics.

For instance, saying “We need $10,000 to run a Google Ads campaign” doesn’t sound nearly as compelling as “We’d like to run a series of ads on Google. Here’s a list of our keywords and negative keywords, their monthly search volume, and our preliminary bids for each. With these projections, we’re expecting to bring in 400 new contacts next month for a total cost of $10,000.”

5. Craft a Message

By this point, you know your target audience and preferred platform, but you’re still unsure what you’re saying. Here’s where you’ll want to think about the broad purpose of your campaign to inspire your ad.

Do you want people to come to your store, or visit your website? Is your immediate goal to drive free signups for your software, or ebook downloads? Think about the message and how that can feed into your ad campaign’s end goal(s).


6. Get People Talking

While your message needs to include your brand purpose and tie in with long-term marketing goals, it also needs to be something people remember.

Mark O’Donnell, one of HubSpot’s own Principal Revenue Marketing Managers, shares the importance of an ad that generates buzz through his own experience,

“The most most impactful ads need to be timely, memorable and provocative.
Specifically on LinkedIn, ads needs to solve a pain point or a need with the audience – at the right time.
It needs to stand out from the competition and a noisy newsfeed. This can be achieved by a true understanding of your ideal customer profile (ICP), and focusing on building relevant audiences and creating urgency. The ask for your audience needs to be clear and the message needs to call them out to take action.
Lastly, test this with multiple ad types, creative and message. The best ads are usually the ones that have been tested, optimised and improved over time.”

Here’s why: As more advertising shifts to social media sites such as LinkedIn, Facebook, Instagram and even Twitter, brand marketing needs to get to the point ASAP to drive customer interest and social sharing. If your message — text, images, or videos — can make users stop, look and share with their connections, you have a much better chance of creating organic interaction and driving more traffic to your site.

7. Decide What You’re Building

Ads can build brand awareness and product awareness — but not simultaneously. As a result, it’s worth taking the time to think about your advertising goals for new marketing campaigns.

For example, if brand awareness is the goal, you may want to consider a set of ads that tell a story or help customers learn more about what makes your brand unique. Here, the goal is to engage with customers over a longer period of time to help them engage with your brand from the first time they see your ad to eventual conversion. Ideally, your brand story will help create a long-term, reciprocal customer relationship.

Product awareness ads, meanwhile, are designed to highlight new products or services, call out seasonal specials or help drive specific action from customers. They’re often one-off or a short series of ads that run over a small period of time.

8. Include a CTA

While building awareness is critical for ads to be effective, it’s not enough in isolation.

That’s why all your ads also need a call-to-action (CTA) that provides information for consumers on what to do next. In some cases — such as an ad on your webpage — the CTA may be simple and direct, such as “sign up for our newsletter” or “click here to buy now.”

If you’re advertising on social sites, meanwhile, reaching for an immediate sale or asking for user contact data may actually drive customers away. Here, your CTA needs to be more subtle but no less clear. For example, you might opt for “click here to learn more” or “explore what we have to offer.” In practice, the goal is to avoid presuming what users want — instead, your CTA provides a path to more information if they’re interested. And if you’ve crafted a great ad, they will be.

9. Don’t Forget the Details

They’re small things — the smallest, in some cases — but can have significant impacts for your ad campaign: The details.

Consider an advertisement for a concert or event that your company is hosting. You’ve done the work: Identified the right market, crafted a great message, and created a CTA that will drive customer action.

But…

You’ve forgotten the details. Your ad doesn’t mention where or when the event is happening. Sure, customers could click through and see the specifics on your website, but there’s no guarantee they’ll take this step. Put simply, when it comes to creating a great ad, you have to account for the forest and the trees: You need big-picture advertisements that are visually compelling, content-rich and engaging, but it’s just as critical to double-check that you’re not missing the details.

10. Create Test Ads

Before launching your ad campaign, it’s worth trying your hand at making an advertisement for your brand. Here’s why: Not all ad designs look as great on the screen as they do in your head. By creating basic mock-ups, you can see what works, what doesn’t, and what needs to improve.

One of the most popular options for simple ad creation is Adobe Photoshop. Not sure where to start? Here’s a quick look at how to make an ad in Photoshop.

How to Make an Ad on Photoshop

Let’s say you want to create a Facebook ad on Photoshop. Follow these steps:

  • Create a new document in Photoshop.

how to make an ad on photoshop

Open Photoshop, select “File,” and then click “New” from the drop-down menu. You’ll see the screen above. Here, you can select the size of your new ad, along with the color profile you want to use.

  • Insert your image.

Next, you’ll want to insert an image to work with. Simply drag-and-drop the image of your choice into the Photoshop workspace and you’re ready to go.

  • Add some text.

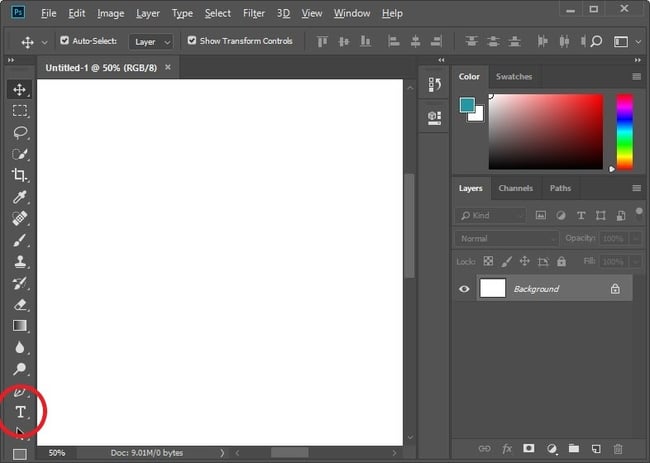
how to make an ad on photoshop: add text

Next, add some text to your image by selecting the “T” button in the bottom left-hand corner. You can choose vertical or horizontal text, depending on what works best for your image.

  • Add a CTA.

Once you’re happy with your text placement, consider adding a CTA. Select one of the shape tools from the left-hand side menu and insert that into your image. Resize as needed, then head back to the text tool and insert your CTA.

  • Consider the 20% rule.

Facebook used to have a hard-and-fast 20% rule that stated no more than 20% of your image could contain text. While this is now a strong suggestion rather than an absolute rule, it’s worth keeping your text to a minimum since Facebook rates ads based on their text volume — the more text you have, the lower your chances of getting seen.

  • Save your file.

Finally, save your new ad. Head to “File”, then “Save As,” and then “Format.” It’s worth saving it as both a Photoshop document (.psd) and a .png file, which makes uploading to Facebook easier.

11. Develop Creative Assets

Whether it’s copy for a Google Ad or a flashy landing page from your in-house designers, all ads need creative assets. Chances are, most of the ads you run will need one or more of the following:

  • Short, promotional copy (for image ads and online ads)
  • Long-form copy (for video scripts)
  • Photographs (for online ads)
  • Custom-designed images and/or animations (for online ads and video ads)
  • Video (for…video ads)
  • GIFs (for online ads)

All of these assets can be overwhelming, and if you’re thinking “I’m not a videographer/writer/designer/photographer!”, that’s totally fine. If these resources aren’t available to you in-house to help make your ad, consider hiring a team of freelancers or an agency to help you produce these deliverables and make an outstanding advertisement, or use an online marketing design tool like Canva to help streamline the process.

12. Determine Measurements of Success and Set Up Tracking

No matter if your ultimate goal is Page Likes, online purchases, or promo code uses, you should never launch an ad without first being crystal clear on two questions:

  • What do we want to see in order to call this ad successful?
  • How are we measuring success?

Jonathan Barshop, a HubSpot Sr. Product Growth Manager, shares his determinants of success for ads geared toward podcast listeners,

“When it comes to podcast ads, we’re either trying to drive downloads for shows within our network or page views to HubSpot’s website. On the download side (the side I manage), we mostly gauge success based on the conversion rate of new listeners, meaning if 1,000 listeners hear our ad on X show and 50 of them go and download one of our episodes, that’s considered a strong conversion. The success of most audio ads are predicated on the podcast hosts relationship with your podcast / product — if they genuinely like it, it’ll come across in the ad read and listeners will flock.”

You have to make the expectations of your campaign known by setting up proper goal-setting and ad tracking.

If you’re advertising online, there’s a good chance the platform you’re using — like Facebook, Google, or LinkedIn — has an ad management and tracking platform, allowing you to see how many interactions your ads have had and how much they cost.

However, you’ll also want to take a few extra steps to aid in your analysis down the line:

  • Use an automated free ad tracking platform to measure advertising ROI and see how your ads tie into larger marketing projects and campaigns. You can also use this platform to compare ads from different sites; say, if you were running ads on both Instagram and Twitter.
  • Set up a custom tracking spreadsheet offline to measure engagements with your ad and other data points like cost, conversion, and advertising ROI, especially if your ad is online.
  • Use custom tracking tokens for links promoted in your ad so that you can analyze engagement and conversions on your own website.

13. Launch Your Ad

The stage is set, and you can finally launch your ad for the world to see.

Needless to say, the process of launching an ad on Google is different than on Bing. The same can be said for every social media channel, TV ads, or transportation ads.

Here’s a list of the more detailed, step-by-step process for launching an ad on some of these platforms. Click through to learn more about the platform or platforms that you’re creating an ad for:

14. Track & Analyze Performance

For campaigns that have a set run time (transportation, television, etc.), determine how the ad’s results performed against expectations. Since it’s difficult to draw a one-to-one comparison for these ad types, you may want to look at general business trends, change in revenue, or even social media/press mentions to gauge success.

For online ads, this process is a bit easier. Results start coming in immediately, so you can see how well your ads are performing instantly, and over time. Take note of the ads bringing in high numbers at low costs and — just as importantly — ads costing a lot but not performing that well.

Remember, you can take the headache out of the manual ad tracking with a free online ads tracking tool.

15. Make Changes, Rinse, and Repeat

Once your ad campaign is over (or if it’s an ongoing online campaign), apply your learnings to your next advertisement.

For instance, maybe you realized your online ads that were wordier performed worse than ads that were more concise, or that YouTube just didn’t work this time around. Lean into what worked (or is working) and abandon what’s not to continue to strengthen your company’s advertising program.

It All Ads Up

And there you have it — our comprehensive guide to planning, creating, launching, and analyzing your new ad.

Looking to streamline the process? Use an advertising planning template to outline your ad campaign, keep all contributors informed, and rally behind the same end goal for your business.

Editor’s note: This post was originally published in October 2019 and has been updated for comprehensiveness.

Improve your website with effective technical SEO. Start by conducting this  audit.  


Categories B2B

How to Make a Video on iPhone (Expert Tips)

It’s an understatement to say that video is important to a successful marketing strategy. 92% of marketers report that videos give them a positive ROI.

You may think you need expensive equipment to create a high-quality marketing video, but you’re actually all set if you know how to make a video on an iPhone.

Sounds too good to be true? Don’t worry. In this post, we’ll walk you through our tips and best practices for filming high-quality marketing and social media videos with your handy iPhone and a few other tools.

Download Now: The 2023 Video Marketing Trends Report

Tips for Shooting Videos with an iPhone

Here are some best practices for filming videos with an iPhone.

1. Find a quiet place to film.

Though it‘s possible to edit out most background noise in post-production, you’re better off avoiding the issue altogether by recording in a quiet space.

If possible, book a conference space and hang signs telling people to steer clear of where you’re shooting, or bring a coworker with you to block off the area where you plan to film.

2. Make sure your iPhone has enough storage space.

Few things are more frustrating than getting this notification while filming on your phone: “iPhone Storage Full.”

If your iPhone tells you it’s out of storage as you’re filming, your phone will stop recording, and you’ll have to start over. To prevent this, ensure you have enough space before pressing “record” by deleting as many unnecessary files and apps as possible.

If necessary, purchase iCloud storage for files to free up more space on your device itself.

To do this, navigate to “Settings,” click on your name, select “iCloud,” and tap “Manage Storage” or “Manage Your Plan” to buy more space.

Screenshot showing how to purchase more storage for iPhone

3. Turn off notifications.

You don’t want text notifications, push alerts, or phone calls to interrupt your filming. So, before you start, set your iPhone to Do Not Disturb mode to silence all notifications so you can record in peace.

To do this, swipe down on your phone and tap Focus, then Do Not Disturb mode. Tap Do Not Disturb again when you’re done to return your phone to normal settings.

Screenshot of Do Not Disturb on iPhone

Pro tip: Do Not Disturb is a great way to watch YouTube videos, play games, and sleep uninterrupted, too.

4. Use a tripod.

Now matter how steady you think your hands are, they probably aren’t steady enough to film a video for an extended period of time.

Now, it’s one thing if you’re scrappily putting together a Snapchat Story or a fun TikTok.

However, if you’re filming a video for your brand — especially one that will live permanently on your blog, YouTube channel, or other social media assets — you’ll need the help of a tripod to keep the video steady and clear.

You can purchase full tripods or smaller versions for your desk on Amazon, at Best Buy, or from other vendors.

5. Light your video.

This point is especially important if you‘re filming in an office building with lots of overhead lighting. Fortunately, you don’t need to buy anything fancy for this step. Our friends at Wistia put together this guide to a DIY lighting setup.

You need enough light to give the impression of natural light, which means it’s coming from various light sources and not just directly overhead.

If you don’t have the time or budget to purchase a lighting setup, find a room or location with plenty of natural light to keep your video subject looking good. Remember to turn off the overhead lights.

6. Use a microphone.

Quality sound is crucial to an engaging video. If you’re speaking in your video, use a microphone to amplify your voice and combat any distracting ambient noise.

You don’t need a fancy microphone and boom setup like in the movies, although those would be a great investment if you plan to film many videos.

You can use something as simple as a microphone plugging into your iPhone’s headphone input to get great video audio — and you can buy one here.

If you have an extra iPhone or can borrow one, you can also use that iPhone as a mic. Just open the phone’s Voice Memo app and record your audio as a memo. While recording, keep the mic hidden in a shirt pocket or just out of frame.

Pro Tip: Clap at the start of each take so you have a reference point for syncing the audio and video together when editing.

7. Film horizontally or vertically, depending on the platform.

If you’re creating content for Instagram Reels, TikTok, YouTube Shorts, or Snapchat — film vertically because that is the format used for those platforms. If you film horizontally

Film horizontally if you‘re filming for YouTube or Facebook (and you’re not creating Shorts or Reels). The video will appear smaller if you record vertically and the viewer’s screen is rotated horizontally.

8. Don‘t use the iPhone’s zoom capability.

Zooming into an image with your iPhone will make the image appear closer, but it will lessen the quality of your video by making it pixelated and blurry. Instead, physically move your filming setup closer to your subject to eliminate the need to zoom in.

9. Lock your exposure.

The iPhone does a fantastic job of finding the subject to focus your camera’s exposure — which is great for taking a photo.

But when it comes to filming a video, its super-powered exposure will continue adjusting and readjusting according to movement — leaving your final video occasionally blurry and out of focus.

You can solve this problem by locking the exposure while you’re filming. Before you press record, hold down your finger on the subject of your video until a yellow box appears around the person or object and the words “AE/AF Lock” appear:

Screenshot showing lock exposure on iPhone

10. Use your iPhone’s built-in grid.

If you‘re unsure how to get the perfect shot, use your iPhone’s built-in grid and frame the show using the rule of thirds.

To access the built-in grid, navigate to Settings, tap Camera, and turn on Grid.

Screenshot of iPhone video of a sleeping cat by a window. Video is filmed using iPhone grid and rules of thirds11. Shoot with your back-facing camera.

It can be tempting to record with your front-facing camera because you can see yourself while filming, easily check to ensure you‘re in the frame, and see everything is in place.

However, the front-facing camera doesn’t film as high a quality as your back-facing camera.

Film with your back-facing camera to give your audience the best visual experience.

Pro-Tip: Have someone on the screen side of your iPhone verify you’re in the frame.

12. Use other Apple devices as a preview window.

If you’re shooting alone, Airplay your camera to your Apple Watch, Macbook, or iPad so you can use the device as a preview window.

13. Edit on a computer.

Once you‘ve filmed your video, you must edit it and prepare it for publication. While the iPhone offers many visual editing tools within its interface, it’s best to use editing software on your computer to fine-tune the images.

Software like iMovie and Adobe Premiere Pro lets you add sound and captions and adjust filtering to make your video look and sound as professional as possible.

You can even try other third-party apps to combine videos on the iPhone.

Lights, Camera, Action

You don’t need a ton of expensive equipment to film and edit engaging videos; you just need to follow the steps above to film something that looks professional with the help of your handy iPhone.

If you don’t have an iPhone, never fear — many Androids have the same high-quality film capabilities as iPhones, and the above tips can be applied to those devices as well.

What are your tips for filming videos on the iPhone? Share with us in the comments below.

video-marketing-report

Categories B2B

X Marks The Spot: What’s to Come After Twitter’s Rebrand?

Last month Elon Musk announced that Twitter’s new name is X.

The name change is supposed to mark the platform’s evolution from a social media tool to an “everything app” that includes banking, e-commerce, and expanded social features.

According to author Walter Isaacson, Musk has been on a mission to make fetch X.com happen since 1999. That year he launched the site offering a range of digital finance products, and the site eventually merged with another company becoming PayPal.

Since the initial version of X.com didn’t exactly revolutionize the financial system Musk is hoping to try again, this time using Twitter as the vehicle to do so. But does this evolution make sense for the app formerly known as Twitter?

Download Now: The 2023 State of Social Media Trends [Free Report]

From a media standpoint, there are a lot of implications.

Since its launch in 2006, Twitter has shaped how people learn information and communicate with one another. When news broke, Twitter was often the first platform people would go to for a quick pulse on major headlines. Or when Instagram got glitchy, the hashtag #InstagramDown would immediately trend on Twitter.

As the changes to the platform keep coming, it is no longer a platform for immediate information.

With major news publications leaving the app, and competitors entering the marketplace, the way users engage with Twitter is beginning to shift. However, it’s going to be difficult to fully rebrand.

After all, Twitter isn’t just a platform — it’s also a verb and a noun. For example:

  • Pieces of content shared on the platform aren’t posts, they’re tweets.
  • Users aren’t posting when they use the platform, they’re tweeting.
  • They retweet when they want to amplify a message.

The intention to call these things x’s has yet to catch on among users.

What happens to Twitter’s most notable communities during the transition to X?

Few things have been as broadly influential as Black Twitter. From #BlackLivesMatter to #OscarsSoWhite, Black Twitter users have been at the forefront of notable movements related to social justice and popular culture.

What’s now unclear is where Black Twitter goes when Twitter is no longer Twitter and what happens to the culture it has heavily influenced.

While we don’t yet know what exact features are included in X’s “everything app” future state, it sounds like the platform will be shifting into everything but what users originally signed up for.

New call-to-action

Categories B2B

How to Create a Heat Map in Excel

Heat maps in Excel help businesses to visualize large data sets, transforming a pool of numbers into easily interpretable graphs. For example, a retailer can use a heat map to analyze sales data and find products that sell more during specific seasons.

Download 10 Excel Templates for Marketers [Free Kit]

In short, heat maps help you find and color-code correlations that may have been difficult to discern from raw data.

This guide will show you how to create heat maps in Excel of different types:

  • A simple heat map with conditional formatting.
  • A heat map with a custom color scale.
  • A geographic heat map.

Let’s get started.

What is a heat map in Excel?

A heat map in Excel is a color-coded snapshot of your data, which helps you analyze thousands of data points and spot negative and positive trends and correlations at a glance.

Lighter colors represent lower values. Darker shades stand for higher ones. Though, you can invert them.

For example, you can depict higher conversion rates in green and lower in red.

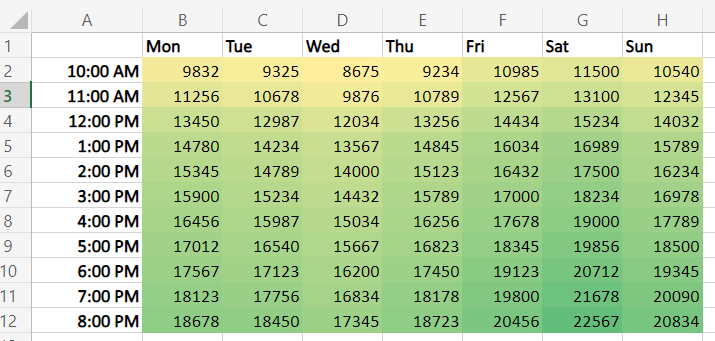
What falls in between will be colored in orange and a gradient with different shades of the three colors based on the value. Or you can fill cells in gradient shades, as shown in the example below.

A retail store footfall heatmap in Excel

The Benefits of Using Heat Maps.

Let’s go over four core benefits of Excel heat maps tailored to business needs.

1. Quick Data Interpretation

One of the primary benefits of using heat maps is the speed of data interpretation.

Consider a financial analyst assessing a company’s monthly expenses across different departments. Instead of working their way through a sea of numbers, analysts could use a heat map to quickly identify the departments with the highest and the lowest spending alike.

This allows for rapid insights and informed financial planning.

A heat map Excel sample

2. Discerning Trends and Patterns

Heat maps unveil hidden trends and patterns in your data that might be missed in raw, numerical form. For instance, a pet store could apply a heat map to analyze sales data over time (or for specific goods).

This way, you can spot a trend of higher sales during certain months or days, indicating peak shopping periods and helping in inventory and marketing planning.

3. Enhancing Presentations and Reports

Turn dull spreadsheets into engaging and representative visuals, making your reports easily read.

Suppose a marketing manager is presenting campaign performance to stakeholders. A heat map can quickly communicate which campaigns were successful and which fell short and why, ensuring clear and effective communication.

Make a heat map for representative reporting.

4. Simplifying Decision-Making

Are you a logistics manager at a manufacturing firm who must understand delivery times across different regions? Use Excel heatmaps.

Color regions with longer delivery times in darker shades to point out logistical inefficiencies.

Create color-coded map charts in Excel (heatmaps)

So, how do all of these work in real life? Keep reading for tutorials.

How to Create Heat Maps in Excel

Find step-by-step guides on creating heat maps with different formatting and for a map chart.

How to Create a Heat Map with Conditional Formatting

For example, you want to analyze a company’s monthly expenses across various departments.

1. Open Excel and input your data. Click and drag to select the numeric data you want to include in your heat map. In our example, these are the numbers from January to June for each department.

How to create a heat map in Excel — select the data range you want to color-code.

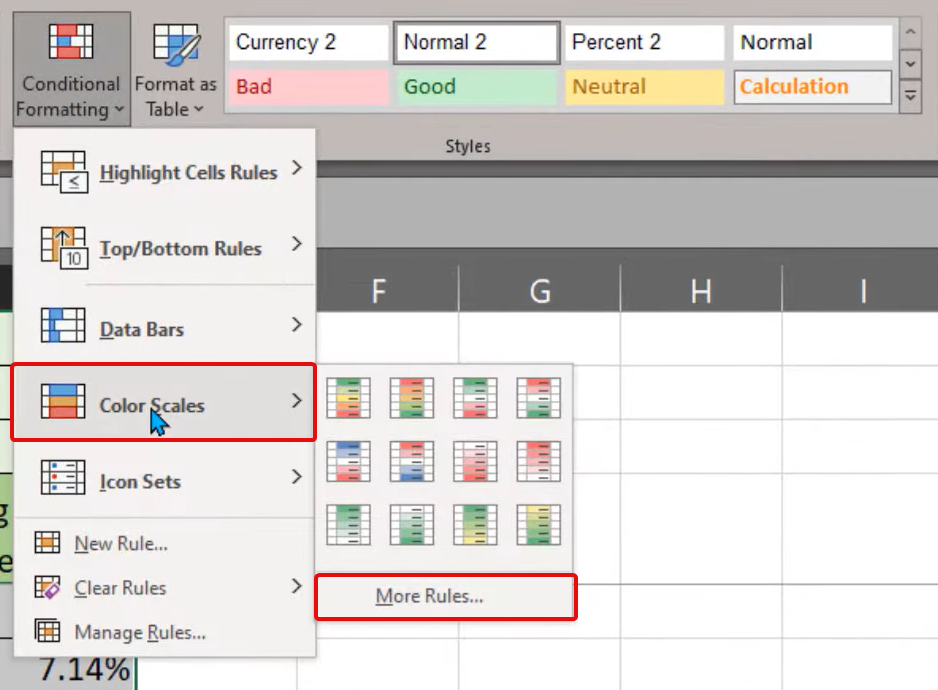
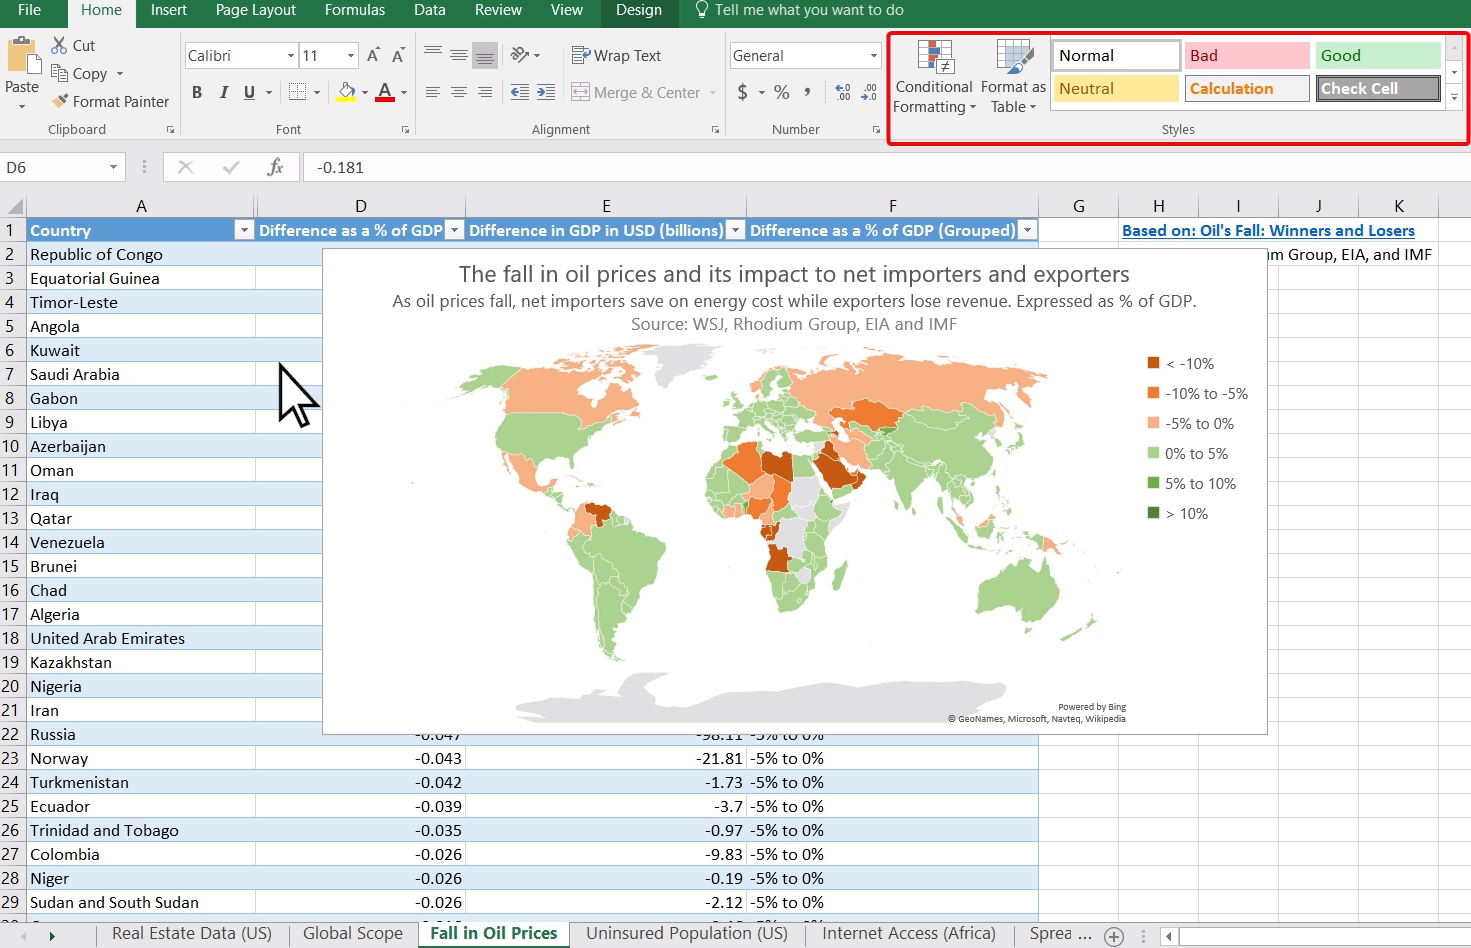
2. Open the Conditional Formatting menu. Navigate to the “Home” tab and click “Conditional Formatting” in the “Styles” group.

How to create a heat map in Excel — selecting color schemes

3. Apply Color Scale. From the dropdown, select “Color Scales.”

A set of preset color gradients will appear. Choose one that suits your needs. For this example, you might select “Green – Yellow – Red Color Scale.”

This scale will apply a gradient of colors where green indicates lower expenses, red indicates higher expenses, and yellow falls in the middle.

A heat map in Excel — example

How to Create a Heat Map with a Custom Color Scale

Sometimes, Excel’s default color scales may not adequately represent your data, or you might want to align the color scheme with your brand colors. Or maybe you want to highlight the cells with lower/higher values than a given number.

In such cases, create a custom color scale. Here’s how to do it.

Suppose you want to find out which brands of dry dog food brought over $11,000 in revenue in the last six months.

1. Go to “Conditional Formatting” in the “Styles” group again. But from the dropdown, select “New Rule” or “More Rules…” It depends on your Excel version.

How to color your Excel heat map in custom shades.

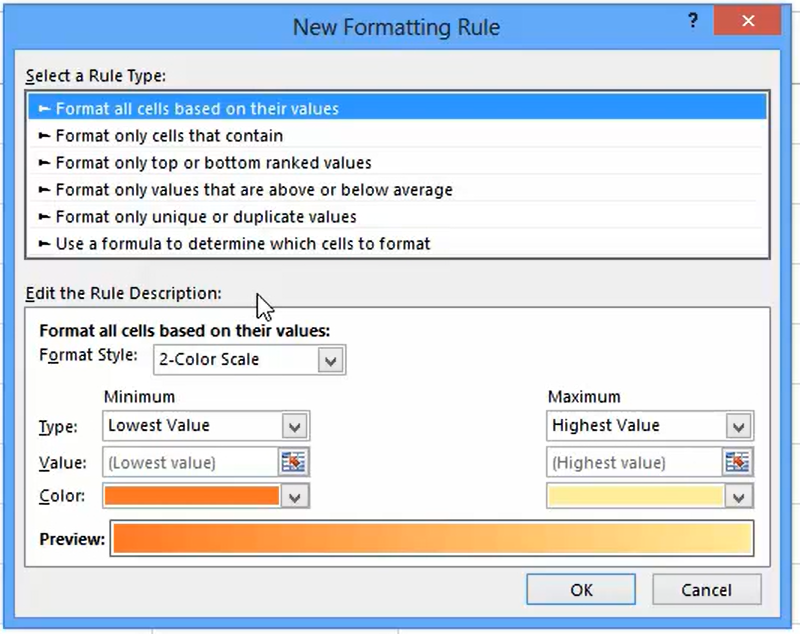
2. Select Rule Type. In the “New Formatting Rule” dialog box that appears, choose “2-Color Scale” or “3-Color Scale” based on your preference.

How to create a heat map in excel with custom colors — assigning custom color scales.

3. Set Colors and Values. Here, you can customize the colors for the maximum, midpoint, and minimum values.

Let’s say we choose dark blue for the highest values (>= $11,000), red for the lowest values, and white for the midpoint. You can also set the value for each point.

An Excel heat map in custom colors

Click “OK” to apply the rule.

Watch the video on how to create advanced heatmaps in Excel.

How to Create a Geographic Heat Map in Excel

Creating a geographic heat map in Excel allows you to compare values and show categories across various geographical regions.

It‘s a valuable tool when you’re dealing with geographical entities like countries, states, counties, or postal codes.

How to create a geographic heat map in Excel.

To create similar maps, simply select your data, including the headers, and in the Ribbon bar, select a Map chart or Recommended charts, so Excel can offer the most convenient map chart for your data.

Select Maps to create a heat map.

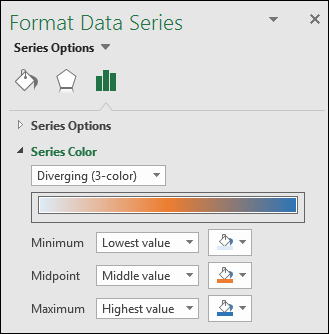
If you want to color-code your map with conditional formatting, double-click on the map to trigger the formatting menu for maps. Then, select the color scheme. Apply your color scheme to a map chart

As you’re switching between options and colors, the changes are automatically applied. Thus, you can play with different options to choose the best one for your map visualization without going back and forth.

Discover all the intricacies of geographic map charts in Excel.

Use Heatmaps to Communicate Data and Get Buy-In

Visualizing data with heatmaps in Excel helps you effectively deliver key insights to your team, management, or stakeholders.

Whether you’re analyzing marketing campaign performance, tracking monthly expenses, or spotting trends in sales data, heatmaps offer an easily digestible, color-coded overview that aids strategic decision-making.

Go and try it out!

excel graph templates

Categories B2B

Everything You Need to Know About AI Cybersecurity

AI has become an indispensable weapon in the combat against cybercrime. According to Forbes, 76% of businesses are earmarking AI and machine learning as key priorities within their IT budgets.

This escalating trend is largely fueled by the exponential increase in data required to detect cyber threats. For example, connected devices alone will generate 79 zettabytes of data by 2025, an unmanageable volume for manual human analysis.

Recent research by Blackberry reveals that 82% of IT decision-makers plan to infuse their cybersecurity strategies with AI within the next two years. In this article, we’re breaking down the ins and outs of AI cybersecurity solutions. Let’s dive in.

Get Started with HubSpot's AI Campaign Assistant

What is AI cybersecurity?

How can AI help cybersecurity?

The Advantages of AI Cybersecurity

AI Cybersecurity Examples

AI Cybersecurity Solutions

What is AI cybersecurity?

AI, or Artificial Intelligence, is ushering in a computing power and learning ability reshaping the world as we know it. It refers to the capability of a machine to mimic intelligent human behavior.

Now, combine that with cybersecurity, a field dedicated to protecting systems, networks, and programs from digital attacks — and you’ve got AI cybersecurity.

AI cybersecurity integrates artificial intelligence into cybersecurity protocols to predict, identify, and neutralize potential cyber threats.

It’s about empowering your defense systems to learn from past incidents, adapt in real-time to current situations, and even anticipate future threats.

Imagine a goalkeeper who doesn‘t just defend, but learns the common shooting patterns of every striker, understands the wind direction, and predicts the ball’s trajectory even before it‘s kicked. That’s what AI brings to cybersecurity.

AI turns your defense from reactive to proactive, capable of intelligent decision-making, and infinitely more resilient in cyber-attacks.

AI cybersecurity is no longer a nice-to-have but a necessity for every organization, regardless of size or industry. It’s the next-generation shield for your digital assets and a robust answer to the evolving sophistication of cyber threats.

How can AI help cybersecurity?

ai cybersecurity; AI helps with faster detection, network security, phishing detection, secure authentication, behavioral analytics, and preventing online frauds

Image Source

As we plunge deeper into the digital age, our reliance on technology has never been greater — and neither has the potential risks. Enter AI, a shining knight in digital armor, bringing a wealth of solutions to the cybersecurity field.

But how exactly does AI lend its power to bolster cybersecurity efforts? Consider the following.

Predictive Capabilities

AI algorithms, particularly those utilizing machine learning, can analyze historical data to identify patterns and trends. This ability allows them to predict potential threats and vulnerabilities before exploitation.

Imagine being able to forecast a storm before the first drop of rain — that’s what AI brings to your cybersecurity table.

Real-Time Response

Cyber threats don‘t wait, and neither should your defenses. AI can monitor networks and systems 24/7, identifying and neutralizing threats in real-time.

It’s like having a vigilant security guard that never sleeps, equipped with the most brilliant surveillance tools.

Enhanced Accuracy

AI significantly reduces the chances of false positives and negatives in threat detection.

By learning from historical data and adapting its understanding over time, AI can pinpoint genuine threats highly, minimizing the risk of overlooking a real danger or flagging a benign activity.

Automated Tasks

AI can take over routine cybersecurity tasks such as monitoring network traffic or analyzing user behavior, freeing your human talent to focus on more complex issues. It’s about working smarter, not harder.

Advanced Threat Intelligence

AI-powered threat intelligence can dive deep into the dark web, monitor threat actors, and uncover potential risks that could go unnoticed by traditional methods. It’s like having a detective who can find clues invisible to the human eye.

Scalability

As your business grows, so too do your cybersecurity needs. AI can scale effortlessly, providing continuous protection regardless of the data volume or the network size.

The Advantages of AI Cybersecurity

Harnessing AI for cybersecurity presents a wealth of benefits. It offers a dynamic defense system against cyber threats, streamlines operations, enhances efficiency, and opens up new avenues for growth.

Let’s discuss the benefits of incorporating AI into your cybersecurity strategy.

AI Cybersecurity Advantages. Proactive Threat Prevention. AI Cybersecurity Advantages. Real-time Threat Detection and Response. Reduction of Human Error. Improved Efficiency and Cost Savings. Scalability. Future-Proofing Your Business

Proactive Threat Prevention

One of the critical advantages of AI cybersecurity is its ability to shift from a reactive to a proactive approach.

AI can analyze past and present data through machine learning algorithms, learning to recognize patterns and predict potential threats.

This predictive capability allows organizations to identify and neutralize threats before they have a chance to impact business operations.

Real-time Threat Detection and Response

AI’s real-time monitoring capabilities are second to none. It can analyze vast quantities of data around the clock, detecting threats as they occur.

When milliseconds can distinguish between a successfully repelled attack and a significant data breach, AI’s speedy response time becomes a vital asset.

Reduction of Human Error

Human error is a leading cause of cybersecurity breaches. By automating routine tasks and decision-making processes, AI reduces the potential for human mistakes.

This leads to a more secure, reliable system that operates effectively even during a threat.

Improved Efficiency and Cost Savings

AI can handle a volume of data analysis that would be impossible for human analysts to achieve, freeing them to focus on complex, strategic tasks.

This shift can lead to significant cost savings and improved operational efficiency, transforming your cybersecurity operations from a cost center to a strategic asset.

Scalability

As businesses grow and data volumes increase, cybersecurity needs can quickly outstrip resources. With its inherent scalability, AI can adapt and grow alongside your business, ensuring robust defense regardless of the volume or complexity of threats.

Future-Proofing Your Business

The cybersecurity landscape is constantly evolving, with new threats emerging every day. AI’s ability to learn and adapt makes it uniquely positioned to respond to these changing threats, keeping your business secure now and in the future.

In a digital age, leveraging AI in cybersecurity is not just an advantage — staying ahead of the curve is necessary.

AI Cybersecurity Examples

Understanding the power of AI in cybersecurity is one thing, but seeing it in action brings a new level of clarity. Here are three examples of companies leveraging AI to enhance their cybersecurity strategies.

Mastercard’s Decision Intelligence

Mastercard’s Decision Intelligence is a fantastic example of AI’s power in cybersecurity.

This solution applies AI and machine learning to analyze and score real-time transactions, helping reduce fraudulent transactions without adding friction for legitimate customers.

By learning from each transaction, Decision Intelligence can continually adapt and improve its ability to detect fraudulent activity, highlighting AI’s potential for ongoing learning and improvement.

BAE Systems

BAE Systems, a British multinational defense, security, and aerospace company, has deployed AI to boost its cybersecurity efforts.

They utilize machine learning algorithms to analyze network activity and identify unusual patterns that could signify a threat.

The company’s AI solutions provide ongoing monitoring and real-time threat detection, keeping their sensitive information and systems secure.

PayPal

Online payment giant PayPal uses an AI-based system to help combat money laundering and detect fraudulent transactions.

PayPal’s AI system analyzes transactions in real-time, spotting suspicious activity and helping to prevent illegal transactions. The system learns from each transaction, improving its accuracy and effectiveness.

AI Cybersecurity Solutions

Harnessing the power of AI in your cybersecurity strategy requires robust tools.

Here are five of the top AI-powered cybersecurity solutions on the market which can equip your sales teams with the defenses they need to protect valuable customer data and secure your digital infrastructure.

1. Darktrace RESPOND

ai cybersecurity examples, Darktrace RESPOND

Image Source

Darktrace, a global leader in cyber defense, utilizes AI novelly with its Autonomous Response technology, RESPOND.

By learning what constitutes normal behavior for a network, its AI can recognize anomalous activity, whether it be an external cyberattack or an insider threat.

When a potential threat is identified, Darktrace‘s AI can take precise, proportionate action in real-time to neutralize it, all while updating its understanding of what is typical for future reference.

It’s a shining example of AI’s learning capabilities put to practical, effective use in cybersecurity.

Core Features

  • Autonomous threat response
  • Continuous learning and adaptation
  • Real-time threat visualization

Pricing: Contact Darktrace for pricing information.

Best for: Businesses of all sizes seeking a high degree of automation in their cybersecurity defenses.

What we like: The impressive self-learning AI technology provides autonomous responses that adapt and improve over time.

2. IBM Watson for Cybersecurity


ai cybersecurity examples, IBM Watson for Cybersecurity

Image Source

IBM’s Watson needs no introduction in the AI world. Known for its success in healthcare and game shows, Watson has also made waves in cybersecurity.

Watson for Cyber Security uses cognitive technology to analyze vast information — from countless blogs, articles, and threat intelligence reports to identify potential threats.

By sifting through this data more efficiently than any human team could, Watson enables security analysts to respond to threats with unmatched speed and insight.

Core Features

  • Natural language processing to analyze various data sources
  • Cloud-based cognitive computing for scalability
  • Integration with existing security tools

Pricing: Contact IBM for pricing information.

Best for: Large businesses and enterprises that require robust, scalable cybersecurity solutions.

What We Like: Watson’s ability to process vast data and integrate it with existing tools makes it a versatile solution.

3. CrowdStrike Falcon

ai cybersecurity examples, CrowdStrike

Image Source

CrowdStrike, a pioneer in cloud-delivered endpoint protection, leverages AI in its Falcon platform. Falcon uses machine learning algorithms to analyze data and detect threats.

This AI-powered platform offers real-time protection, even when the endpoints are offline. It continually learns from the troves of data it processes, improving its threat detection capabilities over time.

This demonstrates AI’s unparalleled scalability and evolution in action.

Core Features

  • AI-based threat detection and prevention
  • 24/7 threat hunting
  • Cloud-native architecture

Pricing: Pricing is available upon request.

Best for: Businesses of all sizes, particularly those with remote workforces.

What we like: Falcon’s cloud-native structure allows scalability and remote threat management, which is particularly useful for distributed teams.

4. Cybereason

AI cybersecurity examples, Cybereason

Image Source

Cybereason offers an AI-powered platform that delivers endpoint protection, detection, and response to secure your business assets. It uses multiple layers of machine learning to uncover malware and ransomware attacks.

It also provides predictive protection, detection, and response once these attacks are detected.

Core Features

  • Endpoint protection
  • Behavioral-based threat detection
  • Automated threat responses

Pricing: Contact Cybereason for pricing information.

Best for: Businesses of all sizes that want a comprehensive, AI-based cybersecurity solution.

What we like: Cybereason’s behavioral-based detection provides an extra layer of security by identifying potential internal threats.

5. Vectra

AI cybersecurity example, Vectra

Image Source

Vectra’s Cognito platform is an AI-powered network detection and response solution that prioritizes threats in real-time and accelerates investigations.

The platform embraces its ability to prioritize urgency based on the threat environment and quickly stop attacks.

Core Features

  • Real-time cyber attack detection and prioritization
  • Automated threat hunting
  • Integration with endpoint response solutions

Pricing: Contact Vectra for pricing details.

Best for: Mid-size to large businesses that require sophisticated threat detection and prioritization.

What we like: Prioritizing threats helps security teams focus on the most pressing issues, enhancing efficiency and response times.

Your business’s right AI cybersecurity solution will depend on your needs, budget, and resources. But whether you’re a growing startup or an established enterprise, the AI revolution in cybersecurity offers potent tools for safeguarding your digital assets.

Embracing the Future of AI Cybersecurity

As we continue to embrace our digital future, cybersecurity will undoubtedly remain a crucial area of focus for businesses around the globe.

With the ever-evolving landscape of cyber threats, it’s clear that traditional defense measures alone aren’t sufficient.

This is where AI cybersecurity steps in, bringing to the table its proactive threat detection, real-time response, enhanced accuracy, scalability, and so much more.

Whether you’re just starting your cybersecurity journey or looking to upgrade your existing defenses, AI-powered solutions offer a robust, dynamic, and intelligent way to protect your digital assets.

New Call-to-action

Categories B2B

How Buyer-Level Intent Data Saves Sales Time and Rejection

Buyer-level intent data allows sales teams to cut down on the amount of time they spend prospecting, doing cold outreach, and waiting weeks to hear from prospective buyers.

Leveraging buyer-level intent simplifies the lives of everyone involved in the sales process—especially the consumer, who gets a more tailored group of messages that better suit their needs. 

In this piece, we’ll review the current struggles of B2B sales professionals, why account-level intent data is insufficient for sellers, and how buyer-level intent data saves time, effort, and most importantly, accelerates pipeline.

“What Comes First?” 

“The definition of insanity is doing the same thing over and over and expecting different results.” – Albert Einstein

“Where do I even start?”

This is the question that so many sales professionals in B2B seem to be asking. 

Despite multiple reports and studies claiming that B2B organizations would begin spending in 2023, not much has changed. Instead, it continues to be tough sledding for sales professionals at all levels.   

And there’s good reason for it: Many businesses are struggling mightily. Even the companies that have been fortunate enough not to need to lay off employees still feel the ripple effects from those that have.  

Integrate’s 2023 State of B2B Marketing Budgets survey reported that some of the biggest challenges B2B marketers shared include headcount cuts (40%), increasing growth targets (39%), and budget cuts (38%).  

While anecdotally we knew that everyone was being asked to do more with less, Integrate’s survey all but confirms it. 

So now what? Let’s return to the first question we asked. 

So Much Data, So Little Action 

The B2B industry is awash in billions of different data points. It has been for quite a while.  

A lack of information has never been the question, however. Similar to many things online, we’re dealing with a lack of knowledge.

A 2021 article from Psychology Today summarized one of the key differences between knowledge and information thusly:

“Knowledge depends on having a context into which information can be accurately placed; context is one of the keys.”

Context is one of the keys. 

Despite all of this data, so much of what we’ve historically had access to is drastically lacking in context.

When it comes to understanding the motivations of a user and then, conversely, determining what would likely drive them to take action, it requires a great deal of context. 

Fortunately, intent data offers far more contextual information to B2B sellers.  

Intention Leads to Action 

The contextual details produced via intent data provide knowledge into precisely: 

  • What a user is interested in 
  • When they took action 
  • and Where it occurred  

Buyer-level intent data goes even further, delivering who is actually interested, as well

Because of this context, this data is truly actionable. 

Before the introduction of intent data at the contact-level, intent data for the longest time wasn’t seen as a priority for B2B organizations, especially within the sales department. 

Bringing Buyer-Level Intent to Sales   

Recently, I was speaking with a sales executive who’s been at multiple organizations in a variety of roles. What he shared with me was enlightening.

“Sales reps are stubborn,” he said. “We aren’t keen on change.”

I certainly understand this. Personally, I’m not a fan of change, either, even if it’s ultimately to my benefit. 

Buyers Consume More and Communicate Less 

Photo by the blowup on Unsplash

We’ll caveat the above shortly, but it’s pretty plain: Buyers continue to consume more content and it takes far longer to get in touch with them

Consumers will do just about anything not to talk with a sales rep. When they do, they need to have a very compelling reason for doing so.

Research from Hubspot in 2021 indicated that it took between eight and 12 touch points to get one contact within one account to accept or respond to a meeting. 

So how much have things changed?

The theory goes that result every few years these touch points increase by about three. By this logic, we should have expected it to take between 11 and 15 touches to have a meeting request accepted or responded to. 

Since the pandemic, however, it appears that this number has only doubled. 

More recent research finds that, on average, it now takes 25 touchpoints before a contact agrees to meet.

25 touchpoints!

That’s the equivalent of 8 emails, 10 phone calls, 6 LinkedIn messages, and one physical gift/good sent to your prospect. That’s a lot of time before getting to connect with your prospect.

Given that some salespeople have 400 accounts to their names within some organizations. How are they supposed to be able to scale this?

So why does it take so long?

Going back to the conversation I had with the veteran sales exec, what he said to me after the aversion to change is what got right to the heart of the issue:

“Ultimately, we don’t know what buyers are interested in. We’re taking a lot of shots in the dark.”

Bingo.

This is why the number of touchpoints has doubled in the last two years. The combination of WFH, third-party cookie degradation, and blocking, along with the pressing need to book business has brought us to this point.

Once again, this is where buyer-level intent shines. 

Understanding the Needs of B2B Buyers 

Returning to Integrate’s State of Marketing Budgets report, their research shared that approximately half of B2B marketers face a significant challenge in using data to make informed decisions and measure performance.  

This highlights a growing necessity for marketers to justify their expenditures to finance departments and C-level executives, underscoring the importance of “defending the spend.” 

Defending the spend has lead to every organization doing more with less.

The word “less” automatically conjures up the idea that you truly at a disadvantage.

But, of course, in this case, less means less clutter, less noise, and more signal. 

Taking Aim 

What if, instead of taking shots in the dark, you could shine a light as powerful as the Sun and aim right down the middle?

Buyer-level intent data delivered through INTENTIVE allows sales professionals to know precisely what their buyers are interested in. They’re able to understand who the right contact is, what their confirmed projects are, and more. Effectively, buyer-level intent data delivers everything that you would only discover during a sales call specifically discovery call 

Think about the number of hours that you would save simply by leveraging this tool.

One of NetLine’s Senior Sales Executives has been able to quantify the amount of time INTENTIVE has saved her: The equivalent of one full day each week.

How much more productive and efficient would you and your sales team be with nearly an extra week to properly prospect or personalize each month?

Imagine how much time you could save if you knew: 

✔WHO the right contact is 

✔WHAT they want 

✔WHAT they’ve consumed 

✔WHAT actions they’ve taken 

✔WHEN they expect to make a purchase decision

INTENTIVE enables this. 

B2B Sales Teams Should Be Using Buyer-Level Intent Data 

It’s clear that buyer-level intent data opens an entire world of possibilities for B2B sellers.  

Equipped with it, sellers can determine who to prioritize, what their prospects need to decide, and when their timeline might be.

Ultimately, B2B buyer-level intent data saves sellers time and increases their productivity, leading to favorable (and more likely profitable) outcomes for everyone involved. 

Categories B2B

The 20 Best Free PDF Readers of 2023

Even though they’re over 25 years old, PDFs are still one of the main types of documents on the internet. Whether you’re trying to access your W-2, a contract, or an ebook, it’ll probably be a PDF.

But to view these important documents, you need to download a PDF reader on your computer.

There are hundreds of PDF readers, and some can cost you almost a thousand dollars per year, so we sifted through the internet to find the best free PDF readers you can download online.

Below, we curated 20 free PDF readers whose capabilities range from only viewing PDFs to creating, editing, and securing them.

→ Download Now: 36 Free Ebook Templates

The 20 Best Free PDF Readers

The 11 Best Free PDF Readers for Windows and Mac

1. Foxit Reader

Image Source

Foxit Reader is like the Google Docs of PDF readers. You can create, share, and secure your PDFs on the cloud.

To create PDFs, you can upload scans, convert Word documents, PowerPoint presentations, and Excel sheets, and even combine multiple PDFs into a new file.

If you want to collaborate, you can grant and revoke document access. You can then track who opens your document and view their activity. The program will also notify readers about new updates to your PDF.

What we like: Foxit PDF Reader provides multiple security options to keep your PDFs safe and private, like passwords, digital signatures, and encryption.

Foxit would be a good option if you create PDFs regularly for your job and need a way to collaborate on the same file.

Core Features

  • Read and print PDFs
  • Access from anywhere
  • Collaborate and share
  • Protect, fill, and sign PDFs

2. Adobe Acrobat Reader DC

Image Source

Adobe’s free PDF reader, Adobe Acrobat Reader DC, connects to the Adobe Document Cloud and other cloud storage systems like Box, Dropbox, and Microsoft OneDrive.

The PDF reader’s compatibility with other systems lets you open, view, share, and comment on PDFs from anywhere and on any device you want.

What we like: Acrobat Reader DC’s most remarkable feature is that it can read text out loud, guiding you along any challenging document.

Adobe’s free PDF reader is great for any busy professional who needs to annotate PDFs on the go or their commute.

Core Features

  • View and print PDFs
  • Share and comment on PDFs

3. Javelin PDF Reader

Image Source

Javelin PDF Reader is a straightforward PDF reader that lets you launch and print standard and encrypted PDFs, annotate them, and bookmark them.

Since its download size is two MB and it doesn’t have extra features like editing, the PDF reader is fast.

You’ll also find a simple and clean user interface. If you want to read and take notes on PDFs quickly, Javelin is the PDF reader.

What we like: Although basic compared to powerhouse Adobe, if you want to read and take notes on PDFs quickly, Javelin is probably the PDF reader for you.

Core Features

  • View and read PDFs
  • Navigate PDFs and hyperlinks
  • Bookmark, highlight and annotate PDFs

4. Google Drive

Image Source

Google Drive is the most accessible PDF converter and PDF storage system. You can convert any documents, presentations, and sheets into PDF files on the platform. You can then upload any PDFs to the cloud for viewing purposes.

If your only use for PDFs is viewing or converting files into them, Google Drive is the best option.

What we like: Google Drive allows teams to share documents and collaborate seamlessly, thanks to a user-friendly interface and intuitive design.

Core Features

  • View PDFs directly in your browser
  • Control access via sharing
  • Comment and collaborate

5. Your Web Browser

Web browsers like Google Chrome, Firefox, and Safari all have integrated PDF readers. To view a PDF on your browser, all you have to do is click on the PDF link.

You can also open PDF files already stored on your computer by dragging them to an open tab in your browser.

Additional features included in most browsers’ PDF readers: rotate, download, print, and adjust text size.

What we like: The most accessible option on this list, web browser readers, make it easy to open, read, and adjust PDFs. If you don’t need to convert files into PDFs, you don’t need to download a PDF reader. You can just use your web browser.

Core Features

  • View PDFs directly in your browser
  • Rotate PDFs
  • Print PDFs

6. Canva

Image Source

Canva is more than a free graphic design and editing solution. You can also view pdfs with a free account. And you can do much more than view — you can manipulate every element of your pdf, editing text and graphics.

It’s as easy as opening the app, uploading your pdf, and opening it.

What we like: Canva is becoming increasingly popular for graphic design and video editing. So many people use it daily, which makes it an extremely convenient tool for viewing and updating pdfs.

Occasionally, the content slightly shifts when you open the pdf in Canva, but the payoff is huge if you’re already familiar with Canva. And as a web-based app with an intuitive interface, it’s easy to use and widely available to almost every device.

Core Features

  • Edit PDF content fast
  • Merge PDF files and organize pages with ease
  • Split, insert and extract PDF pages
  • Edit PDFs from any device
  • Collaborate with your team
  • Share and send files
  • Access free images, icons, graphics, and fonts
  • Get automatic language translation

7. Kindle

Image Source

Did you know that one of the most popular free e-reader apps is also a great PDF reader? The app is free, making it an excellent option for reading and storing PDFs to access them on the go.

After downloading the app for your device, you can email your file directly to your mobile Kindle app. To find your Kindle address, go into settings and find the “Send to Kindle email address.”

By emailing it to your Kindle app, you can access it on any device you use Kindle on. Alternatively, to read your PDF locally on the Kindle desktop app, go to File > Import a Local PDF.

What we like: So many people use Kindle to keep our libraries close for easy access. Using Kindle to read and store important PDFs means you can access them on the go.

What’s more, if you download them, you can access them even if you don’t have internet or wifi access.

If you’re already a Kindle user or familiar with the interface, this is a great option — no matter which device you use.

Core Features

  • Read PDFs and other file types
  • Access on any device

8. DocFly

DocFly has won accolades from publications as a free online PDF viewer and editor. Using it is as simple as going to the website, dragging your pdf file to its upload window, and following the prompts based on your needs.

Image Source

What we like: Because it’s easy to use and requires no downloads, DocFly is a fantastic option for anyone needing a quick way to view or edit pdfs and convert them to other file formats.

The free version is limited to 3 monthly files, but it’s a great solution if you just need a quick fix.

Core Features

  • Review and edit PDFs
  • Merge or split PDFs
  • Create PDFs from other file types
  • Convert PDFs to different file types
  • Save and secure PDFs
  • Access PDFs from anywhere

9. LightPDF

Image Source

LightPDF comes in a browser-based app that just about any web browser can use, as well as an iPhone app. The free version allows you to use up to 3 PDFs a day.

Features include editing, merging, rotating your files, and two-way conversion between PDF and various other file types.

Image Source

What we like: Anything browser based is user-friendly for just about anyone. LightPDF’s intuitive interface makes it easy to use and view or edit PDFs without much know-how.

And while the free version is limited to 3 files a day, that’s sufficient for most people’s needs.

Plus, with AI becoming increasingly popular and important, this option may soon be among the top choices.

Core Features

  • View and edit PDFs
  • Merge or split PDFs
  • Watermark or annotate PDFs
  • Convert a variety of file types to PDFs
  • Convert PDFs into a variety of formats
  • Compress PDFs
  • Use AI to edit PDFs
  • Secure and sign PDFs

10. PDF Escape

Image Source

PDFescape touts itself as the “original online FREE PDF editor & form filler.” Available as a browser-based version, it’s easy to use, make basic edits to your PDFs, and create and fill PDF forms.

Image Source

What we like: The best part about these free browser-based options is that all you need is an internet connection. Because PDFescape is so user-friendly, just about anyone can view or edit PDFs.

Core Features

  • View and edit PDFs
  • Annotate PDF documents
  • Fill out PDF forms
  • Create basic PDF forms
  • Secure PDFs
  • Share PDFs online

11. Sejda Online PDF Editor


Image Source


Sejda offers a free online PDF editor that you can use to quickly and easily manage your PDF documents.

According to Sejda, files stay private and are deleted after 2 hours. And it’s free for up to 200 pages, 50 Mb, or three tasks per hour, which suits most people’s needs.

What we like: You can add files from your local computer, Dropbox, and Google Drive; Sejda makes it easy for the end user—you. They also offer a free desktop version for Mac with a low-cost annual upgrade.

Core Features

  • Connect with Dropbox, Google Drive, or hard drive
  • Edit or add text and links to your PDF
  • Add images to your pdf
  • Fill and sign PDF forms
  • Add shapes or block text on your PDF
  • Find and replace text in PDFs

The 5 Best Free PDF Readers for Windows

1. Ashampoo PDF Free

Image Source

Ashampoo is a free Windows download lets users create, merge, and edit PDFs. A light version of their more robust paid PDF software, it’s plenty robust for most users.

With simple word processor-style editing, the ability to add pages, merge documents, and sign-and-fill, Ashampoo covers the most common basic PDF uses and needs.

Image Source

What we like: Ashampoo’s free PDF reader is a convenient, free option for anyone needing to make simple adjustments.

Core Features

  • View and search PDFs
  • Create, merge, and edit PDFs
  • Create PDFs from any Windows application
  • Fill and sign PDFs

2. MuPDF

Image Source

MuPDF is a standard PDF reader for viewing and editing PDF files.

You can fill out text forms, annotate documents, and use it to convert PDF files into other file types like HTML, SVG, and CBZ. You can also write scripts in Javascript to alter your documents.

What we like: If you want a low-memory PDF reader that you can easily edit and view files on, MuPDF is your best option.

Core Features

  • Small file size
  • Read and annotate PDFs
  • Fill out PDF forms

3. SumatraPDF

Image Source

Even though SumatraPDF lacks some advanced features like annotation, document signing, and form-filling, Sumatra PDF provides an intuitive and fast reading experience; its other key features make it an excellent reader. 

It has multiple viewing modes like a single page, book, and presentation and shortcuts that help you navigate any PDF file. If you just need to read PDFs for work, consider using SumatraPDF.

What we like: The variety of Sumatra PDF‘s viewing modes makes it easy for users to access and read the information they’re looking for quickly.

Core Features:

  • The small, portable PDF reader can be used on a USB stick
  • Simple user interface
  • Read and annotate PDFs

4. Slim PDF

Image Source

Slim PDF is one of the smallest PDF readers in the world, taking up just 15 MB of space on your computer.

Despite its tiny size, this free PDF reader has many advanced features that complement core functionalities, allowing you to print, search, zoom, and rotate PDF files.

It’s available for Windows, Mac, and Linux.

What we like: Slim PDF is small but mighty. Slim PDF is an excellent choice if you want a solution that strikes the perfect balance between being lightweight and powerful.

Core Features

  • Open and view PDFs
  • Add comments or annotate PDFs
  • Fill & sign PDFs
  • Dark/light theme options

5. CoolPDF

CoolPDF is a small download of less than 4MB, and it’s fast. Some users say there’s a learning curve to the interface, and they experience lots of pop-up ads, but the trade-off is a minimal file size — which is great for users looking for speed.

Image Source

What we like: Any easily accessible PDF reader of small file size can greatly benefit Windows users who want something fast.

Core Features

  • View and print PDF
  • Crop PDF file
  • Take text and graphics out of PDF document
  • Convert PDF to BMP, JPG, GIF, PNG, WMF, EMF, EPS, TIFF
  • Extract PDF to TXT
  • Support PDF files of all versions
  • Work with 72 different languages
  • Zoom in/out and rotate page displays
  • Slide show PDF document with full screen

The 5 Best Free PDF Readers for Mac

1. Highlights PDF Reader

Image Source

Touted as the PDF reader for research, Highlights goes far beyond reading or viewing PDFs. It’s packed with easy-to-use features that make taking notes on PDFs easy.

You can open any PDF file, highlight text, snag valuable images, and add comments. That information is pulled into a separate screen so you don’t miss critical information.

What we like: Highlights is one of the best options for taking notes on existing documents, whether for your research or sending messages to a graphic designer to share specific feedback.

The paid version is even more versatile, but the basic free version is sufficiently robust for most users.

Core Features

  • Read and annotate PDFs
  • Track notes in a separate document
  • Merge annotations and sort by category
  • Access on any Apple devices

2. Preview

Image Source

Even though Preview is the pre-installed PDF reader on every Mac, it’s more powerful than you think.

On Preview, you can view and annotate your documents, combine documents, fill out and sign forms, edit images, share files, and even export a password-protected PDF.

Preview is the best choice for someone who wants to use one PDF reader for personal and professional matters.

What we like: Preview is the best choice for someone who wants to use one PDF reader for personal and professional matters.

Core Features

  • Easily view or edit any PDF or other image file format
  • Fill and sign PDF forms
  • Secure PDFs
  • Combine PDF documents
  • Two-way conversion between PDF and other file formats

3. Skim

Image Source

Skim is a PDF reader initially designed to help academics read and annotate scientific papers in PDF format. Still, the platform now improved its functionality to let anyone view any PDF file on the reader.

On Skim, you can highlight text, take notes, take snapshots, export notes as text, and integrate with third-party apps like BibDesk, a bibliography manager.

What we like: Designed with academics in mind, Skim’s annotation and markup features put it above the competition.

Core Features

  • View, edit, and annotate PDFs
  • Highlight important text and take snapshots
  • View all your notes and highlights
  • Convenient reading in full screen
  • Allows powerful presentations with built-in transitions
  • Save passwords in Keychain
  • Export notes as text

4. Wondershare PDF Reader

Image Source

While Wondershare isn’t completely free, it does offer a free trial. However, this may be a good option for someone who needs a pdf editor for one-off projects.

With Wondershare PDFelement, you can not only edit documents and convert them to PDFs, but it also allows for digital signatures, offers watermarks, and makes it easy to create forms.

What we like: Wondershare’s free version offers a robust assortment of features and functionality users typically need to pay for.

Core Features

  • View and edit PDFs, including adding graphics
  • Convert PDFs to and from different file types
  • Batch and compare PDFs
  • Annotate, fill, and sign PDFs
  • Scan and create PDFs

Edit PDFs With Ease

PDF editing software is a must for businesses and professionals. The right PDF editor can aid your team with collaboration and file management.

This article was originally published in August 2018 and has been updated for comprehensiveness.

New Call-to-action