The Relationship Between Content Marketing and SEO? It’s Complicated.
How to (Easily) Make Perfect Content Calendars in Google Sheets
What do you use spreadsheets for?
If you’re anything like me, you likely use them to collect data, track campaign or blog post analytics, or keep track of weekly assignments.
But have you ever thought about using spreadsheets to make a calendar?
And, more specifically, have you ever thought about using Google Sheets to make a functional calendar?
If you often work on campaigns for a few different clients, creating individual calendars in Google Sheets could be uniquely useful for ensuring the client understands when certain content will go live. Alternatively, perhaps you need to create an internal Google Sheet calendar for your team to keep track of upcoming projects.
Making a calendar in a tool that’s commonly used for spreadsheets sounds a little intimidating, but don’t worry, the process is actually pretty intuitive. And with the help of some tips, you can easily make a functional calendar that you can sync your schedule with.
Below, we’ll go over how to make a calendar in Google Sheets and include some tips that’ll help you elevate the design. At the end, your calendar will look something like this:
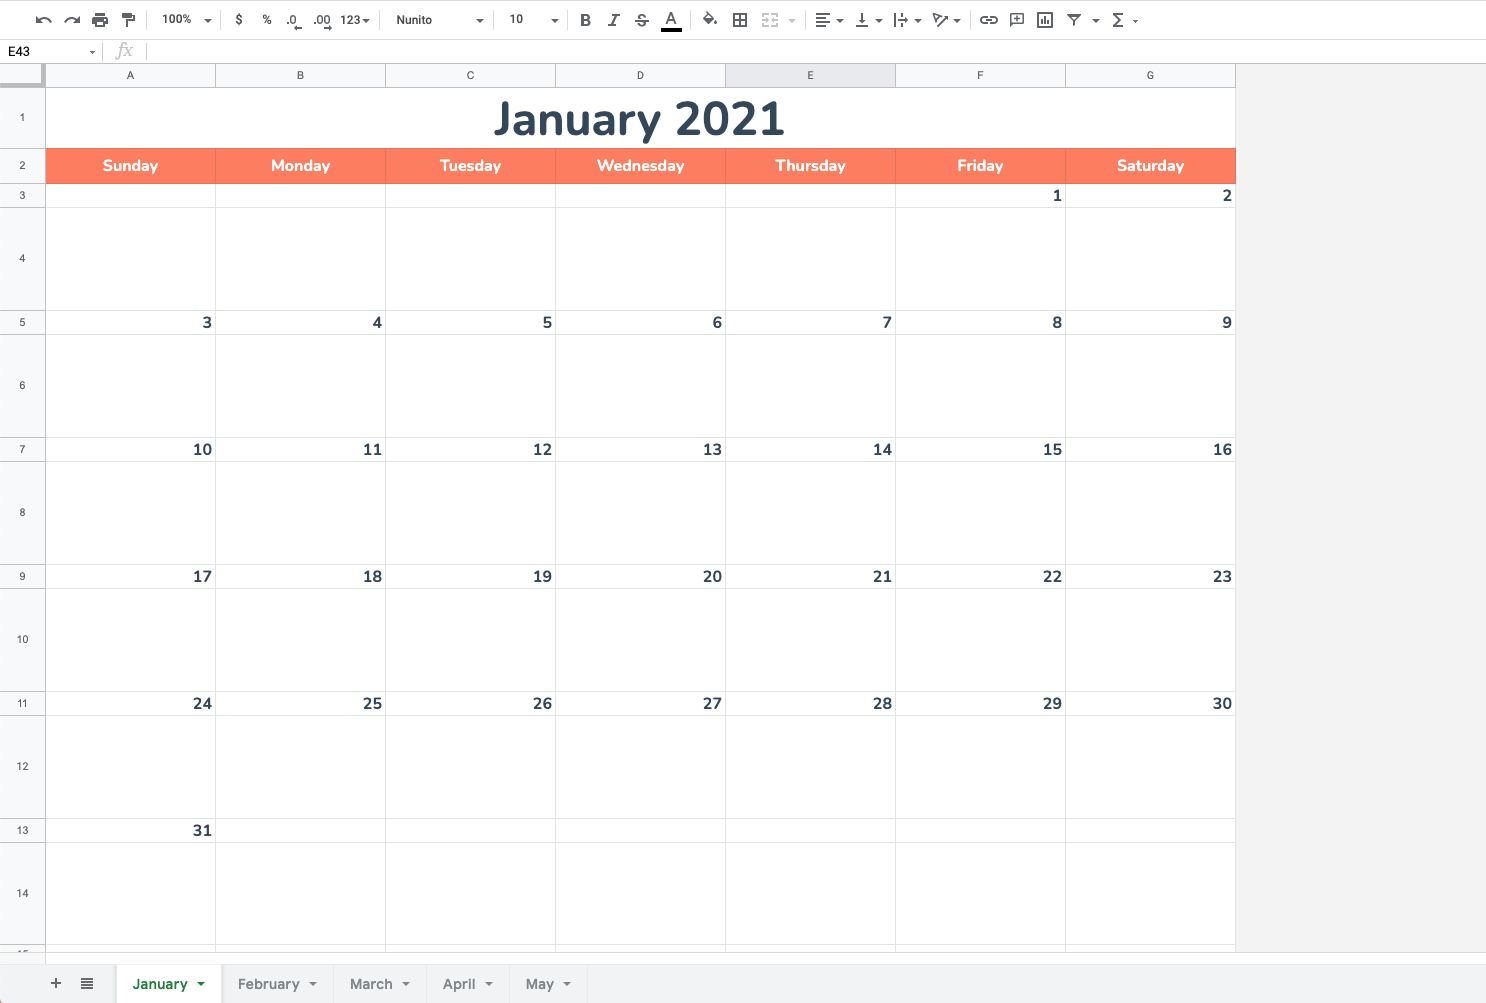
So start a new spreadsheet and get ready to create your very own calendar. 📅
1. Open a new spreadsheet and choose your month.
First, open a new spreadsheet. Then, delete columns H — Z. They won’t be needed.
Then, choose your month. For this example, I decided to do January 2021, so I filled that into the first cell. What’s great about Google Sheets is that it automatically recognizes dates, so typing in a month, followed by the year in YYYY format will tell Google that you’re going to be working with dates.
2. Begin to format your calendar.
Next, format your calendar. I selected the text, January 2021, in Column A, Row 1. I highlighted seven columns (A-G), and clicked Merge to make that cell span across the entire column. You can find this button to the right of the Fill tool.
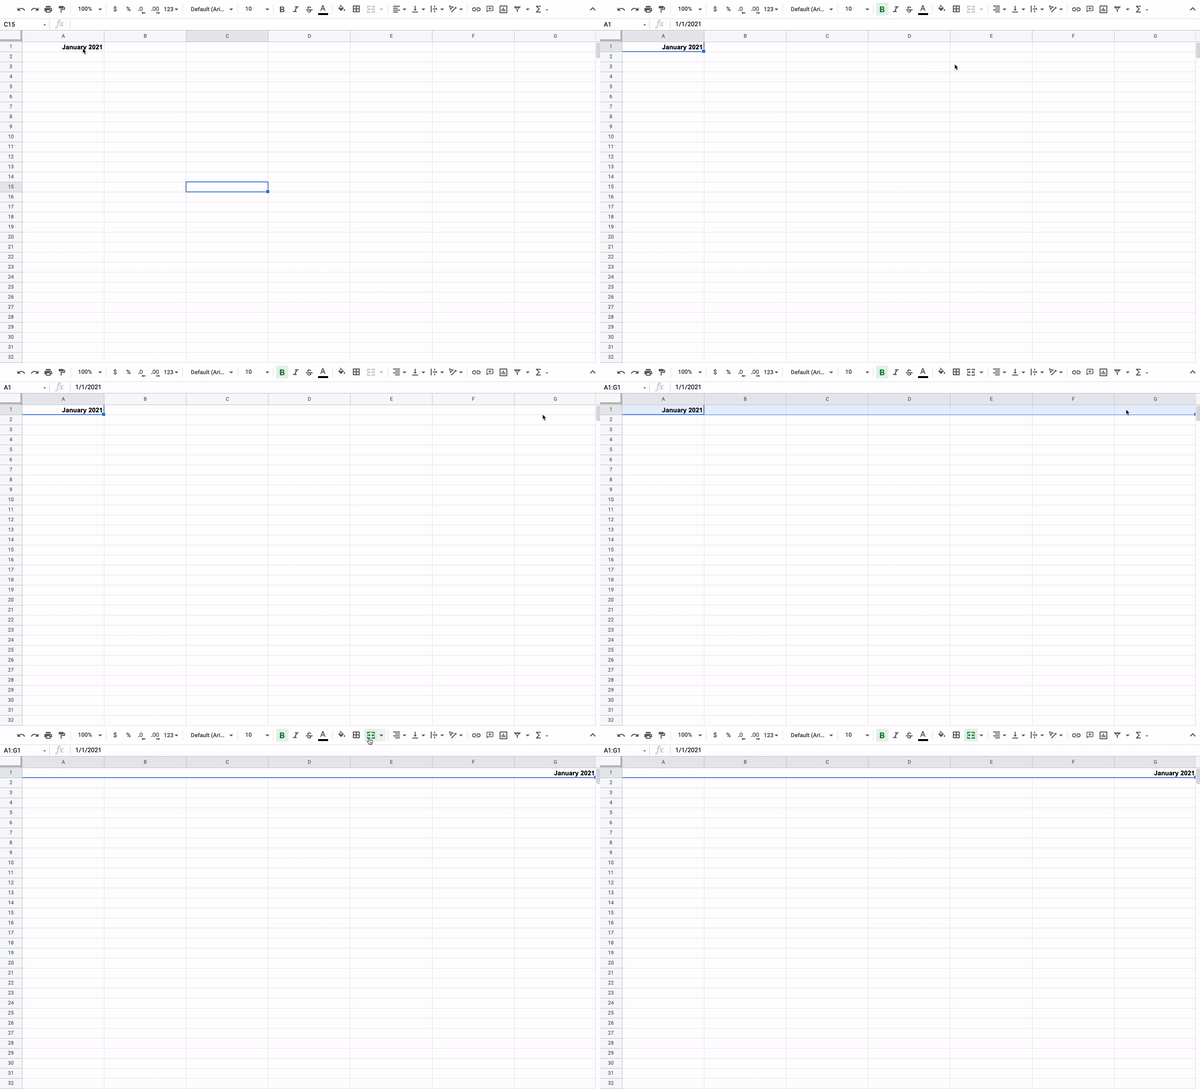
Here, I also center-aligned my text using the tool next to Merge. Then, I increased the font size and bolded the month.
3. Use a formula to fill in the days of the week.
Next, fill in the days of the week in each column (A-G). You can do this manually but I decided to use a formula. Sheets has a function that lets you type in formulas to complete certain actions at once.
To fill in days of the week, in the cell where you want your first weekday to be, type: =TEXT(1, “DDDD”). What this tells Google is that your number will be replaced by a date or time and the format you’re using is weekdays.
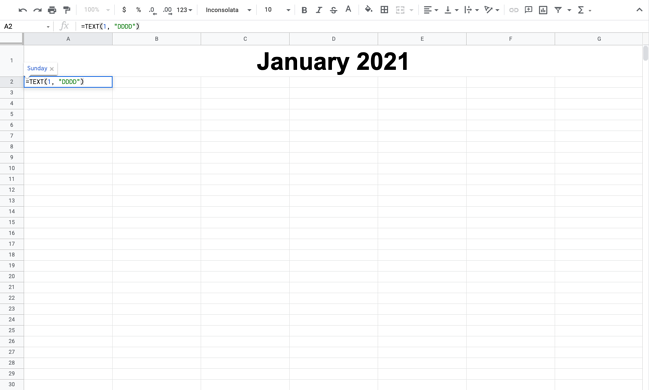
Highlight the number 1 in the formula and replace it with: COLUMN(). Then, press enter and select your first day. You’re going to copy the formula in Sunday’s cell by dragging the selector to the end of your row, (A-G), and pressing enter again.
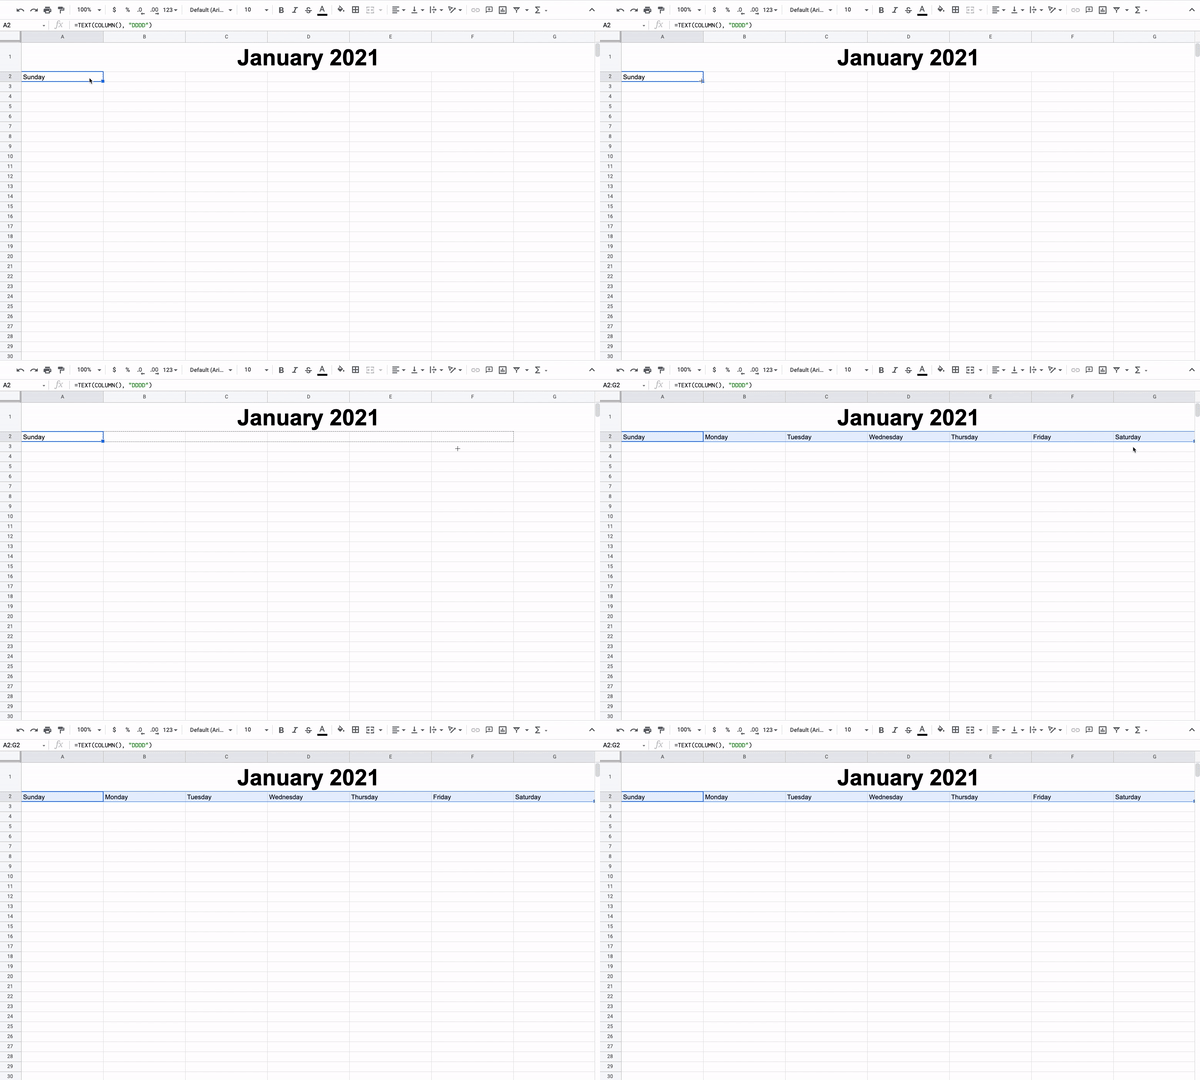
Pressing enter should automatically fill in the rest of the week. Remember, if this doesn’t work for you, you can always fill in the days manually.
Pressing enter should automatically fill in the rest of the week. Remember, if this doesn’t work for you, you can always fill in the days manually.
4. Fill in the numbers.
Excellent! You have your days of the week. Now we’re going to fill in the numerical values. Before this step, I took the time to add color to the days row and changed the font to one I liked a little more.
For the numerical values, we’ll simply identify the first day of the month and click and drag to fill in the rest.
How?
Place the number 1 on the box right underneath the first day of the month, the click and drag horizontally.
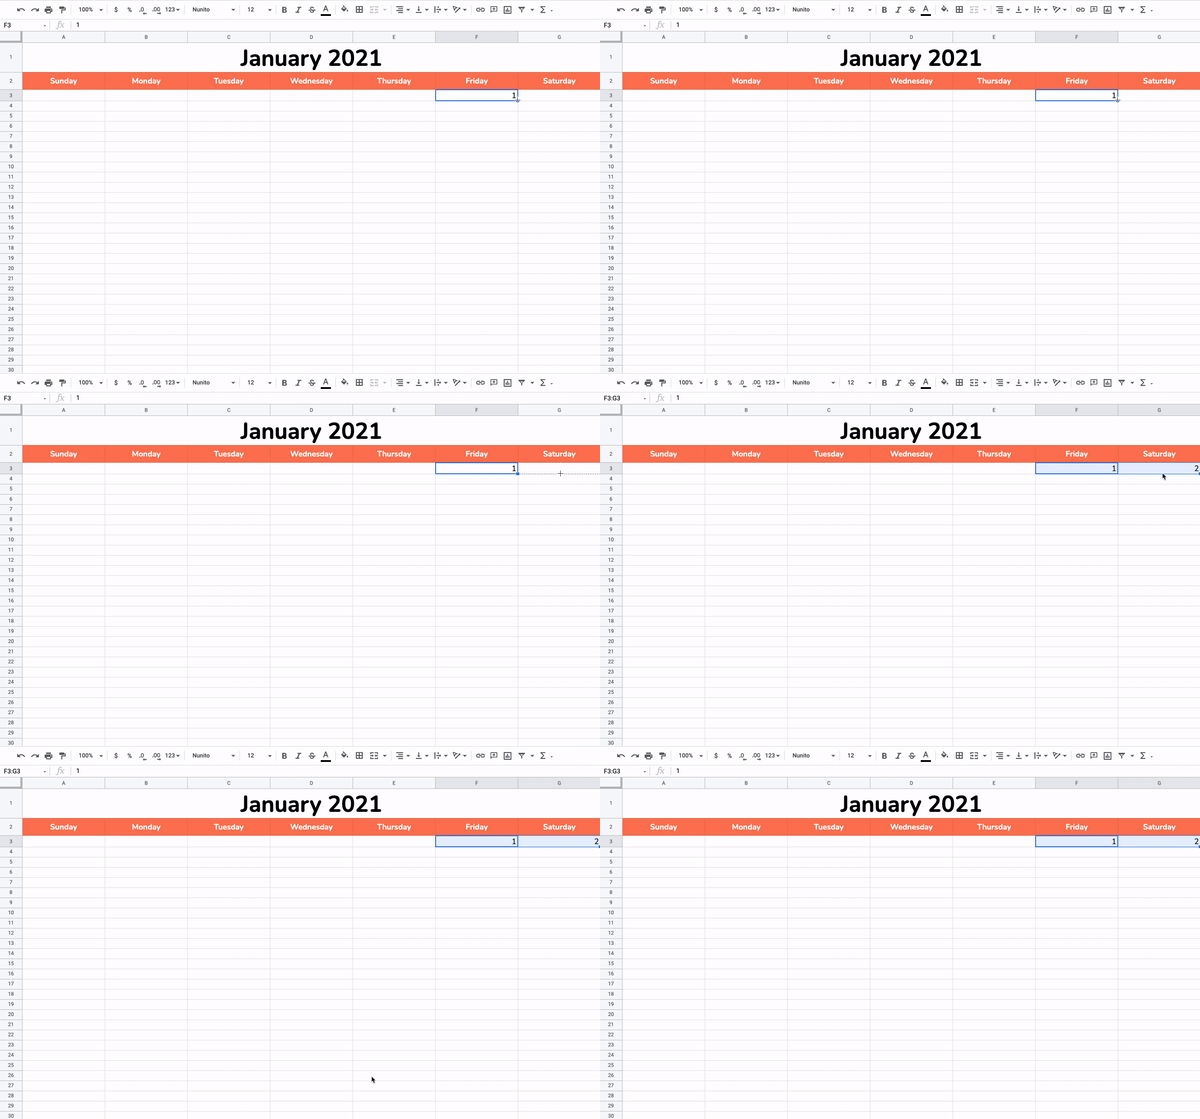
5. Fill in the rest of the numbers.
Note: In this step, I filled in the calendar numbers every other row to help with my formatting later.
Now that you’ve filled out your first row, it’s time to fill in the rest. Manually insert the next number under “Sunday,” then click and drag horizontally to fill in the rest.
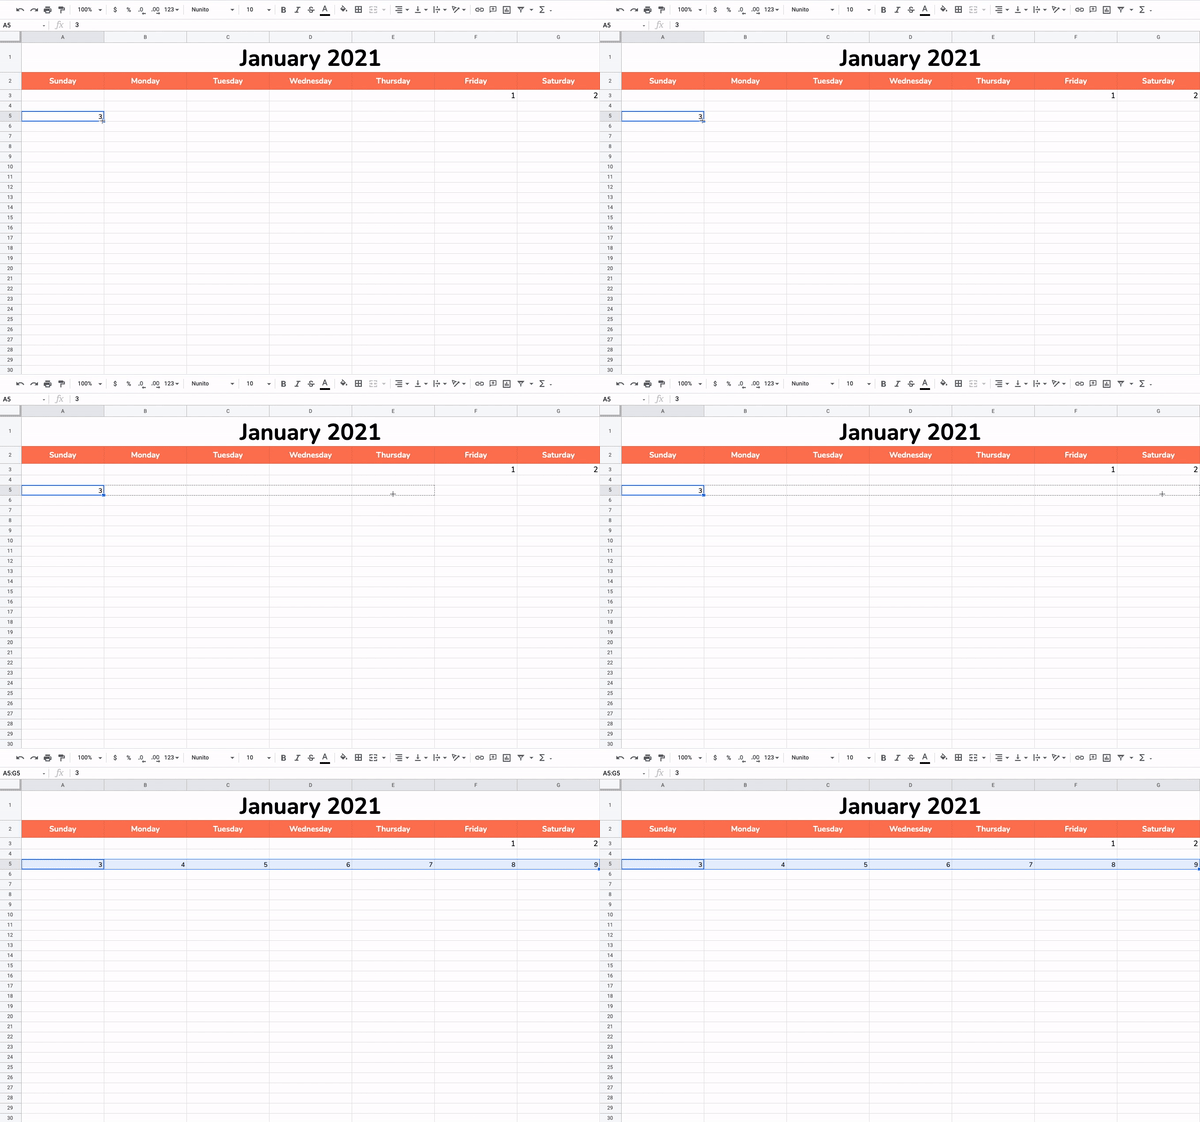
Repeat the process for the next rows. You’ll insert the first number manually, the click and drag down the row. Here’s what that looks like for the next row in January.
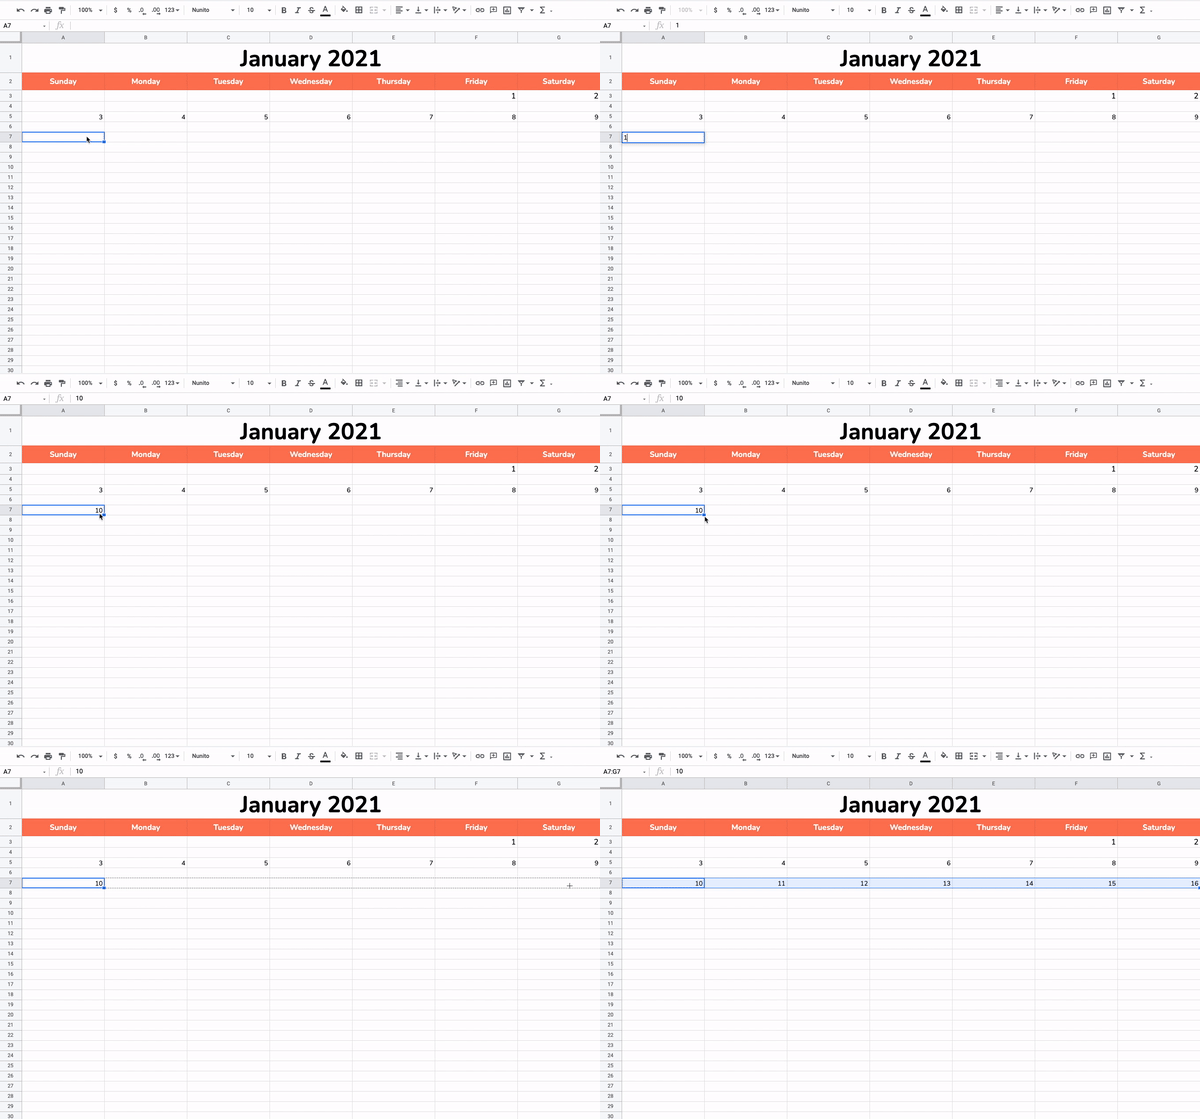
Note: Make sure to end the month on the right number! For January, that would be the 31st.
6. Reformat your calendar if necessary.
Everything is starting to look like a calendar, right? At this stage, I reformatted things to clean up the look of my calendar a little.
Remember those extra rows in between the numbered rows? I expanded those rows to create boxes underneath the numbers. To do this, I simply dragged the rows down to make those cells bigger. 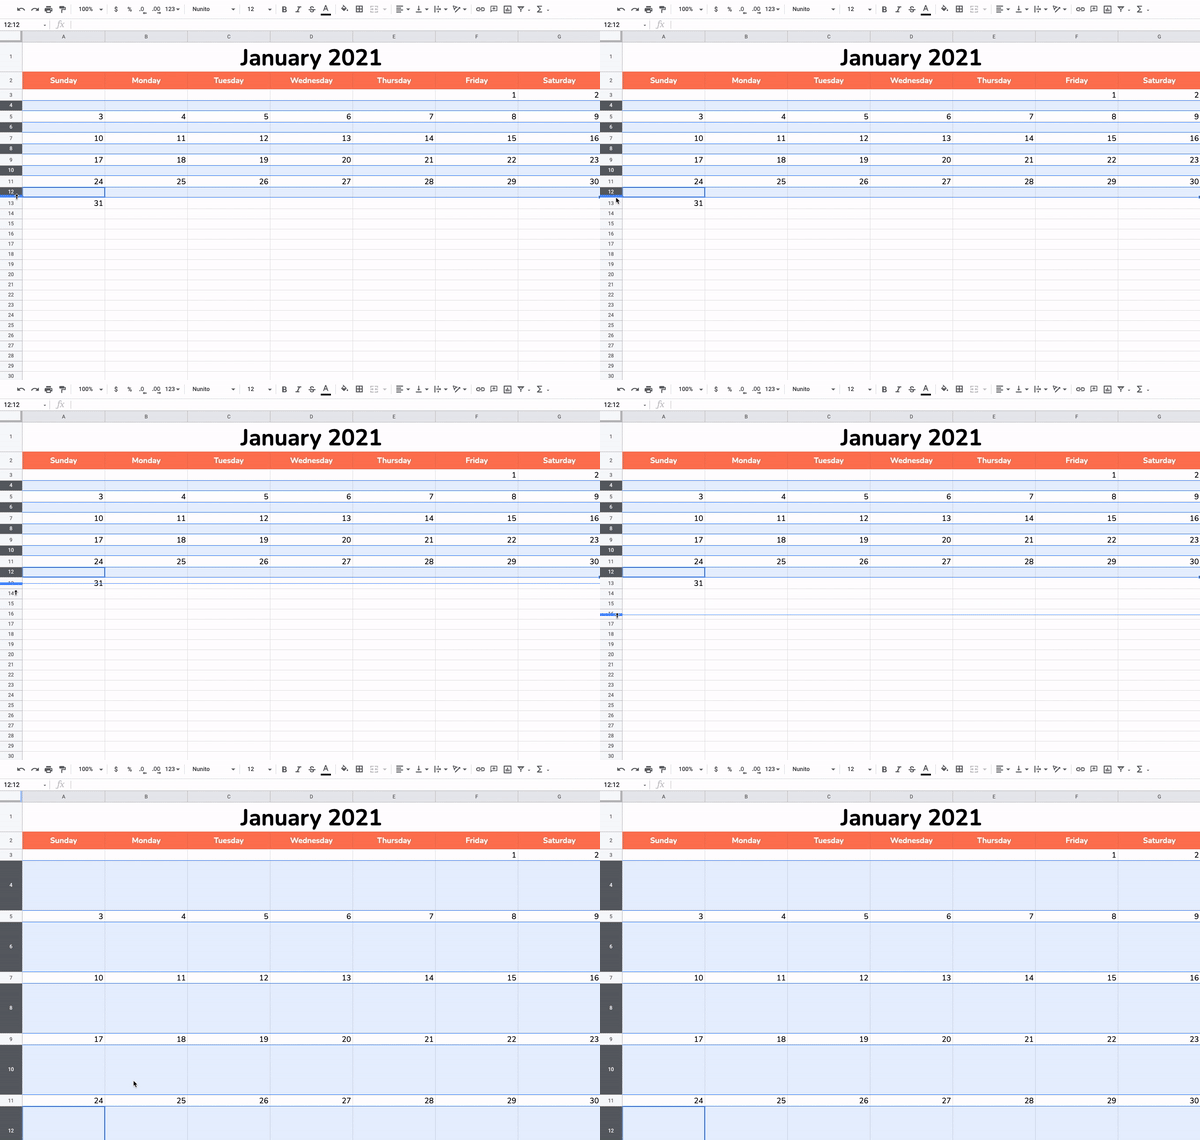
Here are some additional formatting tips:
- Select the empty rows underneath your numbers and center them using the center text alignment tool.
- Select your entire calendar and vertically align all elements so that they’re in the center of their cells. To do this, use the vertical alignment tool.
- Bold your day numbers.
- If desired, lightly shade your numbered rows.
- If desired, gray out the Saturday and Sunday columns so that your workdays stand out.
7. Add design elements to professionalize the look.
Finally, you can add in some fun design elements to personalize the look and feel of your calendar. If it’s for a client or upcoming project, you’ll want to incorporate necessary launch days here.
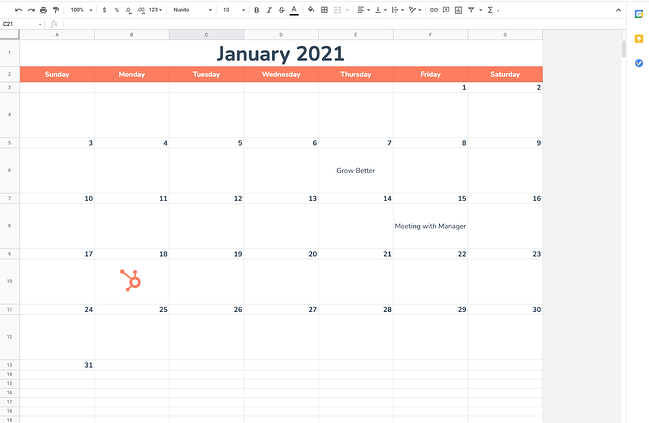
For this step, I added in a few fun images, included a few hypothetical calendar events, and played with font sizes.
8. Repeat the process from February to December.
It’s time to repeat for the month of February to December. Simply duplicate your January calendar once you’ve designed it how you want it to look. To do this, right click the sheet’s tab and select Duplicate from the menu.
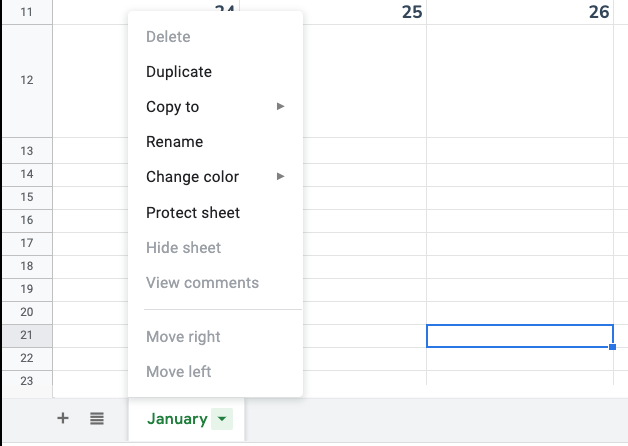 To fill in the numbers, you’ll only need to know the beginning day, then click and drag to fill in the rest of the rows. Here are the first days for every month for the year 2021:
- January: Friday
- February: Monday
- March: Monday
- April: Thursday
- May: Saturday
- June: Tuesday
- July: Thursday
- August: Sunday
- September: Wednesday
- October: Friday
- November: Monday
- December: Wednesday
Next, you’ll want to know how many days you’ll need to fill in. Here are the number of days you’ll need for each month:
- January: 31
- February: 28 or 29
- March: 31
- April: 30
- May: 31
- June: 30
- July: 31
- August: 31
- September: 30
- October: 31
- November: 30
- December: 31
And then, you’re done!
It’s handy to use Sheets because you can open your calendar right on your browser. You can also keep track of your schedule in a place that’s separate from your phone.
Alternatively, you can create important business documents such as social and editorial calendars. Below, I share a template that’s perfect for the task.
Google Sheets Calendar Template
Here’s an editorial calendar template for all of your editorial planning needs. This template helps you lay out a strong editorial strategy on a daily basis.
Featured Resource: Free Editorial Calendar Templates
Use a Google Sheets Calendar to Organize Your Tasks
If you’re handy with Sheets and want to give it a shot, create a Google Sheets calendar. It’s a great option if you need to create a clean calendar to track an internal marketing campaign, organize a client’s upcoming projects, or share an event calendar with key stakeholders. But if you don’t want to create one from scratch, use our editorial calendar template to jumpstart your planning and organization efforts immediately.
Editor’s note: This post was originally published in May 2020 and has been updated for comprehensiveness.
![]()
The Ultimate Round-Up of Content Marketing Tips
There are nearly five billion active internet users and over four billion social media users worldwide — simply put, that’s a ton of opportunity for your brand to engage with an audience and achieve massive growth for your business.
One of the most effective methods for spreading brand awareness and attracting new customers is through content marketing.
Content marketing is a marketing strategy that focuses on creating, publishing, and distributing valuable and relevant content online with the purpose of reaching a targeted audience and incentivizing profitable customer action. Ultimately, content marketing is a critical component for long-term, sustainable growth.
And yet, despite its immense impact, many marketers don’t know how to implement a successful content marketing strategy.
To ensure you’re able to cultivate a truly valuable marketing strategy, we’ve created this round-up of content marketing tips. Keep reading to become a true content marketing expert.
1. Make sure your content has a clear, measurable business goal.
You might be overwhelmed by the sheer amount of content you can create for your business — anything from Instagram Stories, to blog posts and e-books, to podcasts.
However, as Karla Cook, Senior Manager of the HubSpot Blogs, notes, “[It’s critical] every single piece of content you’re creating has a clear, measurable business goal in mind — and simply ‘getting views’ isn’t a complete business goal. Take the time to think about how content can serve your overall marketing strategy, and create pieces that tie back to that.”
For instance, let’s say you decide you want to lean heavily into a blogging strategy. Simply crafting and publishing content isn’t enough — instead, it’s important you identify your target audience and decide how your content can best serve that group. Additionally, you’ll want to use analytics to ensure your content is able to reach the right people with the appropriate search intent.
Once you identify how to serve your audience, you’ll want to ask yourself, “How does this tie back to the business?” While it’s critical you write quality content to grow your audience, it won’t attract prospects if it doesn’t tie back to your business.
Take a look at the strategy that helped the HubSpot blog break a year-long traffic plateau to learn more about cultivating a business-focused strategy for content creation.
2. Know your audience.
Content marketing is all about attracting the right audience — that is, those who are most likely to engage with your brand and buy your products. But you can’t write content that attracts the right audience until you know your audience.
No need to go out and interview every customer who’s ever done business with you, although that could definitely be helpful. Sit down with your team and create a buyer persona, the ideal customer who’s best served by your products. You’ll want to take into account both psychographic and demographic information, and create a buyer persona document that your team can refer to.
Knowing your audience helps you create content that speaks to them as they go through the buyer’s journey.
3. Understand your buyer’s journey.
A good content marketer understands that their strategy needs to engage and delight readers at any stage of the buyer’s journey. While your content should initially attract new visitors to your business, it should also convince hesitant prospects to purchase, and encourage customer retention and long-term brand loyalty.
For instance, perhaps some customers are hesitant to purchase your product because they believe you need extensive video knowledge to succeed with it. To help mitigate concerns and aid your sales team, you might create a video campaign to show customers how to use video marketing.
If you’re feeling stumped, learn how to create content for every stage of the buyer’s journey.
4. Solve for the reader.
When you’re creating content, you have two primary goals: to educate and to help someone solve a problem. While the objective is to generate leads or drive readers toward a purchase, you also want to establish your brand as a trustworthy source of information first. Then, after they’ve come to trust you, readers can convert and turn into paying customers.
Every piece of content should solve for the reader by answering their questions, offering useful resources and tips, and getting them slowly acquainted with what you offer and how you can help.
For example, if your brand offers vacation rentals, your content should revolve around travel and provide important information that potential travelers need. You would write city-specific travel guides, lists of best places to visit, lists of best practices for traveling solo, and so forth. Once a reader continues to come to you as an authoritative source of information, they’ll trust you enough to make you their provider.
5. Adopt the pillar-cluster model.
If you want to create a better reading experience while improving your SEO, organize your content using the pillar-cluster model.
In this model, a pillar page covers an umbrella topic, then cluster pages support that topic. You then use internal linking to connect all the topics together and signal to Google that they’re related.
For example, if you’re a web design firm, your umbrella topic might be web design. You’d write a pillar page titled, “The Ultimate Guide to Web Design.” Then, you would write pages such as “UX Design 101” and “How to Use HTML & CSS” to support that umbrella topic.
6. Write in-depth content.
It’s been well-established that, on average, longer content performs better in search engines than shorter content. So, when writing content for your website, you should make it long — but not just for the sake of it.
As you seek to solve for the reader, you should include everything they need to know in one post about the specific topic they’re looking for. You shouldn’t write long content with paragraphs upon paragraphs of fluff. Rather, answer related questions and bring up any tips that will help them walk away with all the information they need.
To find out the types of questions people need answers to, look at the “People also ask” box when you search the keyword you’re targeting. This will tell you the types of queries Google has picked up on that are related to your search.
Keep in mind that each post or page should only cover one highly specific topic and only target one to two keywords. You’ll want to do this for various reasons:
- You’ll avoid self-cannibalization because you won’t be writing about general topics.
- You’ll strengthen topical authority by writing in-depth content on one specific keyword.
- With less keywords covered per page or post, you’ll have more keywords to target in other pages.
7. Rely on analytics to track your performance.
Quality content is important, but it doesn’t mean much for your business if your visitors and viewers don’t convert into customers. This is why analytics is so important — by carefully monitoring, tracking, watching, and reporting on the numbers, you’ll be able to gauge what’s working, what isn’t, and what could be working better.
Traffic is important, but it’s important you also focus on conversion rates. Perhaps your Instagram account has only 1,000 followers — alternatively, your blog has 7,000 readers. However, your Instagram page has a conversion rate of seven percent, and your blog only converts at about .01. This should tell you that, while your blog is important for an initial introduction to your business, your Instagram is critical for sales and shouldn’t be ignored.
Additionally, focusing on analytics will help you refine and improve your strategy for the future. For instance, let’s say you notice your blog readers are particularly interested in blog topics related to e-commerce. This can help direct your future strategy — you can choose to focus more heavily on e-commerce topics, which will increase traffic (signaling your readers are happy with your content), and ensure you’re spending time and effort where it matters.
8. Keep content consistent and up-to-date.
Victor Pan, Head of Technical SEO at HubSpot, urges content strategists to implement simple SEO tactics to ensure content remains up-to-date and relevant to search engines. He says, “You can tell if being up-to-date is important to your topic if ‘keyword+year’ shows up in the ‘related searches’ of a Google search result.”
To ensure your content remains relevant and updated, Pan recommends the following three tips:
- Exclude the year in the URL when you’re optimizing your content. Great URLs don’t change.
- Include the year in the title of your content.
- Schedule your editorial calendar to revisit this content every year so you can keep it up-to-date, which could include updating the title tag, meta description, and content itself.
It’s important to note that if you do implement an optimization strategy, it’s critical you don’t update the URL. The URL should remain the same to ensure you don’t need to re-earn backlinks. Additionally, you don’t want to create unnecessary redirects.
Overall, consistency is key. Publishing consistent content will help you rank in the SERPs, but it will also establish trust with your audience.
9. Adopt a historical optimization strategy.
A few years ago, the blogging team at HubSpot figured out the importance of adopting a historical optimization strategy. Through repurposing old (yet still high-quality) content, the team was able to double monthly leads, and increase monthly organic search views by an average of 106%.
Ultimately, you don’t want old content to go to waste. If a topic is particularly evergreen (like “how to create a blog”), it makes sense you’d put time and effort behind repurposing it.
10. Repurpose your content.
It takes time and talent to craft highly useful, engaging content — so, by finding ways to recycle existing content, you’re ensuring peak efficiency. Additionally, repurposing content allows you to reach new audiences. For instance, let’s say your podcast team published a high-performing episode. Why not turn that episode’s topic into a blog post?
Alternatively, maybe you created a blog post that performed significantly well — now, you might consider creating a YouTube video that covers a similar topic to reach an audience that prefers video over text.
Repurposing your content will also ensure your audience has more than one chance to see it. Your readers, viewers, and followers are busy. Consider simply implementing a new content promotional strategy on a piece of content that deserves to be resurfaced.
11. Ensure your brand voice remains steady across channels.
Whether you visit Spotify’s Twitter page, YouTube account, or stumble across one of its billboard advertisements, you can quickly get a sense for the brand’s funny, candid, youthful voice. This is what makes me feel connected to Spotify — its unwavering brand consistency, regardless of the channel on which I choose to engage.
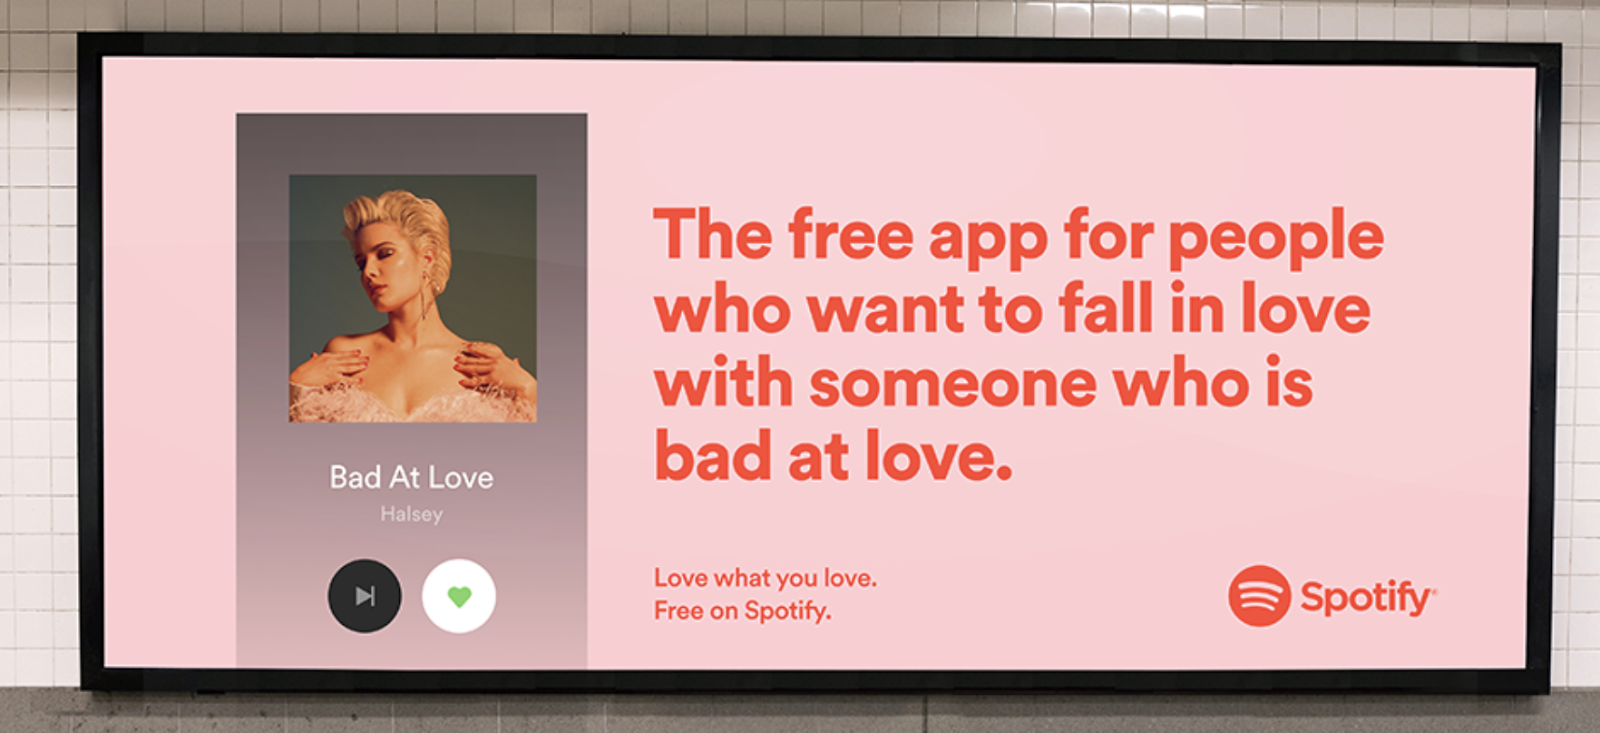
Even if you have a marketing team of 30, it’s critical to produce similar messaging that aligns with your brand’s voice and values across channels. A viewer should watch one of your YouTube videos and then click a link to a blog post and think, “Ah, yes — this is definitely the same company.”
If you need help crafting or refining a brand voice, check out How to Find Your Brand’s Voice.
12. Personalize your content.
Have you ever visited a website multiple times, and each time, the experience gets more and more tailored to your tastes? (Think Amazon.)
Personalizing your website content is crucial. Your business doesn’t own a social media site, meaning you can’t personalize content there based on your follower’s behaviors. That’s why personalizing your website’s content is so important. On your website, you have complete control over what certain users see based on the pages they’ve visited, their dwell time, their account activity, and so on. You can also personalize by device and buyer persona.
One way you can get started is by including a reorder button on a product page for users who’ve ordered that product before. You can also create a popup that contains a CTA to download a guide that helps them get the most out of the product. To better serve each prospect or customer, consider using content mapping, which will help you figure out which content serves which buyer persona at certain stages of the buyer’s journey.
You don’t have to implement personalization manually: you can use personalization software to trigger certain actions, show certain content, and send personalized emails.
13. Use data to strengthen your points.
83% of marketers don’t use data and statistics in their content marketing.
Just kidding — I made that up. But using data is a great way to highlight the importance of a piece and strengthen your points.
Using stats and data provides an irresistible hook and allows you to show why one should read the piece in the first place. For example, I opened this piece with stats on how many people are online, highlighting the fact that content marketing can help you reach a large segment of the population.
The great thing about data is that it can be used both on your website and on social media platforms. Whenever you use one, be sure to tie it into the value of your product or use it to validate your points. For instance, if you’re a water bottle brand, you can write a caption that reads: Did you know that people who don’t regularly drink water are 15X more likely to get dehydrated? Stay hydrated with your [water bottle brand].
I also made that statistic up, but you see my point: statistics and data can prove the value of the product or substantiate your arguments.
Whenever you use statistics, be sure to cite recent research (two years at the latest) whenever possible. More importantly, make sure to use factual, accurate data from reputable sources. Data integrity is critical — especially if your blog is widely read.
14. Publish original research.
Publishing original research can help you look more authoritative and knowledgeable, spurring brand trust and giving your content an edge over your competitors’.
While you often see Fortune 500 companies undertaking this task, it doesn’t have to be left to big names in the industry. You can publish original data, too, by carrying out surveys of your customers or prompting your followers on social media to take a questionnaire. You can survey them on a variety of product-, service-, or industry-related topics.
For instance, if you’re a content marketer at a travel agency, you can conduct a survey about the ways people grappled with the lack of traveling opportunities during the pandemic. You can then cite this original research in a blog post about restarting travel plans after the pandemic becomes a thing of the past.
15. Go beyond written formats.
The rise of video is not about to stop — and with rich video and image packs taking precedence in SERPs, you’d be remiss to not include video in your content marketing strategy.
Content marketers have long heralded infographics as one of the best multimedia formats to include in blog posts. Indeed, infographics have the advantage of being pinnable and easy to scan. And, while they’re still important, it’s time to diversify.
Creating a YouTube video is one of the easiest answers, but you don’t necessarily have to go down that route, especially if you’re not sure how to create a video marketing strategy. You can also include other formats such as interactive photos, editable code modules, interactive charts and graphs, and more.
16. Prioritize the user experience.
User experience is king. You can have the most well-written, well-researched piece of content, but if your website’s user experience is buggy, you’ll lose readers and have them bounce off the page — which is a highly negative ranking factor. Most importantly, those are leads that you won’t convert.
Make sure your site loads quickly, is mobile optimized, and has navigability features such as a table of contents and back-to-top button. Your content should be easy to read on all devices, with a series of clear, consistent headings and a sans-serif typeface.
Be sure to also optimize for accessibility website standards. You should provide alt text for all images, include captions in videos, offer a high-contrast setting for the website, and ensure that your content can be read out loud by a software.
17. Remarket your content.
When you repurpose your content, you take a previously-covered topic and turn it into a new format. When you remarket your content, you take the content that already existed and try to re-engage users who interacted with that content but didn’t convert.
There are so many variables that aren’t on our side. A visitor may not be looking for your product right at that moment; it may not be their pay day; it may not be the right day. By intentionally remarketing your content to those who’ve already shown an interest, you increase your chances of capturing their interest at just the right time. And that’s what content marketing is all about.
Content Marketing Tips for the Modern Marketer
Content marketing is here to stay. While it evolves every day, its essence never changes: content marketing is all about the reader, not about the brand. In your content marketing campaigns, seek to know your target audience, serve their needs, and solve their problems, and you’ll soon have an army of brand evangelists who market your brand for you.
Editor’s note: This post was originally published in April 2019 and has been updated for comprehensiveness.
![]()
How to Use Facebook: A Beginner’s Guide
Facebook has changed quite a bit since I first signed up for an account in 2008. Back then, Facebook was still called “The Facebook”, and my bio literally said, “Check out my MySpace, it’s waaaay better than my Facebook.”
Needless to say, Facebook has evolved at breakneck speed since my middle school years, and it’ll keep adapting at a swift pace for as long as it exists.
If you need a refresher on how to use Facebook for marketing your business or you want to sign up for a personal account, check out this in-depth explanation of how to use the most popular social media network in the world.
In addition to sharing their own ideas, users can engage with the content other people share on Facebook by reacting to it with a like, a laugh, disapproval, and even a hug. Comments and shares are additional ways users can interact with each other’s content.

Facebook for businesses works similarly, except businesses have Facebook Pages not profiles like individual users do. Businesses can use their Facebook Pages to engage with existing customers, target new customers, and administer customer support.
To fully understand Facebook and how it works, you’ll want to become familiar with common terms used on the platform. Here is a list of key Facebook terms and what they mean.
Profile
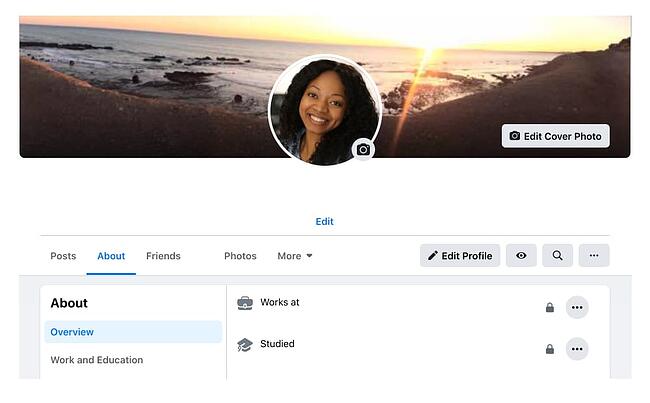
The Facebook profile is where your information will live. Your name, photo, hometown, workplace, education history, and so on can all be added to your profile. You can make your profile as public or private as you want by disabling the information you don’t want publicly visible.
Newsfeed
This is the place where all of your friends’ posts will appear. You’ll also see updates from business pages that you’ve liked. Your posts will also appear in the newsfeed where your friends can see them.
Timeline
Often confused with a newsfeed, the timeline is your personal record of all the posts you’ve shared and posts you’ve interacted with. While you won’t usually see friend’s status updates here, there is one exception — if they’ve tagged you in a post or a photo, it’ll appear on your timeline. Your friends can see your timeline by default if they search your name unless you’ve set your privacy settings to do the contrary.
Algorithm
The algorithm is an elusive concept. Essentially, the algorithm is a series of computations that Facebook’s servers do every second to determine what content you want to see, interact with, and click on next. The algorithm uses dwell time (how long you view a post), engagement, page likes, posts, and more to determine the type of content you might like to see. Over time, the algorithm gets better at determining what content to show you.
Status/Post
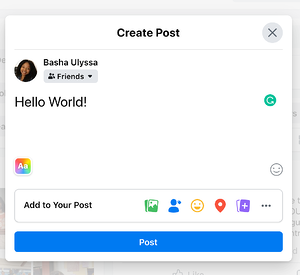
The two terms are often used interchangeably, but “post” is the term Facebook uses to describe something you share on the newsfeed. Text, images, videos, and location are just a few of the types of posts you can share to the newsfeed for your friends to see.
Friends
These are people you’ve either sent a request to and they’ve accepted or people who have sent you a request and you’ve accepted. Unlike other social networking sites that allow someone to follow you without you following them back, Facebook’s friend system requires both you and the other person to be friends with each other. A personal account for an individual cannot have more than 5,000 friends (and it’s not a good idea to make a second Facebook profile to get around this rule).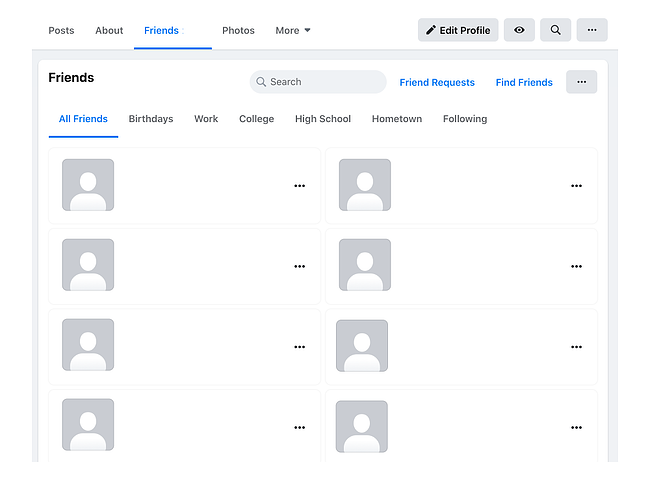
Followers
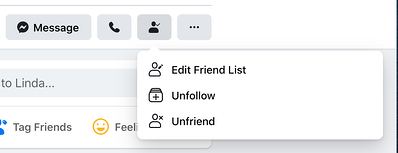
Facebook has a follower option as well. When you add new friends, you automatically follow them (and they follow you, too). This is Facebook’s way of adding this new friend to your newsfeed and making sure you see their posts (at least for a little while unless you stop engaging with them). For individuals who exceed 5,000 friends on their personal Facebook profiles, people can opt to follow them instead to stay up to date on their posts. Keep in mind, while Facebook automatically follows your friends for you, you can manually unfollow them without unfriending them. This action removes these individuals’ posts from your newsfeed. If you do this, you’ll need to search your friends individually and surge their timelines to catch up on their latest posts.
Groups
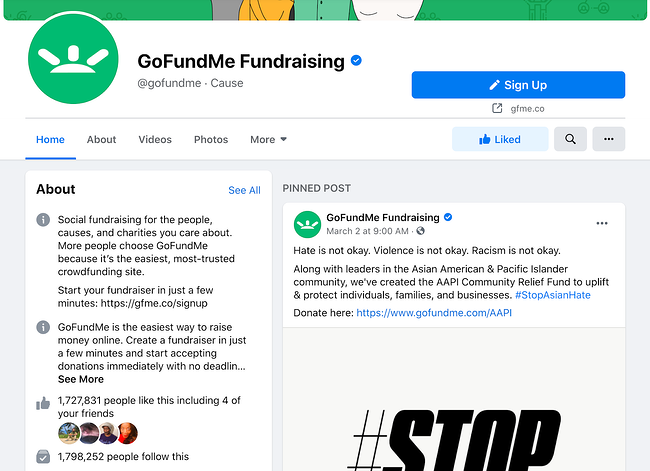
Facebook users with similar interests might find it helpful to create a group on the platform. A group is a community of users who interact with each other based on various topics set by the group’s admins and other users. Only individual users can be added to groups — pages cannot be part of Facebook groups. Admins have a wide range of permissions they can enable or disable to have the group function in a particular way.
Pages
Businesses use Facebook Pages to create a presence on the social network. Pages are not individual Facebook users — think of them as profiles for businesses. They can post updates, images, videos, and all the other types of content that profiles can. However, they have an advantage — Facebook Pages have the ability to connect to Facebook for Business and run ad campaigns.
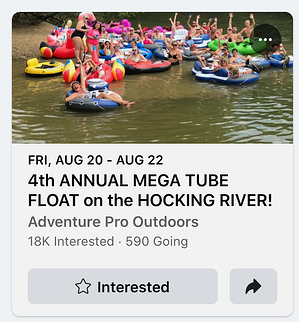
Events
With so much community happening on Facebook, individual users and businesses have the option to advertise events. The events can accept RSVPs, create a guest list, and share the date time, and location of the event. Events can be virtual through a video platform or they can be in person with a physical location.
Messenger
Instead of a direct messaging platform in the native Facebook app, Facebook Messenger exists as a separate application so users can chat one-on-one or in a private group setting. When using Facebook.com on a desktop computer, the messenger is accessible through the native Facebook website.
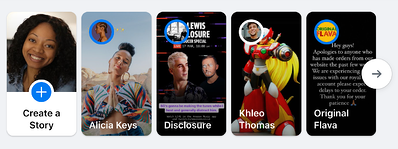
Story
Like Instagram stories, Facebook stories are another way individual users and business pages can connect with their friends and followers. Stories are short pieces of content that are visible for just 24 hours. After 24 hours, the stories disappear from the newsfeed.
Notification
Represented by the bell icon in the third circle below, a notification informs you when a friend engages with your posts, photos, videos, or timeline, you’ll receive a notification that explains what they engaged with and when. Friend requests will also appear here.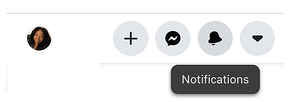
Now that you have an idea of what Facebook is and how it works, here’s a handy guide to using Facebook.
How does Facebook Work?
Facebook is powered by an algorithm that is able to learn each user’s preferences and interests. Then, the algorithm displays content like images, status updates, and videos posted by friends and businesses that the user might be interested in. The goal for Facebook is to get users to engage with, consume, and share content.
Along with this, Facebook runs advertisements for businesses and these ads are sprinkled in between organic content shared by your friends on the news feed. The ads are tailored to your interests so you see what the algorithm thinks you might be interested in based on content you’ve interacted with in the past. This is called behavioral targeting.
How the Facebook Algorithm Works
In the past, Facebook used a chronological timeline. This means that the posts on your newsfeed were listed in the order in which they were most recently shared by your friends on the platform. If your mom posted three hours ago and your best friend posted five minutes ago, you’d see your best friend’s post first, then your mom’s. However, that all changed in September 2011 when Facebook officially announced that it was doing away with the chronological newsfeed and replacing it with a more personalized experience. Rather than seeing your friends’ posts in the order they were shared, you now see the content Facebook’s algorithm thinks you’ll enjoy the most. This newsfeed is still around today.
1. Sign up for a Facebook account.
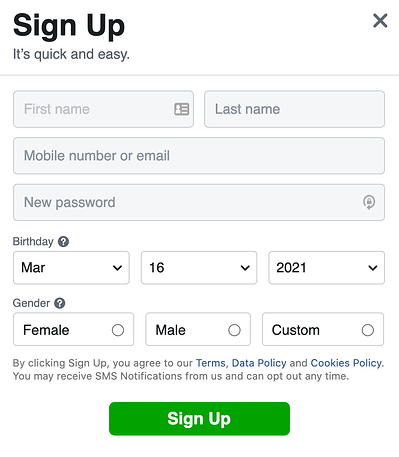
To sign up for a Facebook account, follow these three easy steps.
- Visit Facebook’s website.
- On the homepage, enter your first name, last name, mobile number or email, new password, birthday, and gender.
- Click Sign Up.
2. Set up your privacy settings.
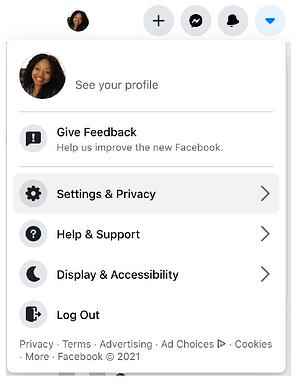
After you’ve signed up for a Facebook account, you can adjust your privacy settings to control who can see your profile and information. Follow these four simple steps to change your privacy settings.
- Click on the downward pointing arrow that’s located on the top right corner of any Facebook page.
- Click Settings.
- In the left sidebar, select Privacy.
- Set who is allowed to see your past and future posts. You can also control how people can find and contact you.
Odds are, there’s probably someone on Facebook who has the same name as you. To differentiate yourself from these people and help your friends and family find you on Facebook, personalize your profile by adding a profile picture, cover photo, and some personal information.
3. Personalize your profile.
Picking a Profile Picture
- Go to your profile and click on your profile picture.
- To pick your profile picture, choose a photo that you’re already tagged in on Facebook, one that you’ve uploaded to Facebook, or a photo from your computer. You can also add a frame to your profile picture.

Choosing a Cover Photo
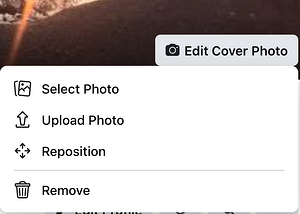
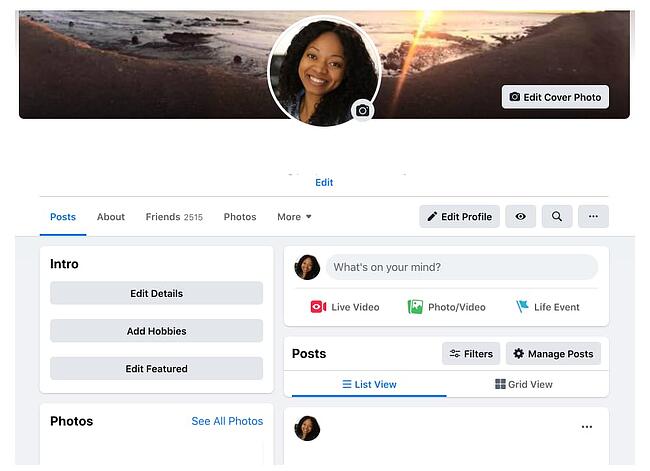
- Click the camera button on your cover photo, which is on your profile.
- To choose your cover photo, you can pick a photo from your Facebook profile, a selection of Facebook’s own cover artwork, create a collage, or upload a photo from your computer. You can also reposition or delete your current cover photo.
Updating Your Profile
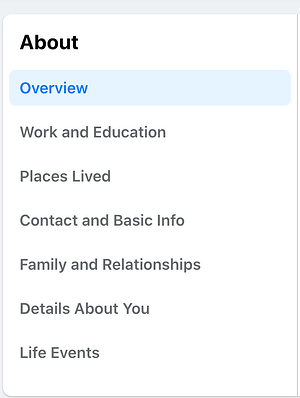
- Click the About section on your profile page.
- In this section, you can fill in information about your work and education, the places you’ve lived, contact and basic info, family and relationships, details about you, and life events.
4. Like and follow public pages.
On Facebook, you can follow and get updates from your favorite brands, celebrities, sports teams, and publications. The best way to do this is by searching for them on Facebook and liking or following their public page, which will have a blue verified check mark next to their name. After you like or follow their page, you’ll start to see their updates in your news feed.
5. Review your timeline.
Your timeline is a digital log of your Facebook activity in reverse-chronological order. Your status updates, uploaded photos and videos, and the photos you’re tagged in will appear on your timeline.
6. Add friends on Facebook.
There are three ways you can add friends on Facebook. You can either search for them, find them in the Find Friends tab, or import a list of contacts from your email, iCloud, or phone.
To find friends on Facebook, go to your profile, select the Friends tab, and tap the Find Friends button. You’ll see a list of friend requests from other people and a list of people you may know that you can add as a friend on Facebook.
If you upload a list of contacts onto Facebook, you can add your friends as you sort through each of your contacts.
7. Post on Facebook.
The main purpose of Facebook is to help friends and family connect with each other. And the best way to connect with your friends and family is by updating them about your life with status updates. To share a Facebook status, go to the text box at the top of your news feed page or on your profile page.
With status updates, you can share text with 15 different colored backgrounds, photos, videos, GIFs, stickers, and links.
You can also share other types of posts, like:
- Feeling/Activity: Share how you’re currently feeling or what you’re currently doing.
- Check In: When you visit a city, location, or place, check in and let your friends know where you’re at.
- Tag Friends: If you’re hanging out with your friends, tag them in your status and share what you’re doing.
- Tag Event: If you’re at an event, you can tag it in your status and share what event you’re attending.
- Ask for Recommendations: If you just moved somewhere or you’re about to visit a location, you can ask your Facebook friends for recommendations on where to go.
- Poll: Ask your Facebook friends what their opinion is on a certain topic.
- Support Nonprofit: Choose a nonprofit organization of your choice and share it through your status. Your Facebook Friends can then select the donate button to support the chosen organization.
- Answer a Question: Choose a predetermined question to answer or create your own question to answer and share it with your Facebook friends.
- Lists: Choose a predetermined topic to make a list for or create your own topic and share it with your Facebook friends.
- Facebook Stories: All the content that you can share through a status update is shareable through your Facebook story. You can also upload content to your stories by clicking the Add to Your Story button on the right sidebar. Additionally, you can watch all your friends’ Facebook Stories by clicking on their picture in the Stories section, which is also located on the right sidebar on your home page.
8. Add photos and videos.
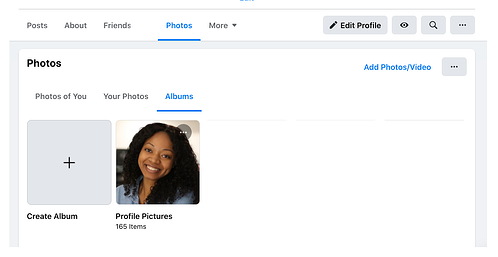
On Facebook, you can add photos, videos, albums, and live video broadcasts to your profile for all your friends to see.
Uploading photos or videos
To upload photos or videos to your profile, follow these four simple steps:
- Go to your Profile.
- Select the Photos tab.
- Select Add Photos/Video.
Upload pictures or videos from your computer.

Creating photo or video albums
To create a photo or video album, follow these four simple steps:
- Go to your Profile.
- Tap the Photos tab.
- Tap Create Album.
Upload pictures or videos from your computer.
Facebook Live
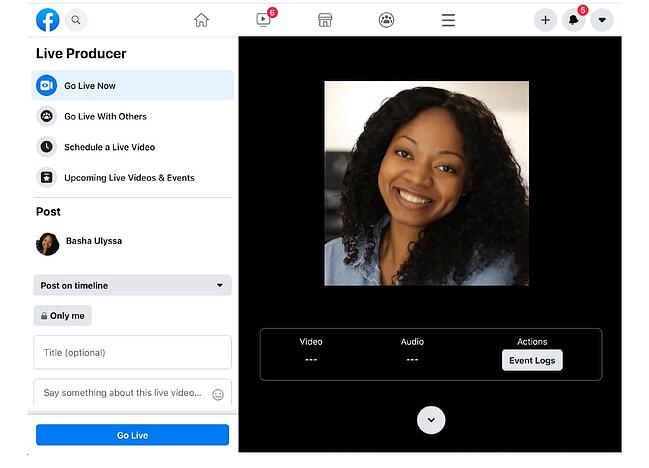
To do a live broadcast on your Facebook account, follow these three simple steps.
- In the box that says What’s on your mind?, select Live Video.
- Once you select Live Video, you can write a description about your broadcast, tag people in it, add a feeling or activity, check in to an event, support a non-profit, or add a poll. You can also title your live broadcast or tag a video game if you’re live streaming someone or yourself playing a video game.
- Select Go Live when you’ve finished describing your live broadcast.
9. Connect with friends.
On your news feed, you’ll see updates from your friends, family, or public pages you follow. To interact with them, you can like and react to their posts, share content on their timelines, and communicate with them through text or video chat.
Like, Comment, Or Share
If you like someone’s post, give them a thumbs up, comment on their post, or share it.
Other Reactions
If your Facebook friend’s post evokes a stronger reaction in you than a like, you can also express that you love, laughed, are amazed, sad, or angry at their post by holding down the Like button.

Sharing Content on Your Friends’ Timelines
Anything you can post on your status, you can also post on your friend’s timeline.
Facebook Messenger
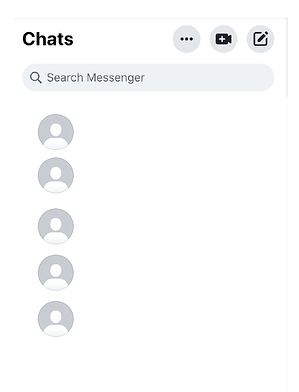
To chat with your friends or public pages on Facebook, use Facebook Messenger. You can access it by tapping the Messages button at the top right corner of any Facebook page or selecting the Messages button on the left sidebar of the home page.
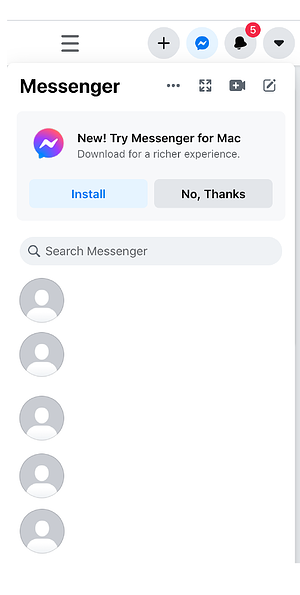
Next, select New Message and type in your friend or brand’s name that you want to connect with. Facebook Messenger also lets you create group chats by clicking on New Group. After that, all you have to do is name your group and add the friends you want to include in the group.
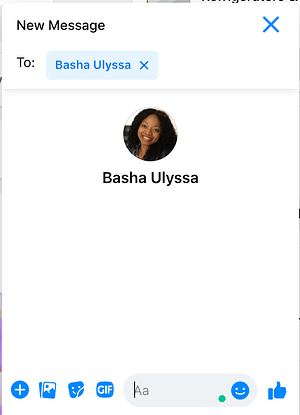
When you message your friends or group on Facebook Messenger, you can upload pictures, videos, and files from your computer, as well as stickers, GIFs, emojis, and take pictures and videos from your computer’s or phone’s camera.
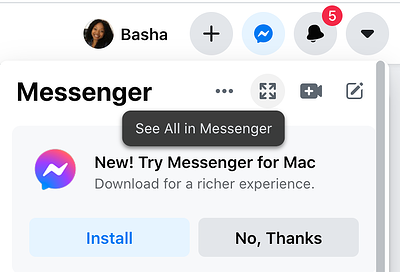
You can also view Messenger on its own page, where you can search for past conversations and manage your settings. To view Messenger on its own page tap the Messages button in the top right corner of any Facebook page and then tap the See All in Messenger button.
To instant message your friends’ who are logged onto Facebook at the same time as you, tap the Chat button on the bottom of any Facebook page and strike up a conversation with your friends who are online.
Phone and Video Calling
When you have Messenger open on its own page, you can search for any of your friends or groups, click on their name, and tap the phone or video chat button to call them.
10. Review your newsfeed.
Your news feed is a curated feed of posts from your friends, family, and public pages you follow that Facebook’s algorithm thinks you’ll be interested in. You’ll also see ads from brands who think you’ll enjoy consuming their content or products.
To customize your news feed, tap the downward pointing arrow in the upper right corner of any Facebook page and tap News Feed Preference.
From there, you can prioritize whose posts you’ll see first, unfollow people and groups to hide their posts, reconnect with people and groups you unfollowed, discover public pages that match your interests, and hide apps from your news feed.
11. Discover additional Facebook features.
Facebook isn’t just a platform for viral content and connection. It’s also a hub for community communications, video streaming, marketplaces, and games.
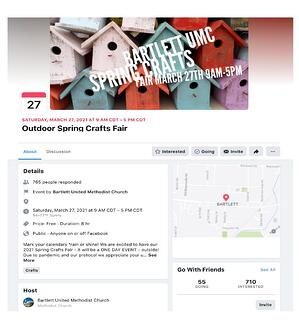
Events
The Events page on Facebook will show you any upcoming events that are popular with your Facebook friends or have been set up by the groups you belong to. You can also find events based on their date, location, and category.
To find the Events page, select the Home button. Then, on the left sidebar, you’ll see the Explore section, where you can select Events
Groups
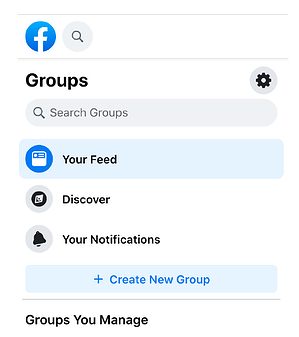
The Groups page on Facebook will show you which groups you manage and belong to. You can also discover groups to join based on Facebook’s suggestions and a ton of other categories.
To access the Groups page, tap the Home button and then on the left sidebar, you’ll see the Explore section, where you can click Groups.
Facebook Watch
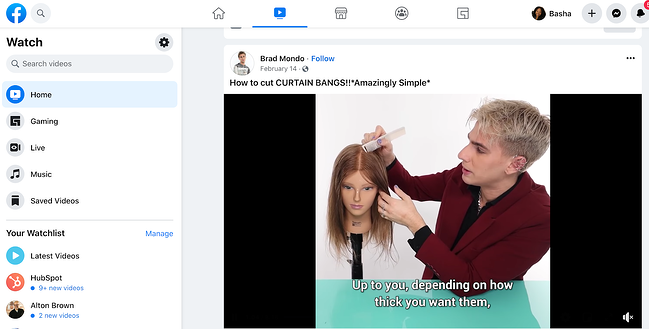
On the Facebook Watch platform, you can watch videos from the shows you’re following and search for other shows and videos.
To access Facebook Watch, select the Home button. Then, on the left sidebar, you’ll see the Watch button right under the Marketplace button.
Marketplace
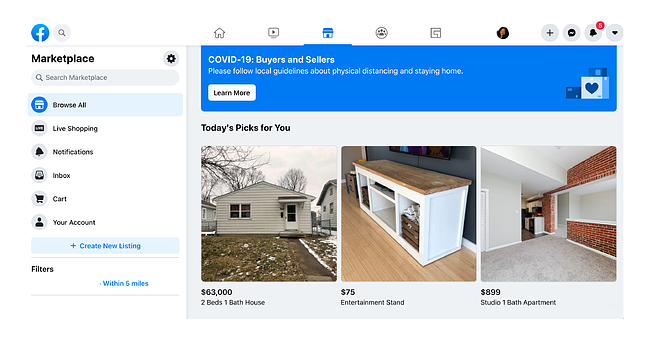
Not only does Facebook compete with Netflix in the streaming industry, but they also compete with eBay in the marketplace industry. With Facebook Marketplace, you can browse for all kinds of products, join groups to buy and sell products with people in your area or who share similar interests, shop for products sold from different shops, shop by category, and sell your own products.
To access Facebook Marketplace, select the Home button. Then on the left sidebar, you’ll see the Marketplace button right under the Watch button.
Games
Facebook Games is one of Facebook’s best features. They host a huge collection of massively popular games, and you can browse the most popular games on the platform by top charts and categories. You can even play most of the games with your friends, too.
 Editor’s note: This post was originally published in October 2018 and has been updated for comprehensiveness.
![]()
A Beginner’s Guide to Facebook Insights [+ Step-by-Step Instructions]
If your brand has a business Facebook page, you’ll want to invest time understanding your Insights dashboard.
It holds important data that helps you understand how your page is performing and is key to growing your page.
Features like weekly insight summaries and competitive data on other business pages make Facebook Insights a powerful tool that every marketer should leverage.
Let’s dive into what Facebook Insights is, how to access it, and how to interpret the metrics it tracks.
Facebook Page Insights vs. Facebook Audience Insights
Despite having similar names, Facebook Insights and Facebook Audience Insights have completely different functions.
Facebook Insights visualizes incoming data from your business page so you can learn how users are behaving on your page, what content they’re engaging with, and how your page matches up to competitors.
Facebook Audience Insights, on the other hand, is used for ad campaigns and helps marketers understand Facebook audiences in general (which can also include those who follow your page).
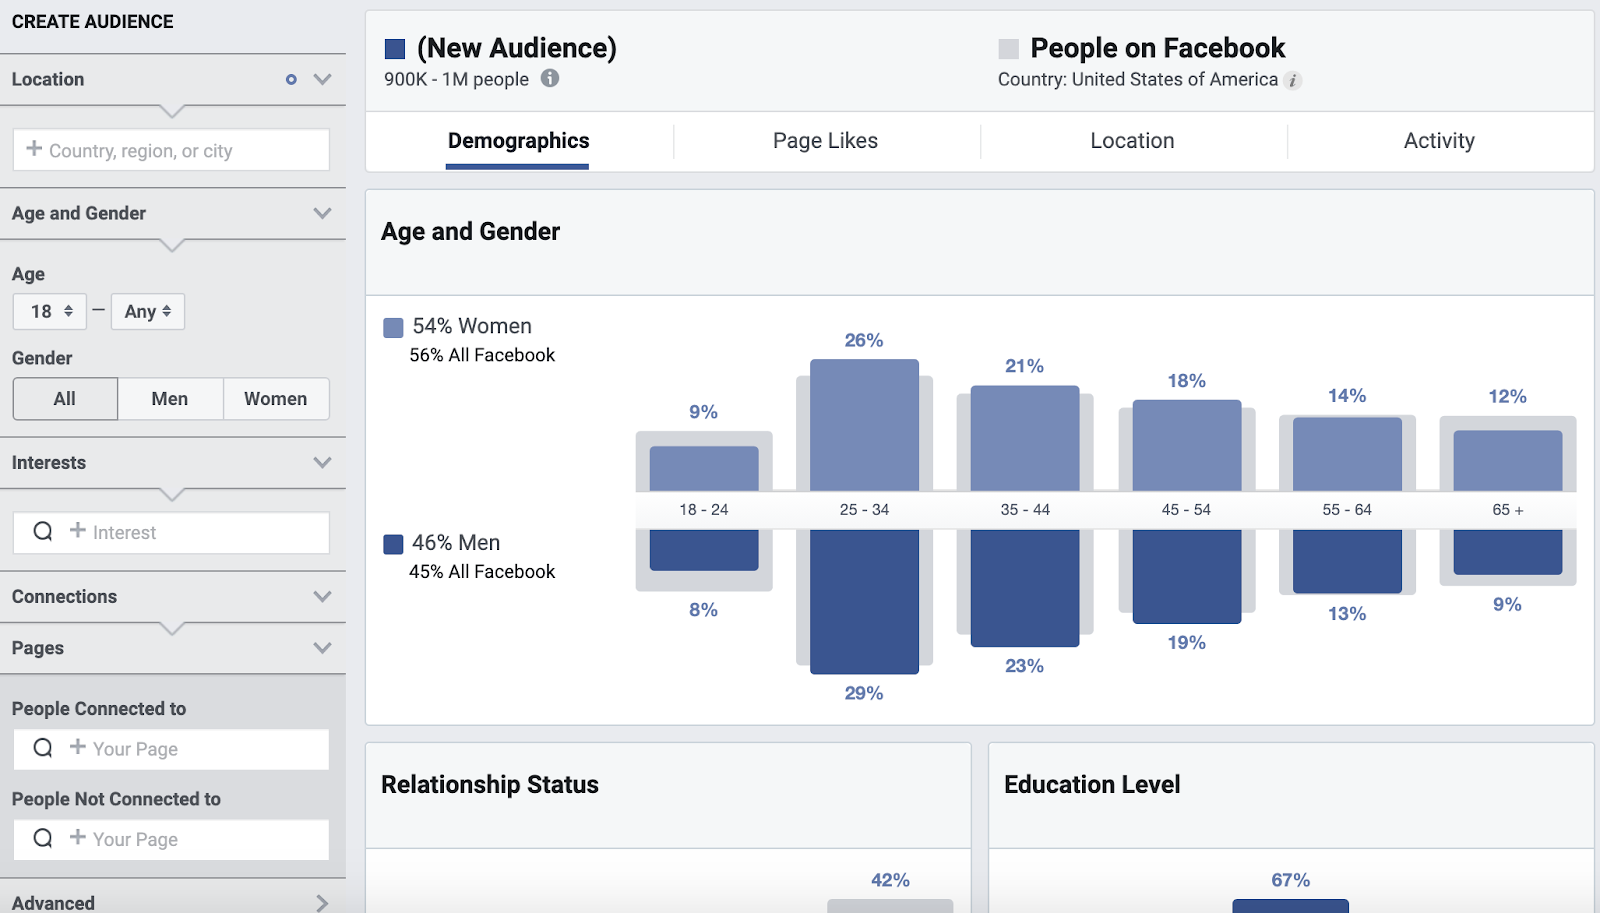
The platform includes information on user demographics, such as location and relationship status as well as user behavior, including average ad clicks and comments.
Where is Facebook Insights?
To access Facebook Insights, you’ll need to have a business page. Then, follow the steps below:
-
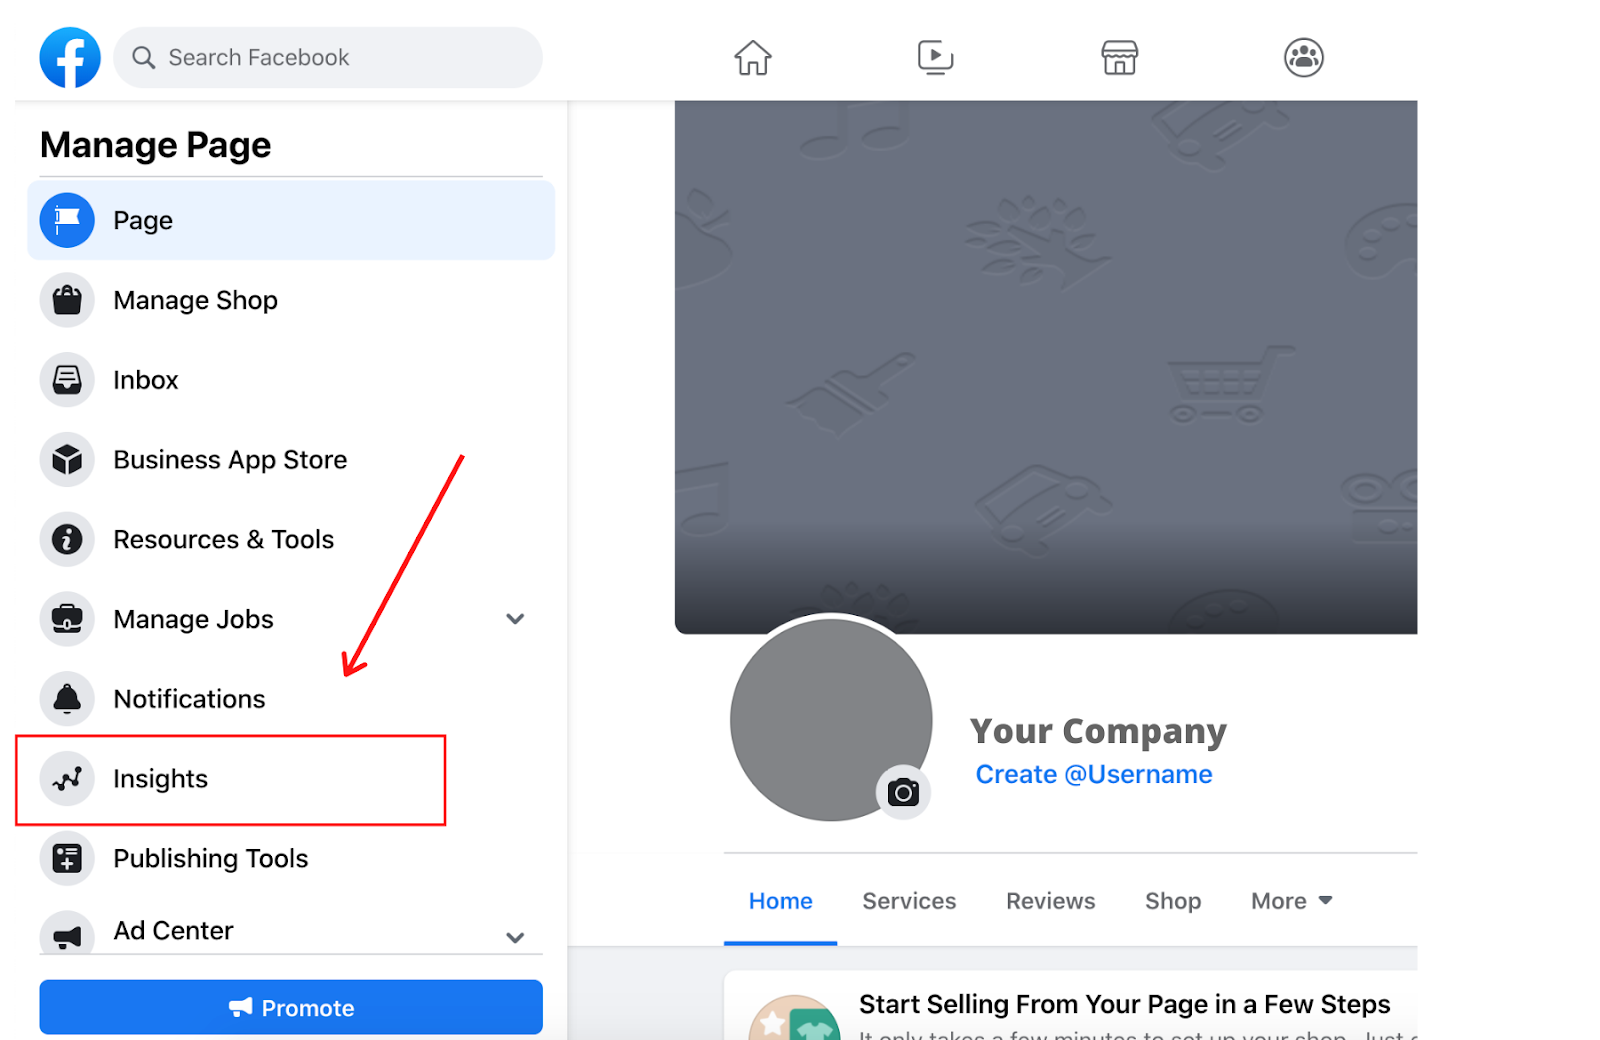
Once you log into Facebook, head to your business page. Then, click on “Insights,” located on the sidebar to the left of the page.
-
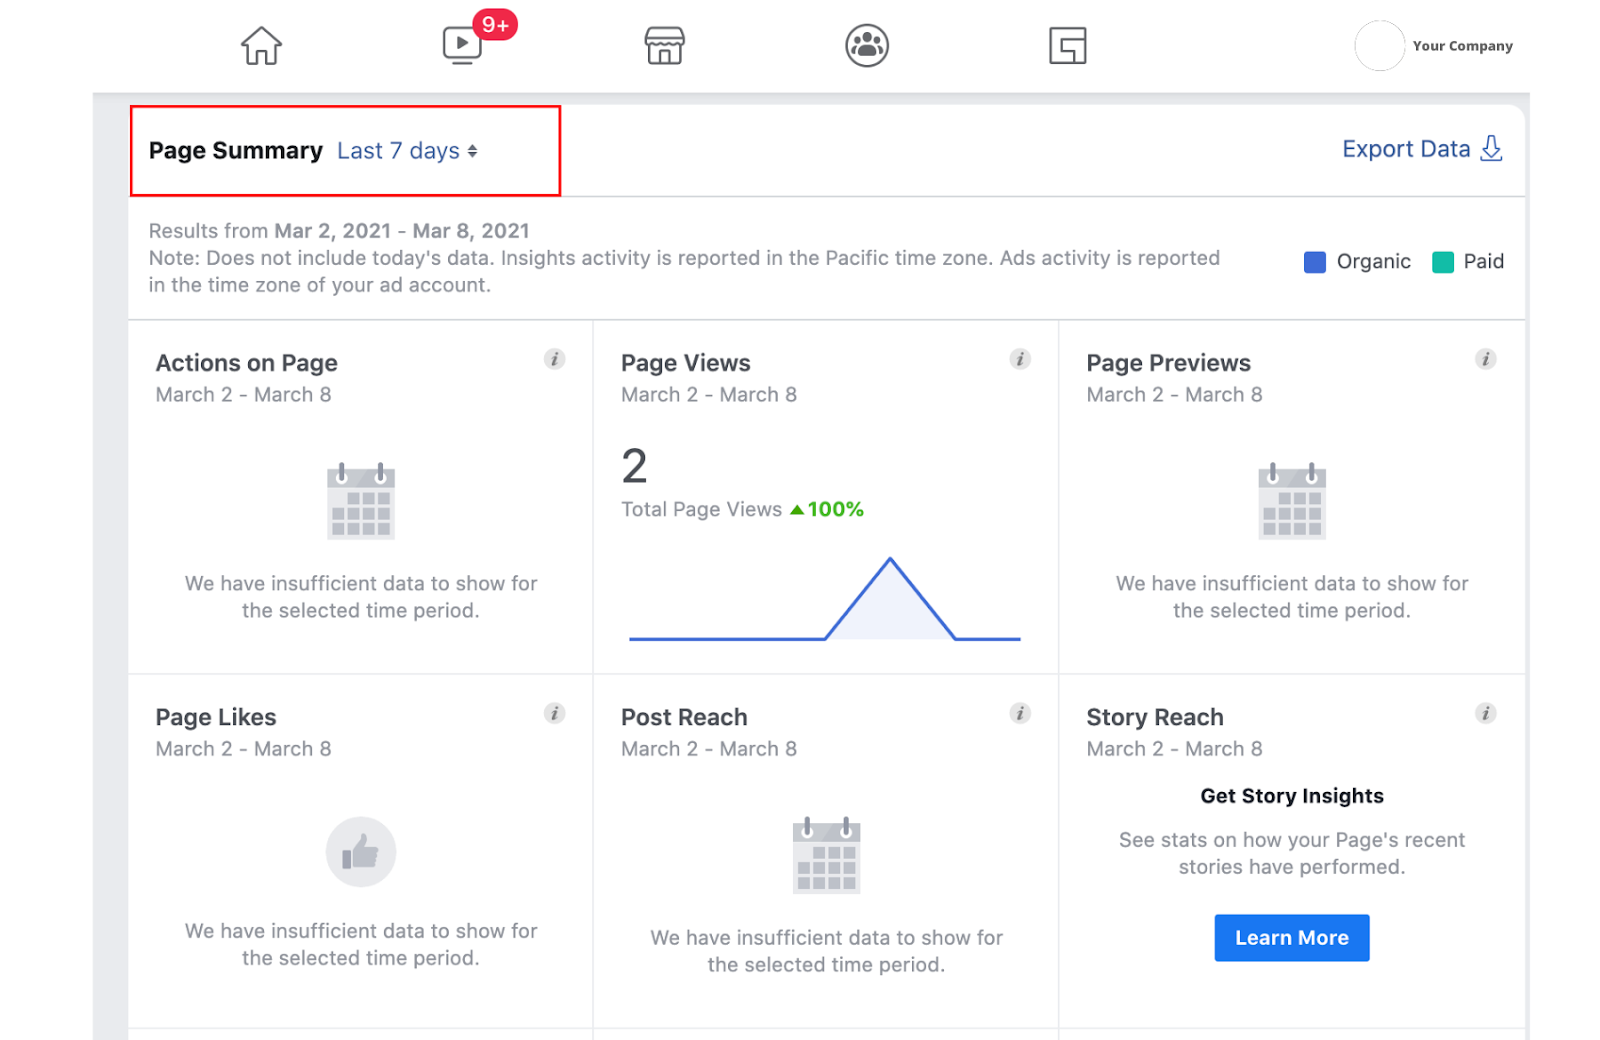
You’ll land on the “Overview” page which features a dashboard with three main categories. The first is your page summary, which shows key metrics from the last seven days. However, you can also view data from today, yesterday, and the last 28 days.
-
Once you scroll down, you’ll see insights on your most recent posts.
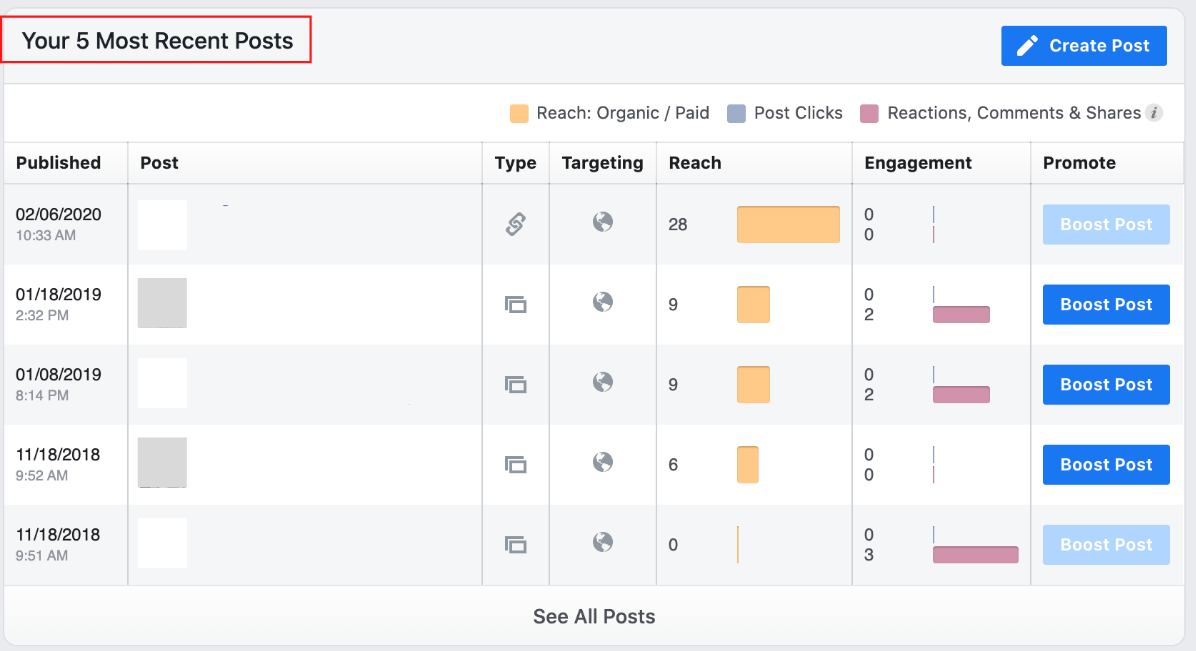
-
The last section features insights from your competitors. In this section, Facebook can recommend pages to watch, but you can also customize which brands’ performance you track by clicking “Add Pages.”
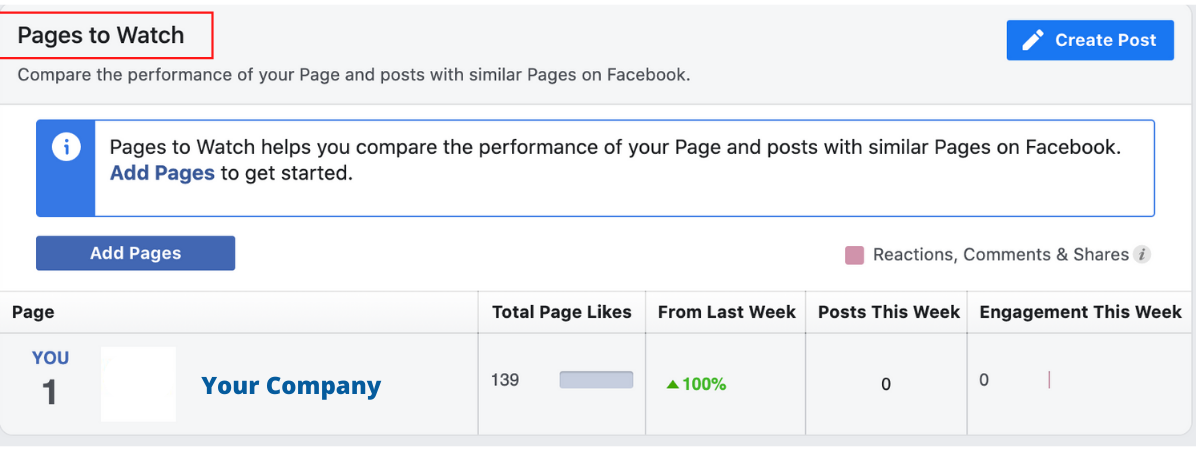
-
To dive deeper into these metrics, you can click each category listed on the sidebar to the left of the dashboard.
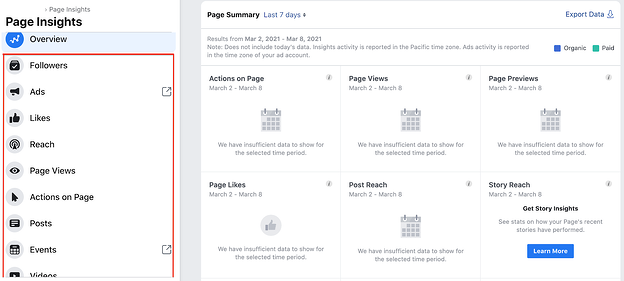
How to Use the Facebook Insights API
The Facebook Insights API, also known as the Ads Insights API, allows you to fetch ad data to track your ad performance. The API is particularly useful because it allows marketers to pull the exact data they want to track, no matter how granular.
To fetch the data from the API, you must determine what data you want to pull and create an access token for that ad, so that only your team can access that information. You’ll then need to determine where to import that data, like Google Sheets or HubSpot’s ads software within the Marketing Hub.
It allows you to pull your Insights API into the platform and match it against with data already in the CRM. This will provide a better understanding of the customer journey and give you a 360-degree view of how your ads are performing.
How to Export Facebook Insights Data
-
Start on your dashboard overview. On the top right corner of your “Page Summary,” you’ll see “Export Data.”
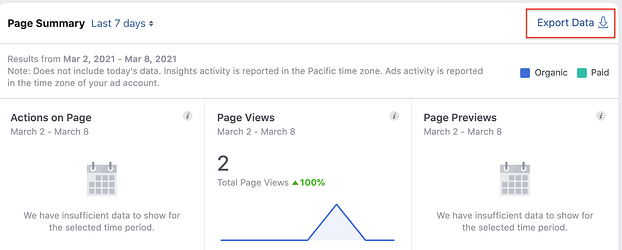
-
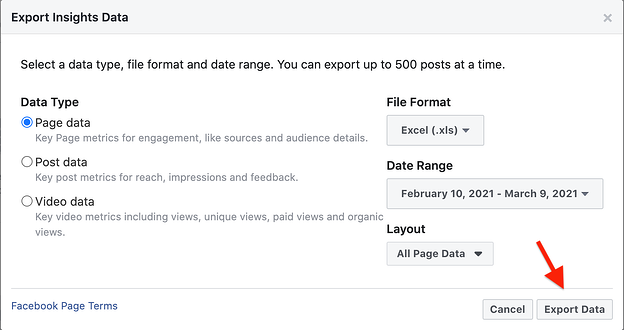
A window will pop up. From there, you’ll narrow down what data to export, the data range, file format and layout.
-
Click “Export Data” and you’re all set.
Top Facebook Insights Metrics
Your Facebook Insights dashboard displays top metrics about your business page. On any given day, you can get a snapshot of your page’s performance and adjust your strategy accordingly. Top metrics include:
- Page views – The number of times your page has been viewed by Facebook and non-Facebook users.
- Page likes – How many Facebook users like your business page.
- Actions on page – How many actions users take on your business page, such as to click on a website link or ask for directions to your store.
- Post reach – The number of users on Facebook who saw your post.
- Post engagement – How many people liked, shared, reacted, or commented on your post.
You also have video insights, which can tell you how your videos are performing. Key metrics include:
- Minutes viewed – The total amount of time users have spent watching your videos.
- Video views – The number of users who watched your video for three seconds or more.
- Audience retention – How long you maintained your video’s audience in a video.
For tips on how to interpret your video insights, jump to this section.
How to Interpret Facebook Insights
Before you start analyzing your data, make sure you know what questions you want answered. This will help you narrow down which key metrics to focus on.
Once you know that, start looking through the data to identify patterns.
For instance, let’s say you notice that your how-to posts get shared at a much higher rate than your other content.This may indicate that this type of content resonates more with your audience and adds value to them and their community. As such, you may want to double down on these posts if your goal is to get higher engagement.
Analyzing the data is one thing, but what’s more important is what you do next. As you notice trends, take note of them and conduct experiments to learn more about what your audience wants. This will help you learn more about your audience and develop content that meets their needs.
If your team wants to focus on video insights, scroll down to the “Videos” tab on the left sidebar and click on it. Once there, you’ll see your top video metrics, such as watch time and top video performers.
For tips on how to understand your video insights, watch the video below. It dives into how to navigate your video insights dashboard and what your insights can tell you broken down by performance, loyalty, audience, and retention.
Your Facebook Insights dashboard holds so much information about your page’s performance and your audience. If you leverage that data, you can create better content and generate more revenue for your brand.
![]()
A Simple Guide on How To Conduct Backlink Analysis
Link building is an invaluable part of SEO. In fact, it’s one of the top factors search engines look at when determining your ranking.
Whether you’re developing a new link-building strategy or revising a current one, it’s important to look at where you currently stand. That’s where a backlink strategy comes into play.
Let’s cover what a backlink analysis looks like and the tools needed to conduct one.
Backlink Analysis
What is backlink analysis?
Backlink analysis is a comprehensive review of a website’s backlinks to analyze the site’s performance and identify issues that could affect its search engine ranking.
Backlink analysis is like the SEO version of going to the doctor for a check-up. You should do it regularly to ensure everything is in order, but you also do it when you notice something is wrong.
Completing this process is one of the best ways to understand your site’s health and understand what factors are contributing to its ranking. Perhaps you’ve noticed a sharp dip in your ranking, or you’re simply not seeing the progress you were expecting.
A backlink analysis will also show you how your website measures up against your competitors. You’ll gain some insight into what strategies your competitors are using and what you could implement in your own process.
Lastly, it’s a chance to identify new growth opportunities that you haven’t yet explored.
1. Choose the sites you want to analyze.
While it’s obvious you’ll be analyzing your own website, you’ll also want to narrow down the competitor sites you want to review.
You may already have a few top of mind, but if you don’t, you’ll want to pick sites that:
- Offer similar products or services.
- Are currently outranking you for your target keywords.
2. Select an auditing tool.
Although you could conduct a manual backlink audit, it’s likely more efficient to use a backlink tool that already has the key features you’re looking for.
There are several backlink checker tools out there, ranging in price and capabilities. You’ll usually find them as a section within an SEO tool, like Majestic and SEMrush.
Need help finding a backlink analysis tool? Find a few suggestions here.
3. Get a quick overview.
Once you select your auditing tool, it’s time to start the analysis.
Enter your domain name into the search bar and look at the results.
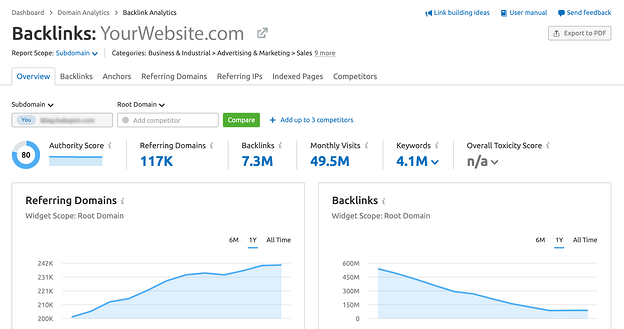
You’ll start with a ton of data. To get a quick idea of how your site is performing, focus on these metrics:
- The total number of backlinks: The total number of links pointing to the site. For instance, if website A writes a blog post and hyperlinks to a page on website B, that is a backlink. If this number is very low, it may be the reason why your page isn’t ranking well.
- Referring domains: The total number of websites that are pointing to your site. Website A pointing to website B counts as one referring domain. Sorting these domains by authority can tell you how valuable these pages are to your ranking and give you ideas for outreach later on.
- Top linked pages: The pages on a website that get the most backlinks. This can indicate the type of content that’s best for link building.
Repeat this step with your competitors to set a benchmark and learn where you fall. Depending on the tool you use, you may be able to compare these metrics on the same page without going back and forth.
4. Analyze the details.
Now it’s time to get into the nitty-gritty details and look at metrics that will answer the “why.”
Begin by looking at your anchor texts, the words used to hyperlink your webpage. This is a great way to identify spammy backlinks that could be hurting your ranking.

If you’re not sure how to know if the referral domain is spammy, see if the anchor text relates to the content on your site. If it looks like the junk section of your email and includes crude language, it’s likely spam.
Once you identify these links, you could reach out to the websites to ask to be removed. It’s a long shot but could work in some instances. Disavowing those links is the more realistic option, which is basically telling Google to ignore those backlinks.
Speaking of spam, you’ll also want to look at your country code top-level domain (ccTLD) distribution. ccTLD refers to the last portion of a URL, which designates the country it originates from.
This is another way to identify websites that could be the source of your negative SEO (i.e. malicious practice meant to negatively impact your ranking).
If your website gets a lot of traffic from Haiti, for instance, it wouldn’t be a red flag to see a lot of .ht backlinks. However, if you start to notice links like .cn or another unfamiliar TLD, you may want to look deeper into this.
Next up: broken or lost links. It’s important to identify your broken and lost links as you miss out on “link juice,” the potential to rank higher from a backlink. In addition, it can make your website harder to crawl.
How do you fix it? There are several ways to do so:
- Reach out to the referring domain and ask that it be fixed.
- Redirect the broken page to a new webpage on your website.
- Redirect the broken page to another page on your website with similar content.
5. See what your competitors are doing.
As you dive deeper into your domain, be sure to compare your findings with your competitors.
For instance, look at the referring domains for the website that’s outranking you. If there’s little overlap between your list and theirs, this could give you direction into which domains to aim for.
It’s also helpful to compare your backlink acquisition rate against your competitors. Are they growing at a much faster pace than you? It could highlight another section worth investigating.
Top Backlink Analysis Tools
1. Google Search Console
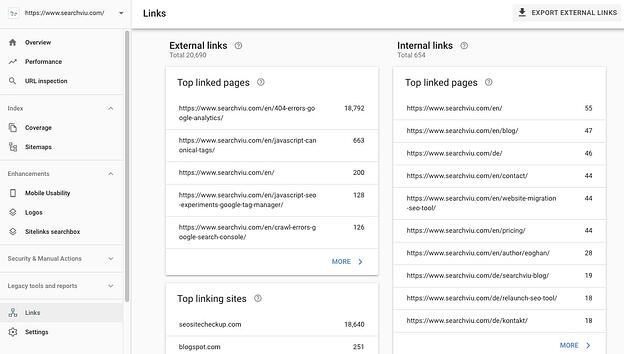
Google Search Console is a free tool to do an initial backlink check. You can see top metrics, like your total links and referring domains.
The downside to this platform is that you cannot compare your site to your competitors. However, it is a good place to start to gain a big-picture view of your site’s performance.
2. Ahrefs

Ahrefs is an SEO tool with extensive features to help companies optimize their websites.
The backlinks checker is easily accessible through the “Site Explorer,” and allows you to quickly export the data for further analysis. You can also access the sections on the left sidebar to explore each backlink feature more in-depth.
Ahrefs is a paid tool with pricing starting at $82/month and up to $832/month for agency-level capabilities. You can also take advantage of their free trial for seven days at $7.
3. SEMrush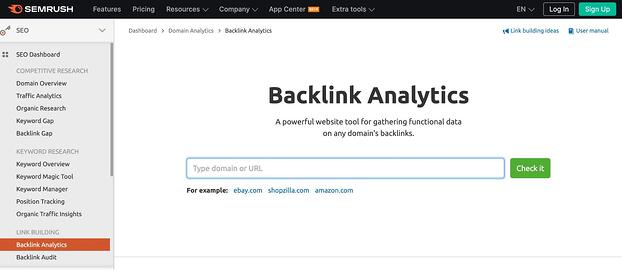
SEMrush is another top SEO tool with a backlink tracker available to subscribers.
You can easily compare your report to three competitors at a time and use the graphs for a visual understanding of the data.
To get a peek into how it works, SEMrush allows free users to make 10 requests a day. While you will only get a limited view of the feature, you can get an idea of how the dashboard functions.
For full access, you must obtain a subscription. Pricing starts at $99/month and goes up to $449.
4. Moz
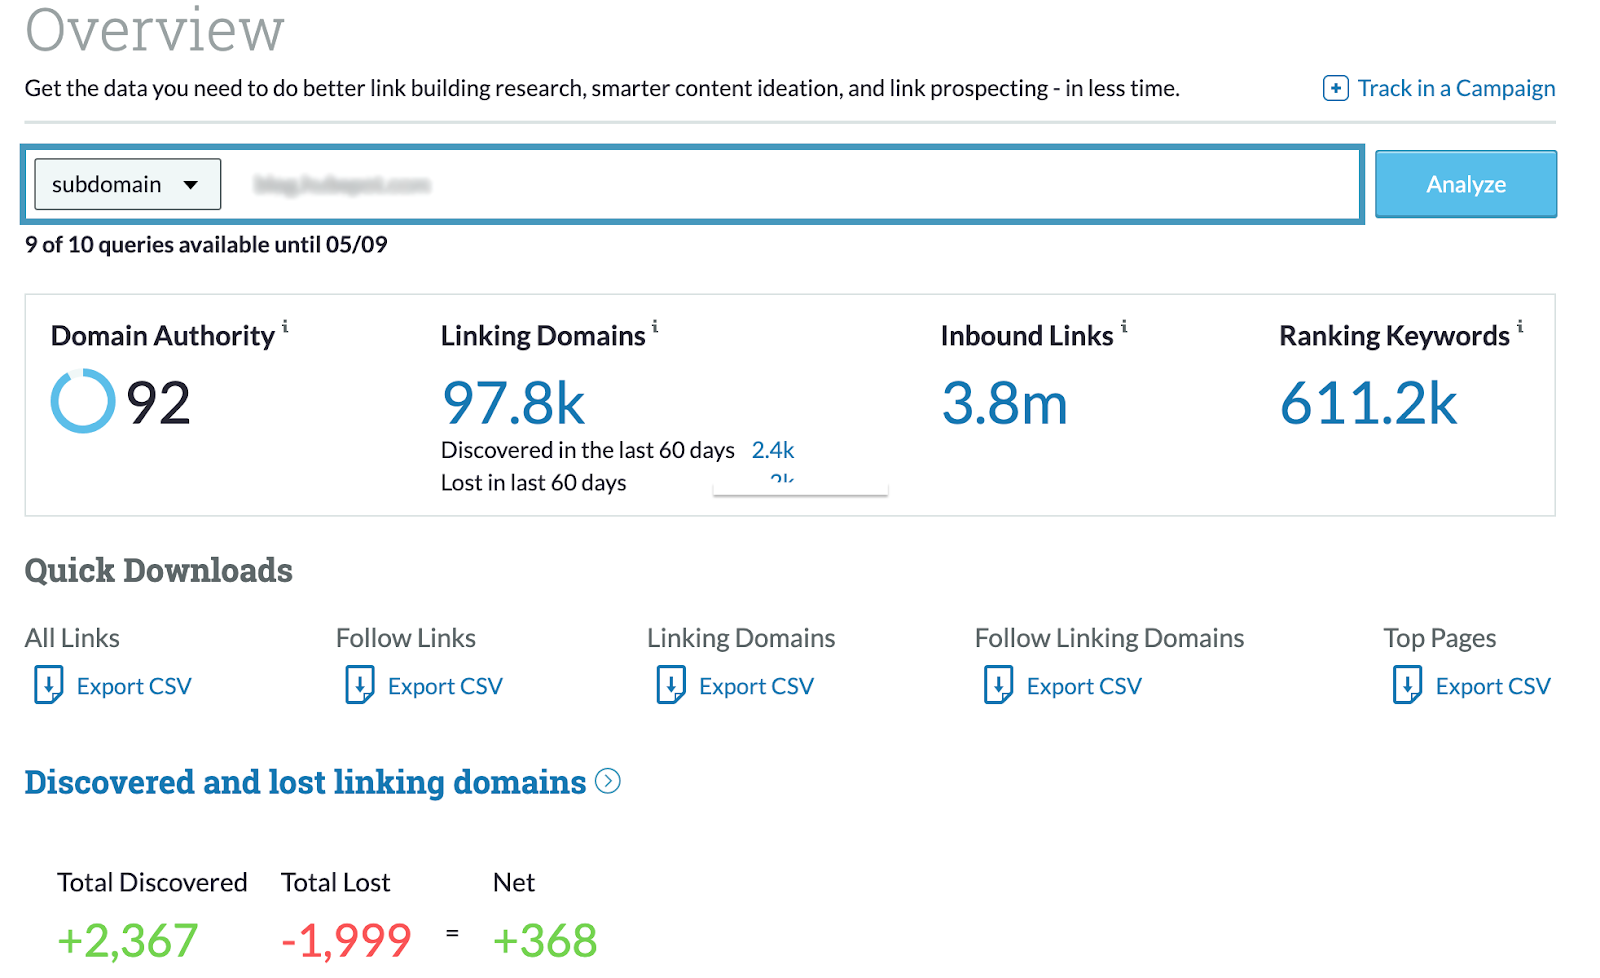
Moz is one of the top backlink tools in the market.
The dashboard makes quick downloads easily accessible to focus on key areas of interest.
The “Spam Score” feature provides some insight into which links may be damaging your SEO efforts and how to reduce them. Another standout feature on the site is the “Discovered and Lost” section which shows you the linking domains you’ve gained and lost within a specific date range.
You can use Moz using a free 30-day trial or subscribe to one of their monthly plans, starting at $79.
Backlink analysis is an essential part of your SEO strategy and will require continuous maintenance. However, Once you know what to look for, it should be a painless process.
![]()
The 3 Best Evergreen Webinar Software You Need Now
Initially launched in the 1990s, webinar caché once relied heavily on live events. In 2020 however, we saw the webinar space pivot towards the on-demand space.
Lower cost per acquisition, ease of automation, and building trusted archives of useful content has proven to be an effective means of moving customers through the sales funnel.
While not as flashy as their live counterparts, evergreen webinars have proven to be the tortoise to live webinar’s hare: slow and steady sees the highest ROI.
Read on to find out our favorite evergreen webinar strategies, platforms, and the features that make all the difference.
When businesses first started producing webinars the focus skewed towards live events. Shiny and new, the promise of a live webinar meant capturing highly engaged leads and collaborating with top talent in the industry.
But live webinars are also a ton of work to produce: weeks of coordination, marketing emails, practice sessions, and script revisions, building slide decks… all for an hour of learning, and a few days of follow-ups.
Tons of information was lost every time a webinar ended because there wasn’t a simple way to re-watch it. Until we got savvy and started recording them.
Hosting your recorded webinars is an excellent, low-cost way to create resources for potential or existing customers about how to get set up with your software, walking through common blockers customers face, or demonstrating new tools and integrations.
There are many different content streams you can explore with automated webinars, including:
- Training videos: Record your account executive’s run-through of your software and make it work harder by offering it as an on-demand webinar.
- Lectures and thought leadership: Get the most out of guest-speaker and C-Suite time by offering a thought-leadership section of on-demand webinars in your archive.
- Tutorials: Make it simple to learn how to use and explore new product integrations or updates with quick, evergreen webinar content.
- A case study walk through: Make your case studies come to life, and then automate the recording to make your witticisms and insights go the extra mile.
When done well, a library of on-demand webinars can act as an automated sales engine, driving customers through the funnel as they engage with and learn more about your product. It’s a great example of working smarter rather than harder.
Evaluating the Best Evergreen Webinar Software
It’s tempting to outsource your software search to Google. While you might end up with a good product, you may be missing key features that will make your presentations really hum. You may even end up over-investing. The first thing to do? Understand your limits.
A webinar program can be a simple automated recording … or it can be as complicated as producing live television. Understand the complexity of your program by asking yourself the following questions:
- How many attendees do I expect per session? Most platforms have tiered pricing tied to how many guests can attend a given webinar. If you’re just starting your webinar program, look for an option that will allow you to scale up but doesn’t demand a huge investment right away.
- What resources are available to me? Training and implementation take time. A lot of time. As you’re researching platforms, consider what kind of support is available. Will you be given a dedicated account manager? How robust is the platform’s resource library? Remember: The best software is the software you actually use.
- Always take advantage of a free trial … and if you are considering purchasing the product, but need more time, ask for an extension.
The Best Evergreen Webinar Software
On-demand webinars don’t have the same immediate converting power as their live counterparts. Instead, they excel at customer education and establishing brand trust.
Think of your on-demand webinars as a way to educate your existing customer base, and as an ambassador of your company’s willingness to help.
Here are two of the best software for hosting, recording, and delivering evergreen webinars:
1. DEMIO
Demio is a best-of-both-worlds option. While its focus is on producing live webinars, Demio makes it simple to build out your webinar library. We love how Demio:
- Offers automated recordings, which make it easy to record and archive live events into an easily searchable content library.
- Has a “Stay Registered” feature, which allows participants to sign up once for an ongoing series and captures valuable emails for future marketing efforts.
- Boasts an excellent analytics dashboard to give you insight into how your live and on-demand webinars are performing — a great opportunity to let your learnings inform your live and evergreen webinar content.
2. EverWebinar
The OG in evergreen webinar technology, EverWebinar is all about the on-demand life. If you’re looking to set it and … well, not forget it, but not be beholden either, this is the software for you.
- EverWebinar allows users to schedule their webinars to play at set intervals throughout the day, week, or month. This has the double benefit of mimicking the live experience (which does tend to get higher engagement). It also lets your marketing team run tests as to what time of day is best for your audience.
- A list of unique features makes it easy to drive home the “live” illusion and cut back on the stress of managing a big roster of scheduled webinars. Options like “Block dates,” which stop your webinars from playing on specific days, or “Block nighttime viewing,” which keeps your analytics from being skewed by background streaming. “Time-zone auto-detection” makes it easy to globalize your offering with the click of a button.
- A bonus for super-users: if you’re looking for a platform to help you organize your collection of recorded webinars, EverWebinar and WebinarJam are designed to function together. *Insert handshake emoji*
3. WebinarGeek
A great option for a company new to the webinar game, WebinarGeek is a simple software that makes it easy to host and record live webinars and turn them into a library of evergreen, on-demand content.
Along with standard features like customizable waiting rooms and robust analytics, we also love:
- WebinarGeek’s intuitive interface: It’s easy for someone brand new to the webinar world to orient themselves in the WebinarGeek platform.
- The monthly pricing plan, making this option accessible for businesses looking to explore the webinar space without a deep financial commitment.
- The pre-record function makes it simple to test presentations, rehearse with multiple presenters, and explore other features. Pre-recording your webinar also leaves you with a “clean” version to upload as your evergreen content.
Build an evergreen webinar funnel with these top tools.
As we all get more literate in live and on-demand educational content, the need for simple and sleek webinar platforms will continue to grow.
By determining your needs early and taking the time to test various platforms, your team will be ready to educate, inspire, and get a better understanding of your customer base so you can help them make great decisions.
![]()
How to Get a YouTube Community Tab [+ How to Use It]
With nine in 10 marketers planning to use YouTube in their 2021 marketing strategy, it’s more important than ever to capture your audience’s attention. One of the best ways to do this is by creating a connection with your viewers through fostering community.
YouTube’s own creator academy says it best: “A loyal community of viewers can help promote your videos to new viewers through their own social networks, and give you instant feedback on what they do and don’t like.”
While building these relationships doesn’t happen overnight, it’s rewarding to see your channel grow.
The community tab is one important way that YouTube helps creators build relationships with their audience. Read on to learn how to get your own YouTube Community Tab, and how to use it to build relationships, increase subscriptions, and boost watch time.
Fans can comment and like or dislike posts, and share them with their friends. And just like that, a functioning community is created.
Community is an important part of our human experience. With the COVID-19 pandemic, the way we participate in our communities has changed.
According to SproutSocial, YouTube has stepped into this position. “Viewers are connecting with YouTube content in a way that helps them feel like they’re living what they’re watching. After a year in a global pandemic, this is a necessary way to help people still feel connected to their passions, hobbies, and normal life activities. “
How to Get a Community Tab on YouTube
To get a Community tab on YouTube, your channel will need to have over 1000 subscribers, and it can take up to one week after passing that number to see the Community tab appear.
Note that if your channel has over 1000 subscribers, but the Community tab option is not yet visible on your channel, you’ll need to enable custom channel layouts to display the tab.
How to make a Community post on YouTube
Once you have access to the Community tab, it’s time to start posting and engaging with your audience. Creating a post is simple and similar to posting on any other social media feed.
To create a Community post:
- Sign in to YouTube.
- At the top of the page, select ‘Upload’ and then ‘Create post.’
- Type a message to create a text post or choose to add a video, poll, gif, or image to the post. You can also mention other channels using the @ symbol followed by the channel name.
- Click ‘Post.’
Once your post is published, your subscribers will see it in their feed. They may also get a notification that you’ve posted something new.
Where is the YouTube Community Tab?
You can find each creator’s Community tab on their homepage, if they have it enabled.
On desktop, click on a channel name to go to their home page.
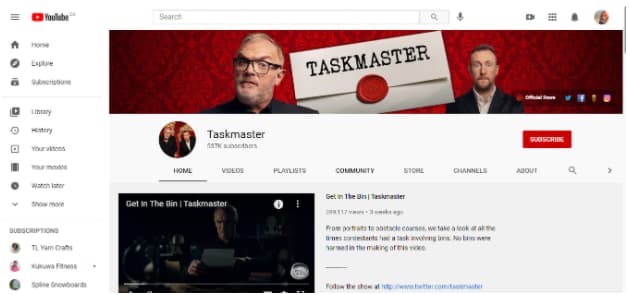
From there, click on Community in the middle of the screen. Here, you’ll find all their most recent posts where you can comment and interact with them.
On mobile, you’ll need to use the official YouTube app to see the Community tab, as it won’t show up in the mobile browser. Once you’ve opened YouTube, visit a channel’s home page. You’ll be able to click on the Community tab on the top of their page.
7 Ways to Use the YouTube Community Tab
Engagement is one of the most important YouTube channel analytics. When your audience is more engaged they will watch more videos, share more, and keep coming back. If you use the Community tab to its full potential, you can grow your audience and build a community around your content and brand. Here’s how.
1. Post behind the scenes footage and updates.
While your videos might be carefully produced, scripted, and put together, many viewers crave authenticity from creators. Your Community tab is where you can show more casual updates. Use this format for sneak-peaks or personal updates.
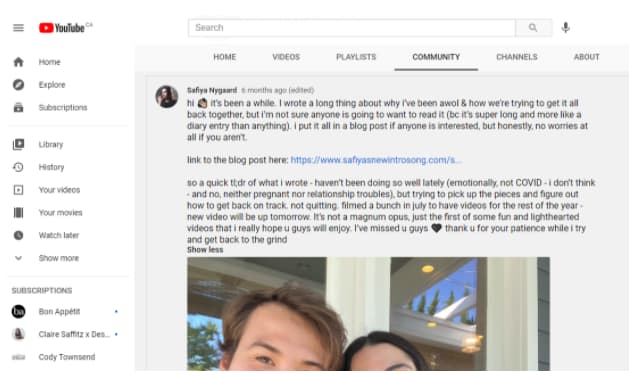
2. Heart ❤️ and respond to comments.
When reviewing your community comments, use a heart ❤️ to show appreciation for a viewer’s comments.
The viewer may get a notification (depending on their settings), and they’ll be able to see that you liked their comment.
 Responding to comments starts a conversation, and builds a stronger connection with your viewers. Don’t get too caught up in replying to all of the comments on your channel, but taking the time to heart and respond to a few will show that you’re paying attention.
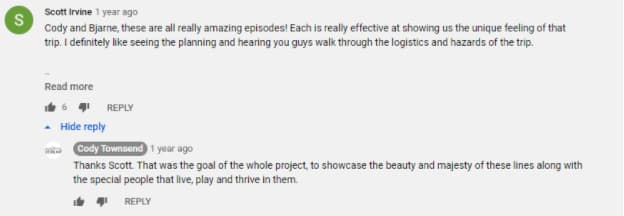
3. Pin a top comment.
When a comment really tickles your fancy, it’s from a VIP, or just something that you want to promote, you can pin it to the top of the comments. It will be the first thing other viewers see when they check out your community posts.
4. Promote a collaboration video with a fellow creator.
Are you really a YouTuber until you’ve done a collaboration with another creator? Once you’ve uploaded your shared creation, make sure both of you post about it on your Community tab. It’s a great way to drive traffic to your channel and expand your audience.

5. Poll your audience on what type of video they want to see next.
Find out what your audience wants from your channel. Ask them for feedback on your upcoming videos, or poll them about an upcoming competition.
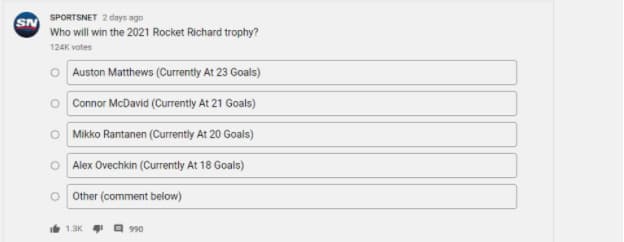
Sportsnet has over 124,000 votes on their latest poll about the 2021 Rocket Richard Trophy.

6. Shoutout to a fan or fellow creator using an @mention.
Mention a fan or another creator to share the love or get more eyes on your videos. Popular channels will often select a fan to shout-out to at the end of their video. The Community tab is another place where you can make these connections.
7. Share ‘members only’ posts.
If you offer Channel Memberships (a paid subscription to your channel where “viewers make monthly payments in exchange for access to exclusive badges, custom emojis, and other perks”), you can choose to create posts that are exclusive to your channel members.
This is a great way to thank them for their support and give them even more opportunities to engage with your channel.
Building a Community on YouTube
One of the things I noticed when trying to find examples for this post is that many creators aren’t using the Community tab to its full potential.
The power of being able to post updates and notify subscribers is huge! You’ve got a captive audience, so make sure to update them regularly, even when you don’t have time to upload a full video.
Stay engaged with what your fans want, and you’ll build a loyal following quickly.
![]()
The 11 Best Live Webinar Software of 2021
If you’re looking to attract highly engaged leads, interact with your audience, get real-time feedback, and capitalize on exciting guest speakers, the live webinar format is for you.
In a blind test run by the team at Business2Community it was discovered that a live webinar not only got 2.3x the number of registrants than an on-demand video, but the live webinar’s attendance also exceeded that of its on-demand counterpart by 23%.
The live attendants were also more … well … attentive. Participants viewed an average of 80% of the live webinar content, whereas the on-demand version captured 35%.
To take full advantage of these benefits, you need to choose the best software for live webinars. Read on to discover our favorite candidates for a live webinar platform, divided by category for easy research. Oh, and once you’ve found the right webinar platform, make sure you check out our ultimate guide to creating compelling webinars.
The Best Live Webinar Software
Best Webinar Software for Marketers
1. WebinarNinja
Optimizing for the customer journey is crucial and WebinarNinja knows it. The team of WebinarNinja focused their tool development on making it easy to track and customize according to a prospect’s position in the funnel. We love how this platform:
- Integrates with CRMs such as Salesforce and Hubspot so you can easily track your leads.
- Offers a gated landing page option to charge for events, which is a great option for hosting online conferences or other high-value content alongside regular webinar programming.
- Provides more targeted, customized tracking with a Facebook Ad tracking pixel on webinar attendees.
2. WorkCast
As the webinar platform that brands itself as “created for marketers,” WorkCast is simple to use and has a multitude of helpful features. Whether you’re offering live or on-demand webinars, creating evergreen content, or a combination of all three, WorkCast has your back with:
- Integrations with all of the most popular CRMs, including HubSpot, so you can track your leads and follow up automatically.
- No downloads or plugins required to host, attend, or present at webinars.
- The option for simulive webinars using pre-recorded video combined with a live Q&A session or presentation. All of the benefits of viewer engagement, without the stress of organizing a live webinar.
Best webinar software for small businesses
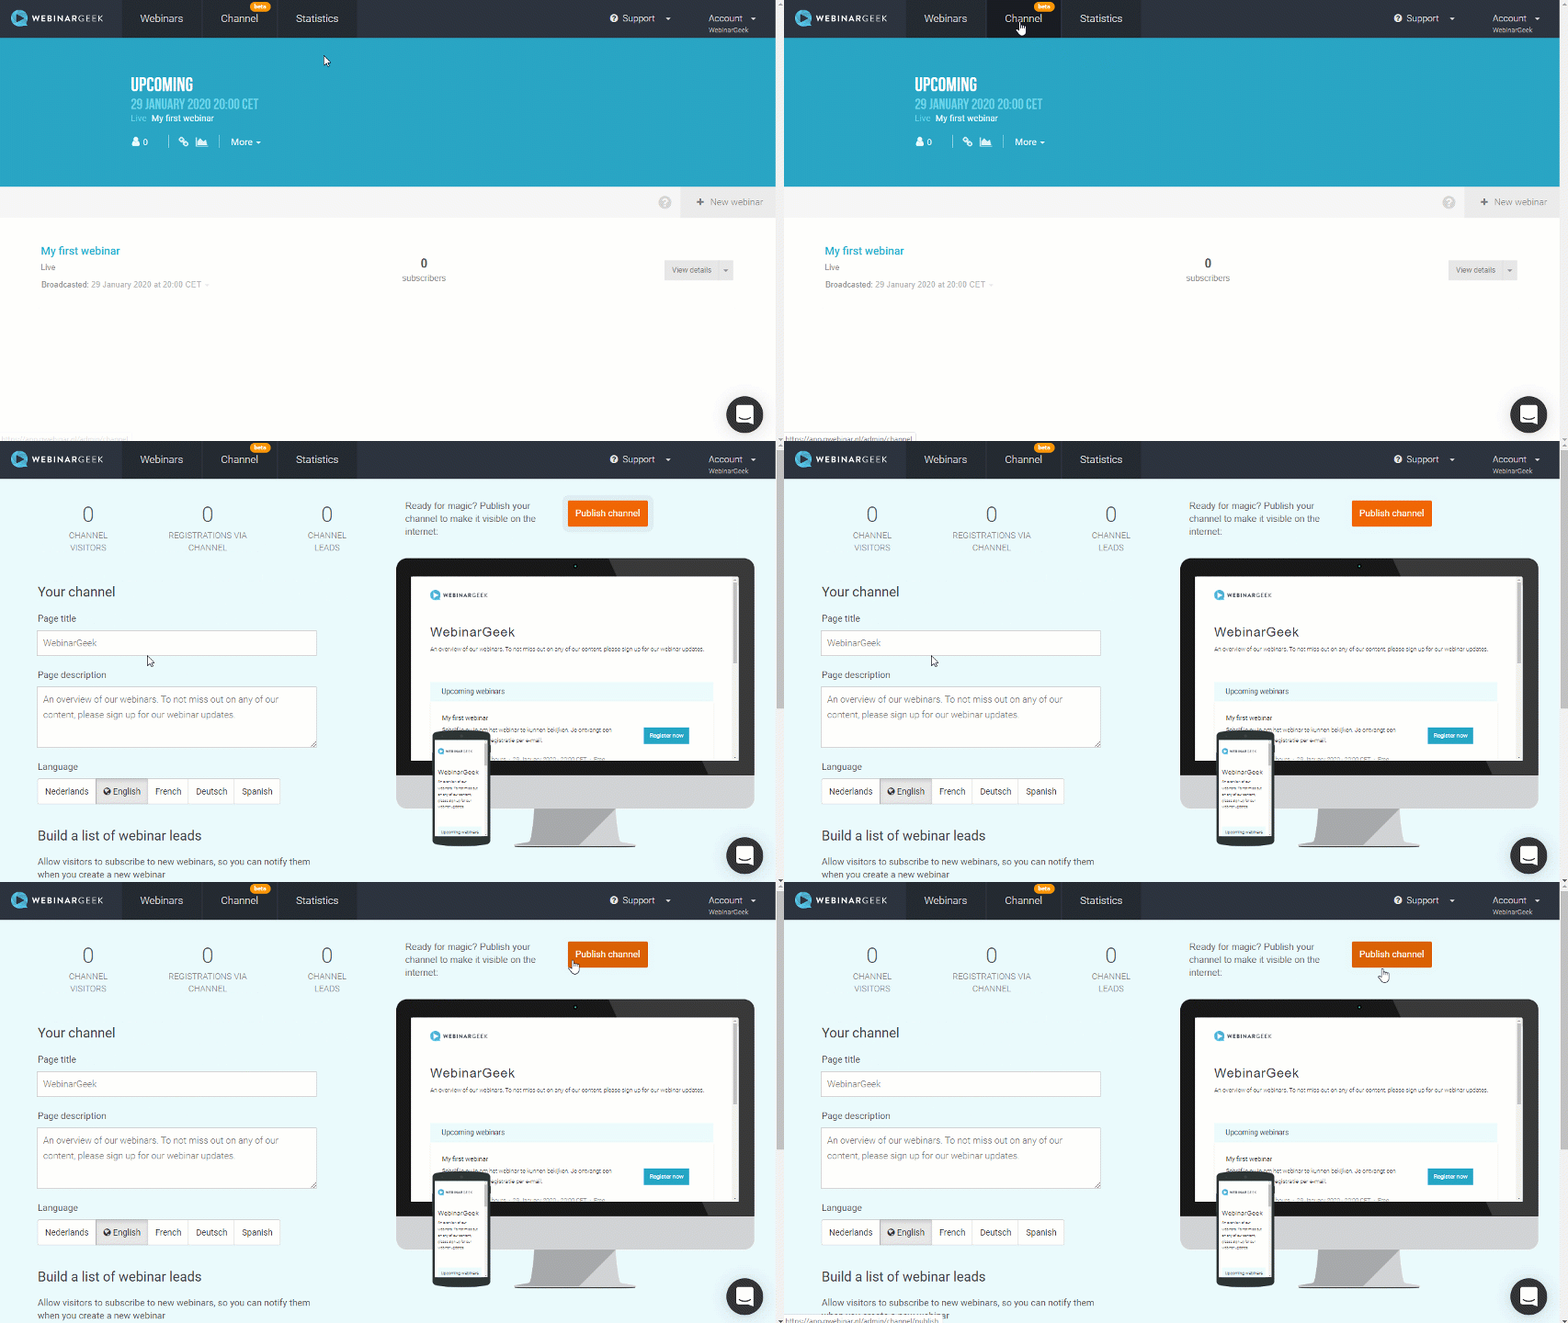
3. WebinarGeek
An easy-to-use platform that provides live, on-demand, and hybrid webinar features. With their smart marketing features, you’ll be able to attract viewers and convert them to customers within the same platform. Priced reasonably for small businesses, WebinarGeek has a number of great tools, including;
- No downloads required for your audience, which makes it easy for non-tech audiences to attend.
- Create your own webinar channel to showcase all your on-demand and future webinars in one place.
- Highly rated customer support (9.8/10 on G2) that will help you set up and deliver seamless webinars.
4. WebinarJam
Marrying a simple interface with comprehensive tools makes WebinarJam an easy favorite for small businesses looking to run live webinars, even on the go. We love their:
- Customizable templates, such as waiting room graphics and emails, for an on-brand experience.
- Ability to add up to six co-presenters, making it easy to produce a collaborative and high-value presentation. You can even inject pre-recorded video for additional presentation options.
- Trifecta of engagement tools: a virtual whiteboard, poll options, and an attendee chat.
- Automatic recording function, which makes it easy to follow up with registrants who missed the live recording.

Best Webinar Tools for Training and Classroom Sessions
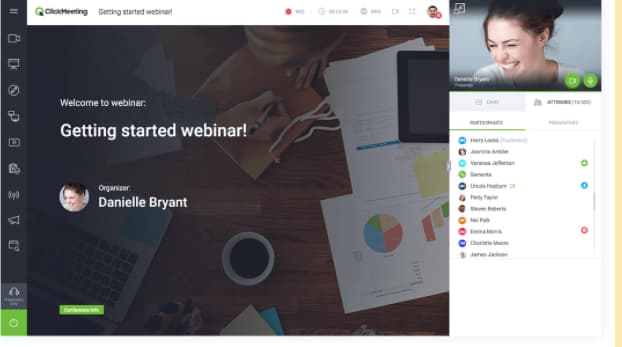
5. ClickMeeting
ClickMeeting offers webinars and video conferencing in one tool. Schedule meetings or webinars easily, and scale your webinar program with ClickMeeting’s 5000 attendance capacity.
ClickMeeting is particularly useful for running training and classroom-style presentations because of its:
- Customizable waiting rooms with agenda layouts, file delivery, and presenter information.
- Full suite of webinar tools including additional rooms, whiteboards, and polls.
- Ability to join and deliver webinars on-the-go with the ClickMeeting mobile apps.
6. Adobe Connect
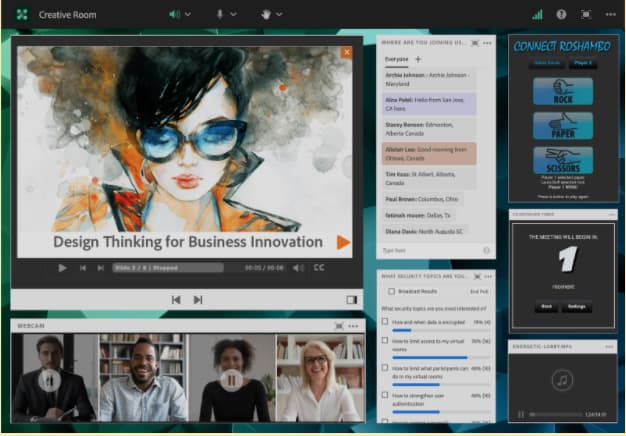
Adobe Connect is ideal for guided training and seminars where you need to “set the stage” for your audience. Their classroom tools enable students to work together effectively. You can also:
- Create breakout sessions, whiteboards, and teaching aids to help you deliver your message effectively.
- Set up multiple “topic chats” to keep discussions on track.
- Read your audience’s digital body language with advanced analytics to help you improve your delivery.
Best Free Webinar Software
7. Zoom
While many of us may have used Zoom for meetings, it’s also a great choice for webinars.
Because so many people are familiar with Zoom, hosts, and attendees both find it easy to use. Plus, if you’re on a tight budget, you can use Zoom’s video conferencing platform for small, free webinars (up to 100 participants).
Some of the benefits of Zoom include:
- Keeping the focus on the presenter’s video, rather than slides, making for a more human interaction.
- Leveraging virtual backgrounds, studio effects, and background noise suppression.
- Dedicated live event support, including monitoring and moderation.

8. Freeconferencecall.com
One of the only completely free webinar platforms, Freeconferencecall.com is still a powerful solution. It’s completely browser-based (which means no downloads for you or your guests), and:
- Offers one-click recording so you never miss out on saving your webinar.
- Has screen- and file-sharing capabilities so you can share your presentation materials effectively.
- Allows you to host up to 1000 guests.

Best Live Webinar Software
9. On24
On24 is the enterprise platform that does it all, as noted in their positive reviews on G2: “We had a wide variety of needs for a service like this — internal training, external publications, panel forums, expert-led seminars, and more. We felt that ON24 checked every box.”
On24 specializes in live broadcasts and has a host of features designed to increase customer engagement with your video presentations. We love their:
- Enterprise-level streaming quality. They’re built for big events that need to stream smoothly.
- Engagement analytics that integrates with your business intelligence platforms for better audience segmentation.
- Engagement hub that stores past webinars for an “always-on” experience.

10. GoToWebinar
A best-in-class option that makes running a live webinar feel positively smooth. Equipped with the greatest hits of live webinar management like engagement tools, automatic recording, and excellent integrations, GoToWebinar goes the final mile by offering:
- 24/7 customer service, which is essential in times of live webinar panic.
- Source tracking to help determine the most effective sign-up strategies.
- Truly excellent analytics that help you to keep iterating and improving.
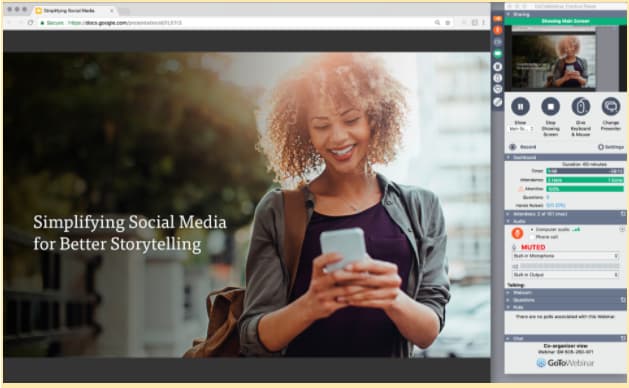
11. Webinar.net
This is an easy-to-use webinar platform that looks good. Webinar.net might be one of the newest platforms on the market, but they’re starting strong with a 4.8 out of 5 stars rating on G2.
Their customers love them because:
- They’re browser-based, so there are no downloads required for presenters or attendees.
- You can upload a background template and pick your colors and font so that your webinar matches your company’s branding.
- Broadcasts can be launched in under 60 seconds with their five-step wizard.
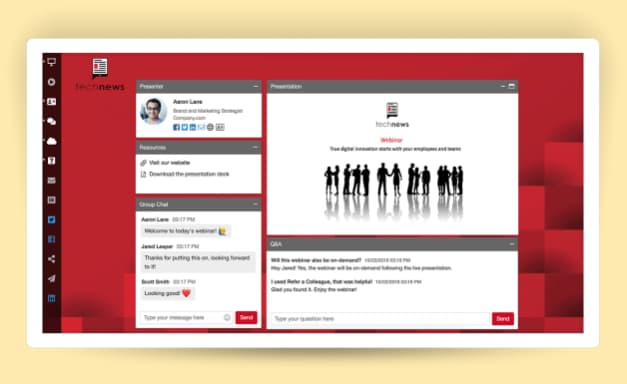
The Best Webinar Platforms in 2021
There are so many different webinar platforms available. Choosing the right one for your needs depends on your budget and your goals. 
![]()


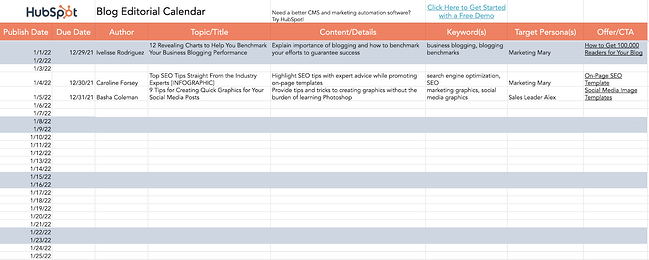



![→ Download Now: SEO Starter Pack [Free Kit]](https://i4lead.com/wp-content/uploads/2021/04/1d7211ac-7b1b-4405-b940-54b8acedb26e.png)

![→ Free Templates: How to Use YouTube for Business [Download Now]](https://i4lead.com/wp-content/uploads/2021/04/b33cfd44-133a-49e3-a943-086c5679d485.png)
