Webinars are a highly effective tool for moving prospects along the sales funnel.
After you’ve loaded them with product and industry knowledge, your prospects become warm leads who can then have fruitful conversations with your sales team. But here’s the thing: the content and execution of the webinar affect prospects’ experience and will impact the quality of the leads you generate.
If the information is misaligned with your prospects’ needs, you risk deterring them from doing further business with you. If the webinar is boring or too long, you may lose prospects before you deliver your final product pitch at the end.
If you don’t place the appropriate calls-to-action at the right time, you may not get enough attendees or fail to prove the ROI to your company’s leadership team.
When creating a webinar, the stakes are high. That’s why using a webinar planning list and following best practices is essential. Below, I go over the best practices for creating webinar invites and share top tips for hosting webcasts.
Webinar Invite Best Practices
In some ways, inviting people to come to your webinar is the toughest part.
Typically, you’ll send a formal invitation over email. You can promote the webinar via your company’s social media profiles, your LinkedIn, your website, and even your blog — but the webinar invite will be delivered over email.
With this email, you have one goal: to communicate your event’s value so that prospects have no choice but to sign up.
Let’s go over how you can do that.
1. Create a short sentence with your value proposition.
Before ever sitting down to write your webinar invitation email, you should sum up what your attendees will get out of your event in one short sentence. This will be your guidepost as you write the invitation.
2. Craft a subject line that shows the value of the event.
Next, it’s time to write a subject line that showcases the skills and tools attendees will walk away with. Don’t forget to include the word “webinar” in the subject line.
Here are some good examples:
- [Webinar] Grow Your Brand 3X with This Proven Method by [Industry Leader]
- [Webinar] Learn How to Close More Deals with [Industry Leader]
- [Webinar] Want Your Company to Become the Next Apple?
Here are some so-so webinar subject lines you should avoid using:
- You’re Invited to a Can’t-Miss Customer Service Webinar
- Come to Our Marketing Webinar on February 15
- Don’t Miss Our Next Webinar About Social Media Strategies
3. Include an engaging banner image.
Your banner image should include the title of the webinar and a clear call-to-action. You could also include the date and time, but that’s optional. Keep it light on text.
Here’s an excellent example from Elementor, a WordPress plugin.

This is a great example because it features high-contrast lettering and the word “webinar” in the upper right-hand corner. Most importantly, it has a call-to-action button that says “Save Your Seat.” Every webinar invite should include a CTA.
4. Include a header that makes your event’s value clear.
In an email, the header acts as a title that comes right after the banner. The header can be the title of your webinar or be the same as the subject line. Either way, it should communicate the value of the event. What will people learn? How will they grow?
Your invitees should immediately be able to tell based on the header alone.
Here are some great examples:
- Webinar: Learn How to Boost Sales with 5 Simple Tricks
- Want to Double Your Organic Traffic? Find Out How in This Webinar
- These Proven Strategies Will Triple Your Conversion Rates
Here are some so-so examples:
- Join Our SEO Webinar on May 15th
- Sales Training Seminar by [Company]
- Leadership Innovation Summit with [Industry Leader]
5. Include a brief description of the event.
Right after the header, include two to three sentences describing the event. The description should briefly outline a challenge and establish the insights and tips that will help attendees surmount those challenges. Alternatively, you can identify a goal, then tell attendees how the webinar will help them achieve those goals.
Remember: value is the name of the game here. People won’t spend an hour on just anything, so make it clear why your webinar is worth their while.
Here’s a great example from HubSpot:
“Creating an outstanding customer journey is a challenge felt by many marketing, sales, and customer service teams. A great experience is always the end goal, but the path to success isn’t always clear. On March 2nd, join CX Spotlight and learn how to better market, sell, and service your audience.”
This example is great because it tells attendees, in no uncertain terms, the insights they’ll walk away with.
Here’s a so-so example:
“Come to our exclusive webinar on February 5th, where we discuss everything in the industry, including email marketing, SEO, and social media. Your host, XYZ, is an industry veteran with 20 years of experience. The presentation will cover key topics and trends happening in marketing today. Don’t miss it.”
This is a poor example because of three reasons. First, it’s too general; second, it doesn’t identify a challenge or a goal (such as growing organic traffic or creating a great customer experience); and third, it doesn’t tell attendees the skills they’ll gain from the event.
6. Include a list of bullet points telling people what they’ll learn.
Now that you’ve provided an overview of the event, feel free to include more detail about what attendees will learn throughout the webinar.
Here’s a great example from HubSpot:
“In this webinar, we’re focusing on the data that really matters when it comes to business growth. Our panel will discuss:
- What info you should be gathering across your web, chat, and email assets
- How to stay organized with this new influx of data
- Best practices for personalizing the buying experience”
Notice how the bullet points address the attendee directly, telling them what they’ll learn and how they can apply it in their role.
7. Seal the deal with a call-to-action button.
All throughout the email, you’ve constantly communicated the value of your event. Now, it’s time to invite your prospects to sign up with a clear, high-contrast call-to-action button.
Consider using the following phrases:
- Save your seat
- Register now
- Register today
- Claim your spot
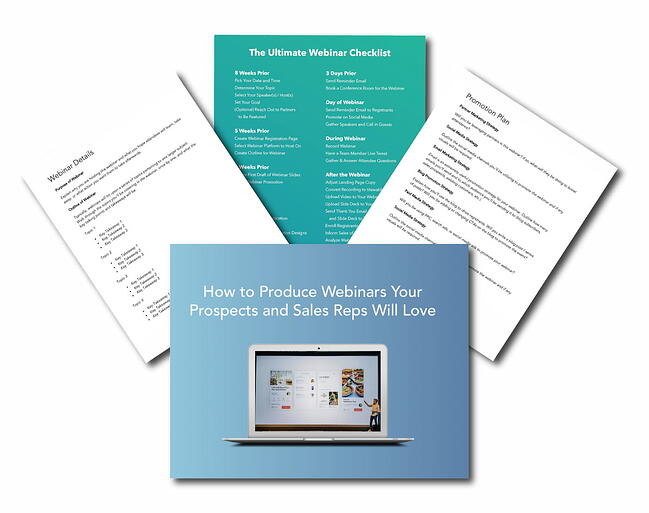
Now that you know the best practices for webinar invites, let’s go over best practices for running your webinar. Use this webinar planning kit to make sure you’re following all the steps.
Featured Resource: Webinar Planning Kit
1. Schedule your webinar for 60 minutes.
How long should your webinar be? The answer is one hour. It’s a well-known fact that 60 minutes is the optimal length of a webinar, with the average viewing time being 56 minutes (ON24).
2. Host it on Wednesday or Thursday at 10 AM or 11 AM.
Both ON24 and GoToWebinar report that Wednesdays and Thursdays are the best days to deliver your event. As far as time, 10 AM and 11 AM have long been established as top performers in both attendee engagement and attendance rates.
3. Send reminder emails.
Leading up to the webinar, send a reminder email twice — one day before the event and one hour before the event. Your webinar platform should also offer the option to automatically send these reminders to those who’ve signed up.
4. Practice accessing the webinar with a teammate.
Two days before the webinar, have someone on your team access the event link to make sure it’s working for participants. Have this person send you a question, raise their hand, show you what the presentation looks like on the other end, and interact with the webinar interface.
5. Establish proceedings for the Q&A section.
Let the audience know in the introduction how you’ll be answering their questions — whether you’ll respond to select questions at the end or answer them as you go. Our recommendation is to schedule 15 minutes at the end for questions.
6. Move slowly through product demonstrations.
When doing a demo or showing software, try not to move too quickly or scroll up and down a web page too quickly. It might take 2 to 5 seconds every time you change your screen for everyone to see the change.
7. Create a clear stop to the presentation.
Have a definitive “stop” to the core material at around 50 to 55 minutes. It’s okay to extend beyond the end time as long as the “officially scheduled program” has a clean end, and those who need to leave can leave.
8. Keep your desktop and digital workspace clean.
Close all unnecessary applications, especially your email clients, file browser, and web browser. If possible, carry out the webinar on a separate desktop (both macOS and Windows OS allow you to create another desktop). You do not want any personal or confidential info displayed, and you just don’t want to interrupt the webinar with any notifications that pop up.
9. Start 2 minutes after the hour.
This gives people time to call in, but does not make those on time wait too long. It is tempting as a presenter to wait for more people to join, but the max you should wait is 2 minutes.
10. Enter the webinar room early.
Enter the event at least 15 minutes early. That will give you time to prepare, troubleshoot any issues, and double-check that your microphone and camera are working.
11. Use pre-webinar slides and announcements.
Put up a slide that introduces you and your company. Show links to your website, social media, and other pertinent sites.
12. Send out a recording and the slides to attendees (with a call-to-action).
Do this within 24 hours, and tell them during the webinar you will do this. A fast follow-up encourages attendees to continue engaging with your company (or convert) while the webinar is still on their mind. This follow-up should contain a clear call-to-action button.
Use Webinar Best Practices to Host a Great Webinar
Hosting a webinar is proven to be a great return on investment. By following the best practices we’ve shared in this post, you can make sure your event drives lead generation, establishes your brand as an authority, and grows your revenue.
Editor’s note: This post was originally published in November 2007 and has been updated for comprehensiveness.
![]()


